
During my kitchen remodel, I discovered a severe rot by the kitchen door that apparently went undetected for a long time. Part I describes the rot damage in detail and my temporary fix.
BACKGROUND INFO
The problem seemed to have been exacerbated by 2 fatal mistakes made by the previous owner/contractor(s):
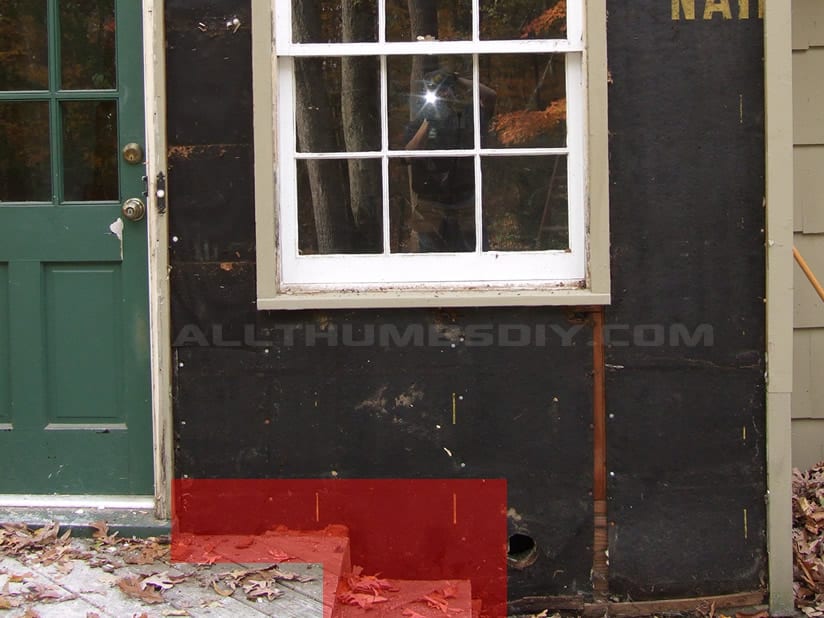
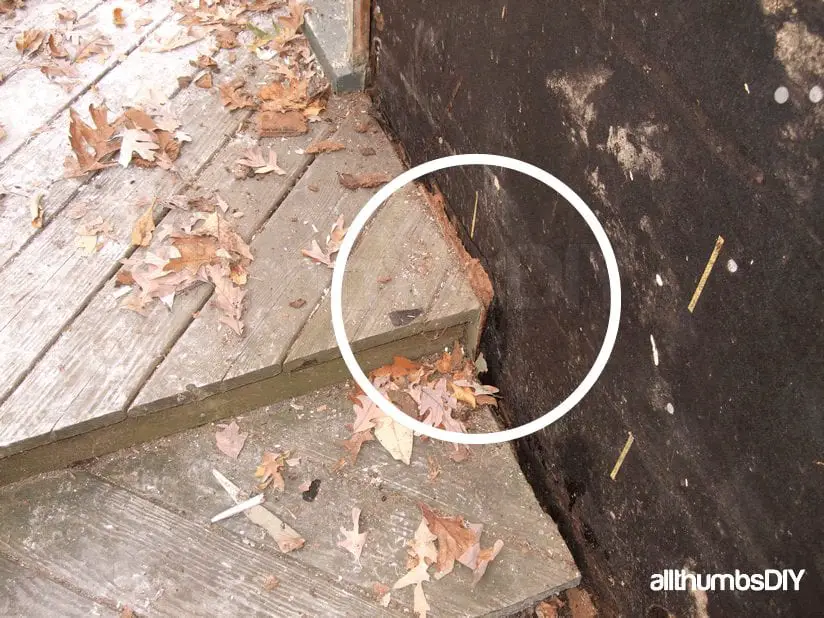
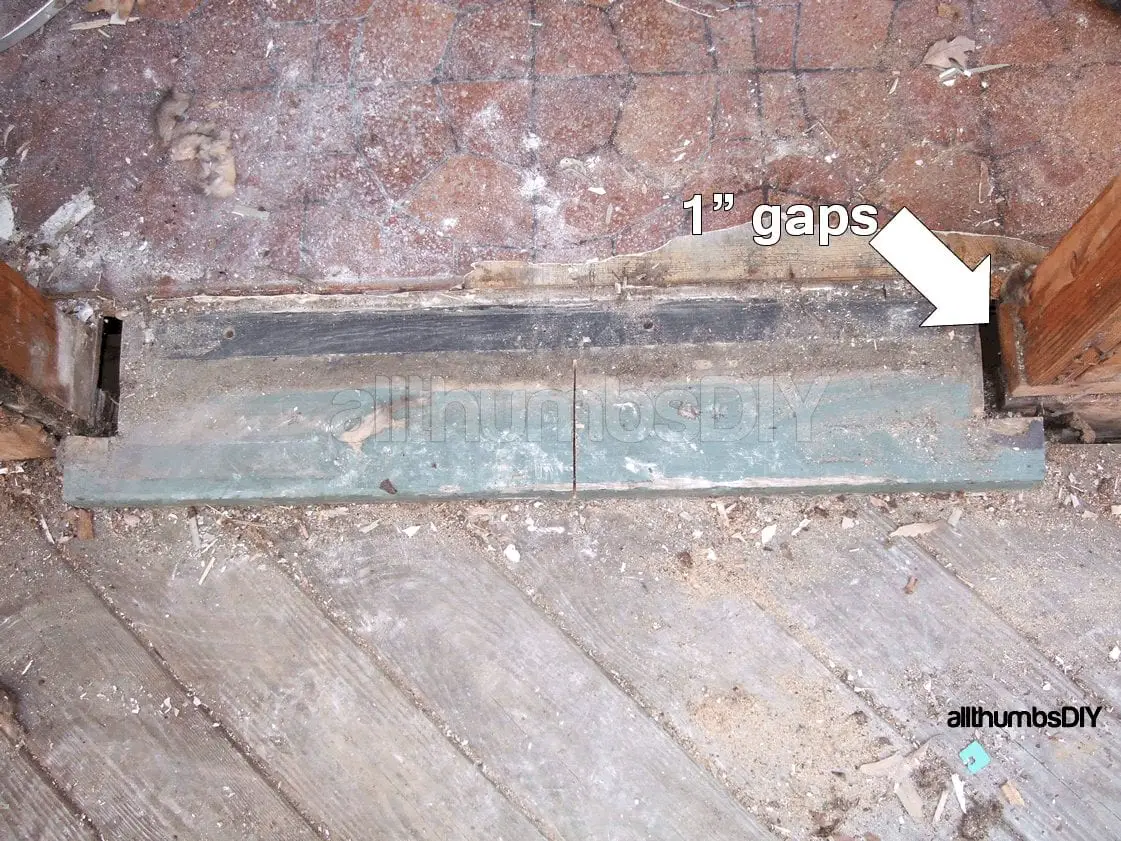
- Concrete patio was poured in a such manner that the top patio area had direct contact with the wood siding on the house;
- Wood deck was installed later on top of this concrete patio. The deck header, or a part of the deck that got attached to the house, was lag bolted to the rim joist of the house without removing the wood siding with no other means of redirecting water. That meant lag bolts probably dripped in water behind the siding, trapping significant amount of water that went undetected over a long period of time. In addition, the surface of the deck was directly touching the wood siding, further trapping more water.
-
- fig.1.1
-
- fig.1.3
Needless to say, I was very aggravated with my discovery as I was already dealing with a tight schedule. The thought of putting my kitchen remodel on hold, with a 7 month old infant and a giant hole on the side of the house during very cold November days, was needless to say unappetizing.
After calming down and considering my options, I made a decision to install a temporary fix that would allow me to complete the kitchen remodel in time, but would also allow me to re-visit it at a later date to implement a permanent fix.
DISCOVERY
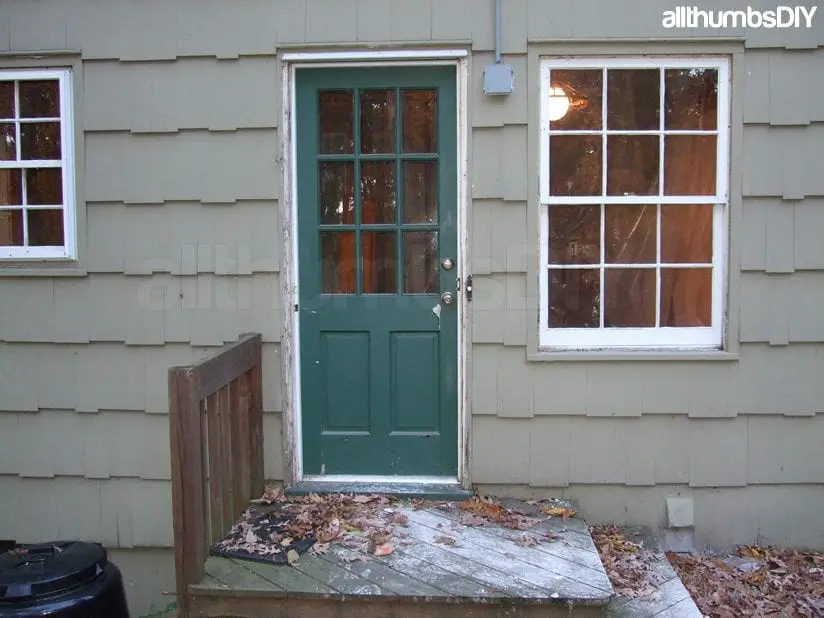
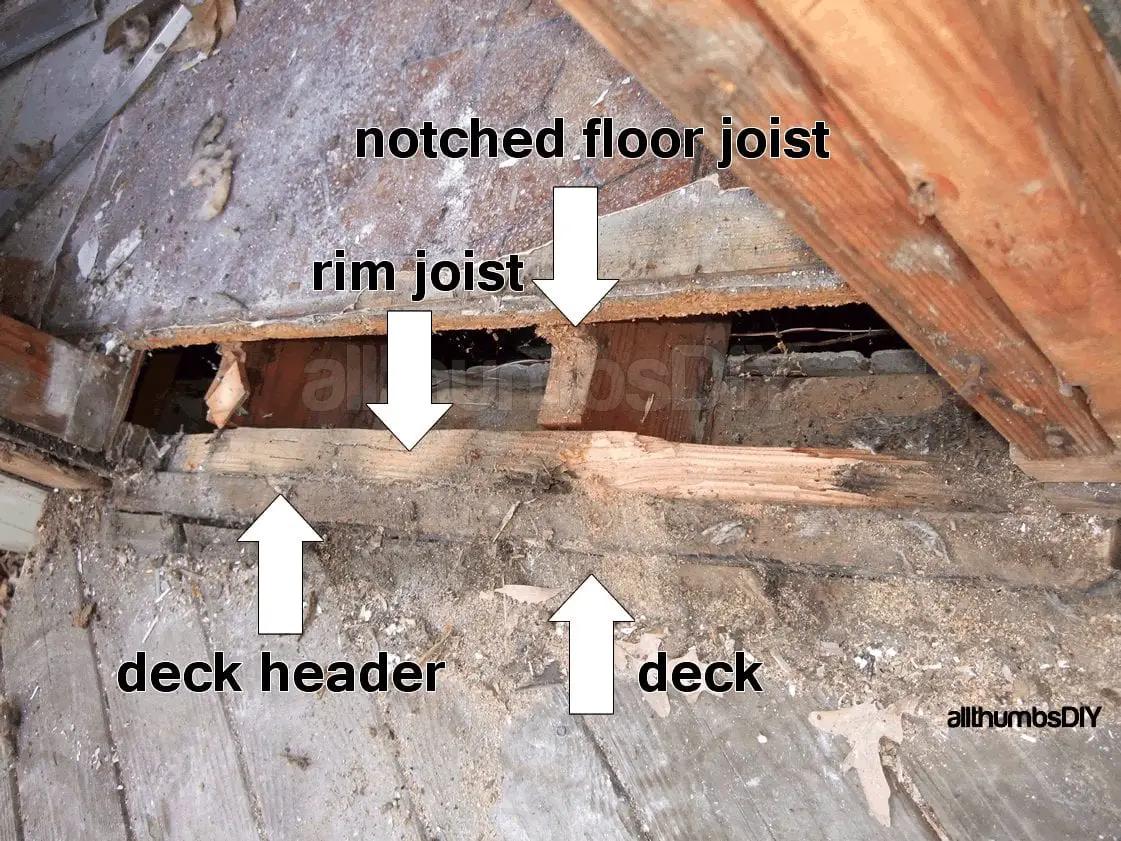
I’ve always had lots of insects and spiders in the basement underneath the kitchen door sill and wondered why. Other than some water stains on rim joists seen from inside, rim joists and sill plates were all solid to touch and seemed to be in good condition (you will get a look at the rotted section later so that you can judge for yourself).
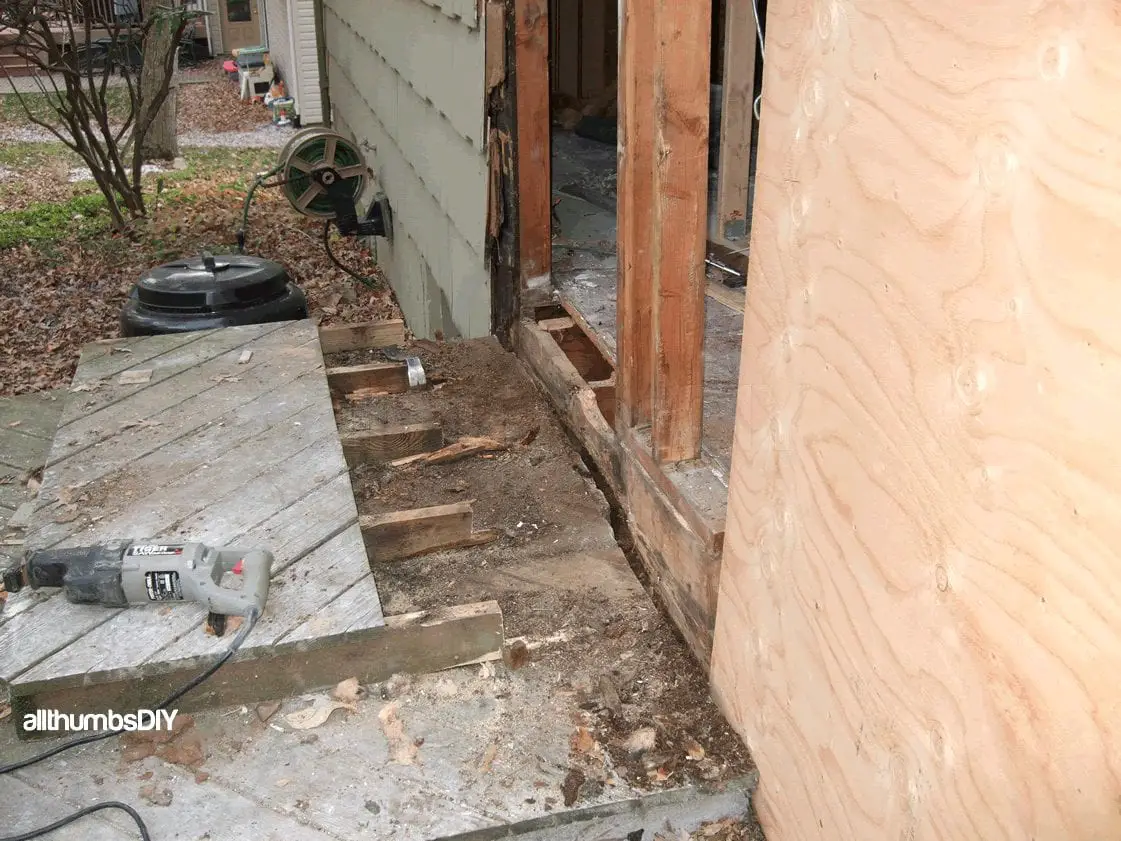
So when I peeled off the siding and deck steps to modify the kitchen wall, I did not expect much of anything. Boy was I surprised (and pissed!).
-
- fig.2.1
-
- fig.2.2
-
- fig.2.3
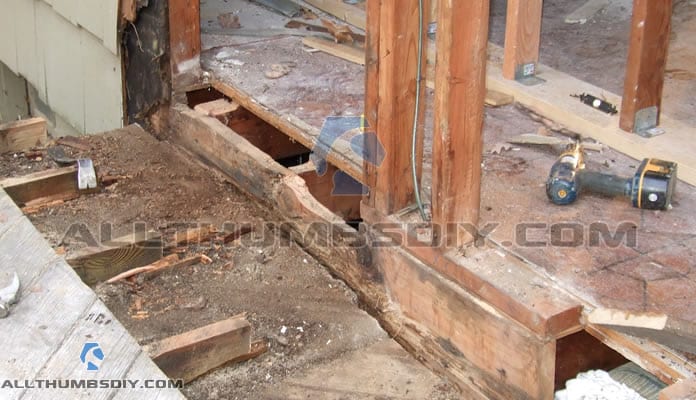
As you can see, the rot on the rim joist was pretty bad (fig.2.2). From what I could see (my view was blocked by concrete patio underneath the deck steps), the bottom two sill plates were in pretty bad shape as well (fig.2.3).
GAME PLAN
Since my entire kitchen wall was removed at this point, I had to move quickly in implementing a temporary fix to complete the kitchen remodel:
- Add blocking pieces between floor joists (to prevent them from twisting due to possible rim joist failure);
- Add new sole plates and plywood spacers (to level out the kitchen floor);
- Add rim joist blocking pieces (to supplement existing rim joist);
- Install Tyvek house wrap with foam rods (to protect the damaged area from more water damage);
PURCHASES
- Three, 2″ x 6″ x 10′ lumber (not pressure treated);
- One, 2″ x 4″ x 8′ lumber (not pressure treated);
- One, 1/2″ plywood (2 x 2 piece, not pressure treated);
- Five sets, each set consisting of one 1/2″ x 5″ bolt, two matching washers and one nut
- One, 5lb box, 3″ Deckmate screws
- Various Structural ties / connectors
- Tyvek house wrap
- One, 1/2″ x 6 ‘ foam pipe insulation (to act as a foam rod)
REQUIRED TOOLS
- 3ft & 5ft level
- Mash hammer
- Claw hammer
- Right angle drill (cord or cordless)
- Circular saw
- Reciprocating saw
- Chisel for wood
- Cap stapler (for tacking down Tyvek) or regular Arrow T25 stapler
ALLTHUMBSDIY STEPS
Step 1 – Remove all debris after exposing the rotted framing;
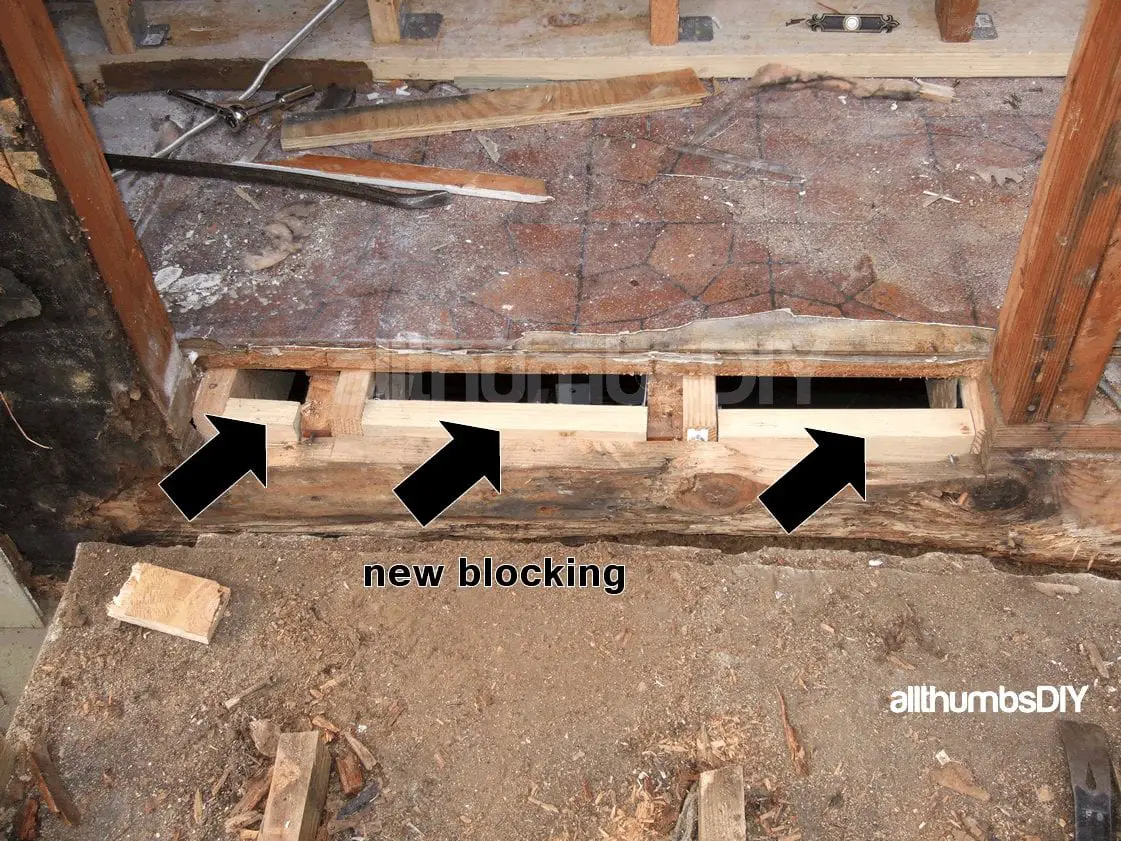
Step 2 – Cut 2×6 pieces to approximately 5 ft in length to “sister” notched floor joists. I rubbed some paraffin / candle wax to make them easier to slide under the floor boards. Instead of using a claw hammer or sledge hammer, I used a 3 pound mash hammer to carefully pound them into place (fig.x.x)
Step 3 – Using a right angle Ryobi cordless drill, I installed sixteen 2.5″ Deckmate screws (eight screws drilled in from the sistered joist into existing joist and eight from the existing joist into the sistered joist);
Step 4 – Using a 1/2″ bit, I drilled a hole towards the rear part of the sistered joist, then installed a 1/”2 x 4″ bolt, making sure to use 2 washers and a nut;
Step 5 – Measure the space between joists and cut appropriate 2×6 (for both floor joists and rim joist) blocking pieces and install them, again using 2.5″ Deckmate screws. In order to add extra strength, I used Simpson Strong Tie L50 connectors to tie in the sistered joist to new rim joist blocks;
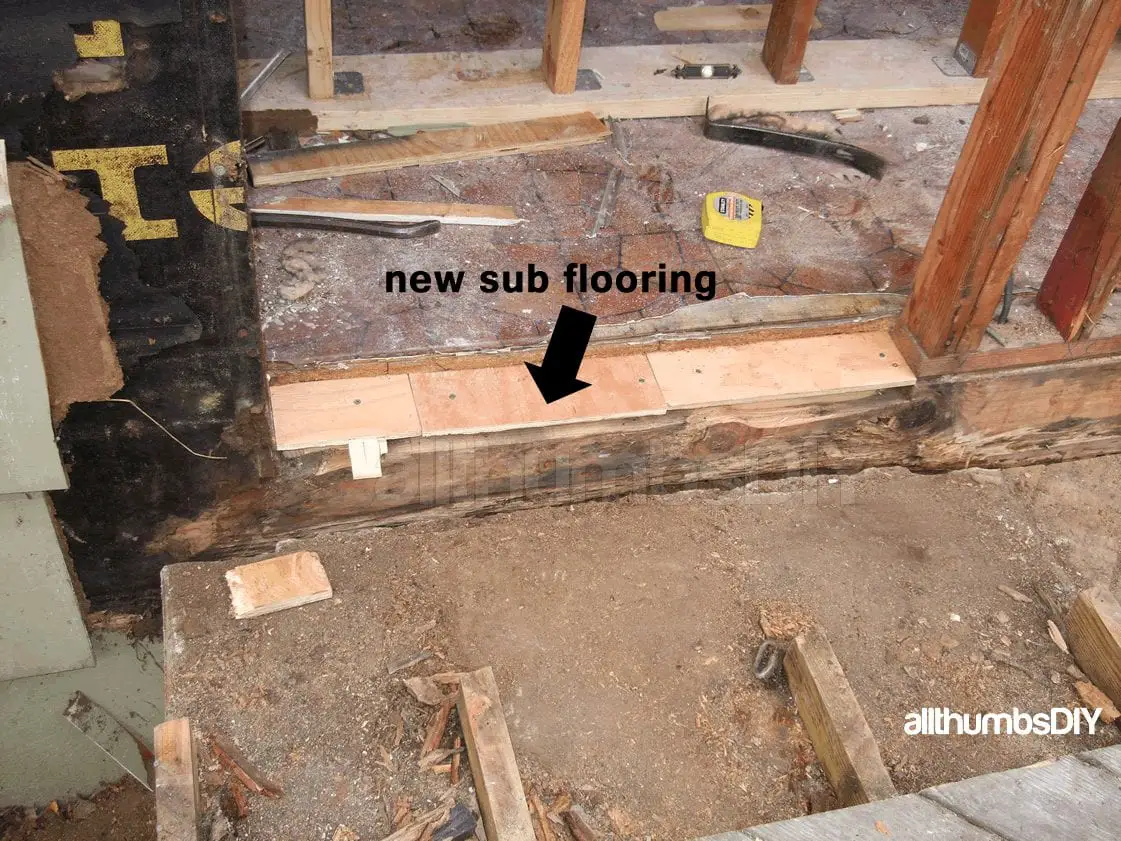
Step 6 – With sistered joists and rim blocks in place, I cut out a strip of 1/2″ plywood to level out the sub flooring (had to use several shims to support the outer edge, where the rotted rim joist height was lower than the new, sistered rim joist blocks)
Step 7 – At this point, I resumed my kitchen remodel work, re-installing floor plates and weight bearing wall framing members. The entire exterior wall was covered with 3/4″ plywood sheathing (exterior grade), EXCEPT a small section of the damaged area which was separately covered with a 1/2″ plywood for later removal.
-
- fig.3.1
-
- fig.3.2
-

- fig.5.3
NEXT STEPS
In Part II of the article series, I will talk about making some hard repair choices as well as implementing a temporary weigh bearing wall structure in the basement to support the 2 story house during repair.
I hope you found this article to be useful for your DIY project and sign up for my newsletter. The signup form is found on the upper right hand corner of your screen.
Thanks and good luck!

jo
Sunday 19th of July 2015
Is there a reason that you specified (in bold) not to use Pressure treated lumber to repair the rim joists/bands?
kevin
Monday 20th of July 2015
@Jo-
Because PT lumber is usually wet, it's my opinion that it can produce VOC which can be breathed in as it dries. I had a toddler at the time of the repair so I didn't want any PT inside the kitchen area. I did end up using PT lumber when replacing the actual rim joist and sill plates though.
Bryan
Monday 12th of November 2012
I've read all four of your posts about how to replace a rim joist. It sounds like this was the rim joist on the back of your house running perpendicular to your floor joists. Is that correct? Do you have any thoughts on how to do this for a rim joist on the side running parallel to the floor joists? The joist on the side of my house seems like it has water damage from where some siding and trip had deteriorated. It hasn't rotted, but it is soft, and I'm not sure where to build a temporary wall to provide support since it is running parallel to the floor joists.
kevin
Monday 12th of November 2012
Bryan-
Working on "rotted rim joist" is bit trickier since there are no joists to support to take the weight off.
I participated in a forum posting that might help you (http://www.diychatroom.com/f19/replace-repair-rotten-rim-joist-picture-155934/).
Before attempting repair, you should first determine what is causing that moisture problem and have a plan to fix it.
Kevin
How to Build a Free Standing Deck on the Cheap – Part 1
Thursday 26th of July 2012
[...] I needed to get some other projects out of the way like replacing my basement windows as well as replacing my rotted rim joist and sills because a new deck would prevent me from doing those projects [...]
How To Replace A Rotted Rim Joist And Sill Plates – Part 4 of 4
Sunday 6th of May 2012
[...] you found this page via a search engine, you may first want to read part 1, part 2, part [...]
How To Replace A Rotted Rim Joist And Sill Plates – Part 2 of 3
Friday 4th of May 2012
[...] you found this page via search engine, you may want to read part 1 [...]