
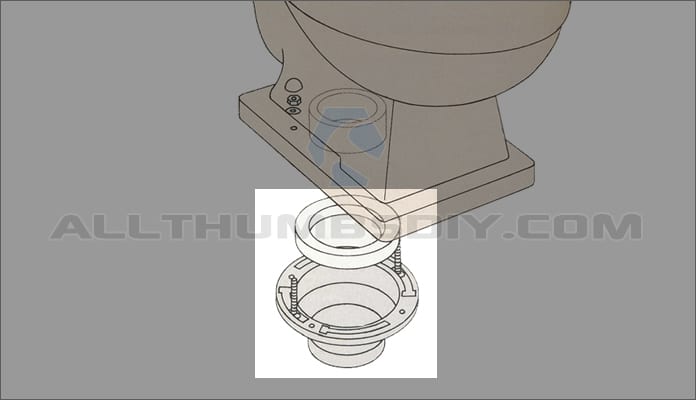
Low toilet flange is a common problem when installing a new (or in my case thicker mortar base). Unless your toilet is properly mated and sealed to the waste pipe, you may face problems related to sewer gas odor (it’s very unhealthy and unpleasant) and/or fluid leaks.
The purpose of this article is to review current products that may solve this problem.
Background
Last year I decided to gut and remodel my small bathroom. Because the sub flooring around the waste pipe was in very good shape, I left it in place.
To make the long story short, my thicker mortar bed, mesh backer, liner, thinset and new floor tiles all added up to raising the overall height of the floor by approximately 1.25”. That meant my toilet flange was now 1.25” BELOW my new floor. Yikes!
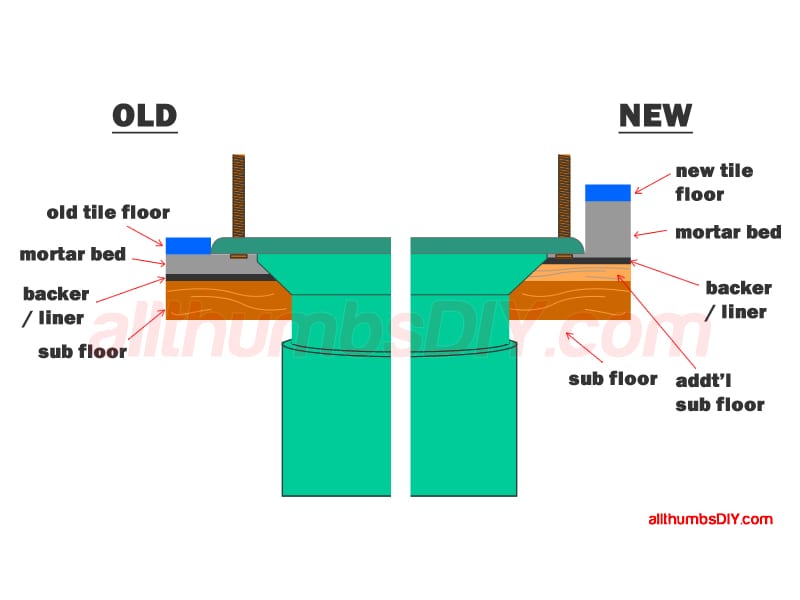
Being a newbie DIYer, I realized I made a mistake AFTER tiling my new floor. You see, because my bathroom was so small, I decided not to use a shower pan which meant I poured thicker mortar bed than I normally would have to pitch water to the shower drain.
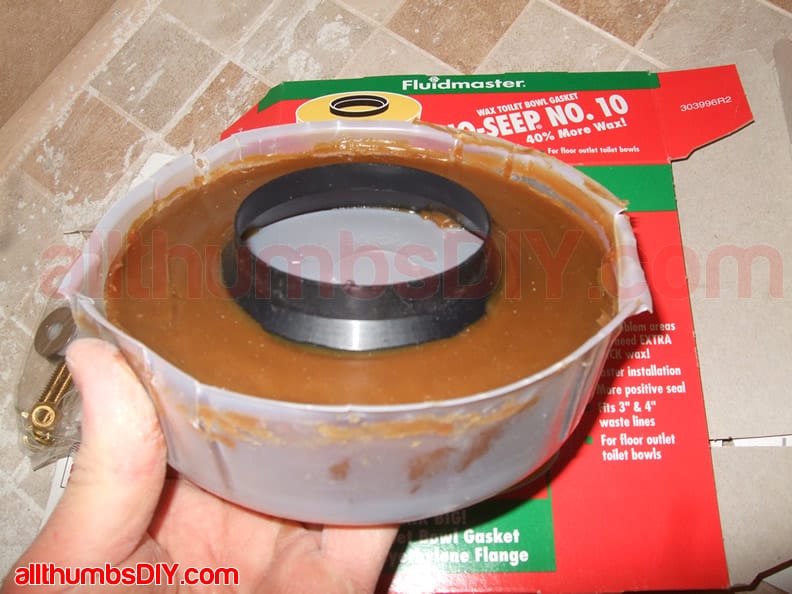
After researching around a bit, I noticed lot of people in my situation used double (stacked) toilet wax rings to compensate for the height disparity so I took one plumber’s advice and bought two wax rings: a regular “thin” wax ring along with FluidMaster’s jumbo wax ring extender kit (which included extra thick wax ring with a built-in polyethylene flange).
This solution seemed to have accomplished the job except that a year later, I am now starting to smell a faint sewer gas odor on and off. Obviously breathing in sewer gas is very very unhealthy, especially when all windows are closed during the hot summer or freezing cold days, I decided to research little bit more in depth about implementing a permanent fix.
OPTIONS

Of course, the obvious solution was to gut the floor, remove the lead and oakum, de-solder the flange, add a coupling and extra pipe and add a new flange to match the higher.
But that solution was unappetizing not only because of the time and expense involved, but that would have forced me to disturb the mortar bed along with a PVC bed liner that was pitched to the shower drain. So I decided to explore some NON-DESTRUCTIVE options:
- Option #1: STACKED WAX Rings – Simply use the same double stacked toilet wax ring setup again.
- Option #2: Extender Kit – Extender is nothing more than a “funnel” that provides solid conduit path from the bowl horn to the toilet flange. Some are standalone (Zurn Flo-Bowl Jr) and some are part of a kit (Set-Rite).
- Option #3: Spacer Kit – Spacer kits come with hard PVC rings with various thickness. Some comes with built in gaskets, others either come with separate gaskets or none at all (in that instance you need to use mastic of some sort like a caulking or plumbers putty). These rings are designed to be stacked in whatever combination to match the new floor surface level. Some kits also come with a toilet flange extender (see option #2).
- Option #4: Sani Seal – This is a fairly new product on the market. Sani Seal is a thick, doughnut shaped made of polyurethane foam ring with a built in cone mold on the bottom that is designed to replace the stacked wax rings. According to the manufacturer, Sani Seal can also be stacked.
| NOTE |
|---|
| All of these products require that your old toilet flange be in a good physical condition to ensure positive seal. If you find that the flange has rust rot, cracks, or other physical defects, or any rots on the subflooring, you need to address those issue first.) |
REVIEW – DOUBLE / STACKED WAX RINGS

This is probably the most common path taken by DIYers. It’s a simple configuration of one regular wax ring stacked on top by another “extra thick” wax ring with a built-in flange. The entire setup can be purchased under $10 and can be installed with relative ease (although it was a nerve wrecking process for me because you won’t know if the proper seal was made until you flush the toilet).
But in reviewing the double stacked wax ring configuration in detail, I started to wonder if there were some inherent design flaws or weaknesses that attributed to my (sewer gas) situation. After some thinking, I came up with three possible flaws:
- (A) Horizontal racking force on the toilet flange bolts – With approximately 1.5″ space between the flange and the bottom of the toilet, flange bolts are not supported horizontally. It would only take a slight bump on the toilet to throw these bolts sideways, possibly damaging the wax ring, creating gaps or even possibly cracking the toilet ceramic.
- (B) Bonding failure between the toilet wax rings – with the toilet being slightly wobbly due to uneven tile floor, it is conceivable that the vertical pressure applied on these wax rings are not even, possibly causing gaps in certain spots between wax rings.
- (C) Top wax ring seal failure – I’d imagine you want a solid “squishing” effect on the top (toilet bowl horn) and the bottom (toilet flange). However, in the case of a stacked wax rings, top wax ring is forced down on another wax ring that is softer than a toilet flange surface. Since there is no solid bottom surface to squeeze the top ring, that could potentially prevent the top ring from being seated tightly against the bowl horn.
- (D) Head or Hydrostatic pressure failure – Increased fluid pressure due to clogs (or even using a plunger) can potentially burst weak spots in between “seams”.
Due to these reasons, I decided AGAINST implementing the double or stacked wax ring setup.
REVIEW – TOILET FLANGE EXTENDERS / WAX-FREE TOILET SEAL
Toilet flange extenders are constructed with either soft or hard PVC, providing solid pathway from the bowl horn to the toilet flange on the floor. I believe products in this category are designed to replace the use of wax rings only, although Fernco advertises that it can handle toilet flanges that are up to 3/4″ lower than the floor surface.
Most are designed to fit INSIDE the toilet drain pipe which will provide a good, solid, positive seal but there are potential issues to be aware:
- You need to know the exact size of the drain pipe in order to purchase the right part. That meant taking the toilet apart for few days.
It’s my understanding that if you have a 4″ drain pipe, small reduction to inner diameter is acceptable. But if you have a 3″ drain pipe, you would want to minimize any reduction to the inner diameter as that would reduce the flow rate.I found out that the bowl horn’s inner diameter is anywhere between 2.0″ to 2.5″. So as long as the product does not reduce the maximum size of a bowl horn, clog won’t be an issue.- Some older toilet designs from 1960s or earlier may have a protruding bowl horn which might create some clearance issues.
Fernco
Fernco (manufacturer link) has been around for a long time and I know most plumbers I have used in the past (yes, I hire plumbers for jobs that are beyond my DIY skills) all recommend Fernco. Fernco products are made in USA and synonymous with rubber products like ProFlex shielded coupling and wax free toilet seals.
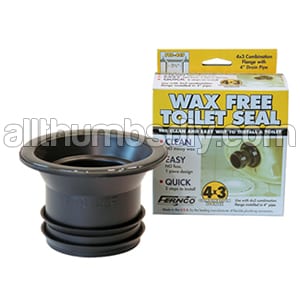
Fernco’s wax-free toilet seal product (FTS-3, FTS-4, and FTS-4CF) are comprised of flexible PVC that uses adhesives and barbed fitting (in lieu of gaskets) to create positive bowl horn and waste pipe seals. These positive seal connections are designed to seal out any fluid or gas leaks in addition to handling head-pressure (when a clog occurs).
For brochures and installation instructions, click here 1, here 2, and here 3
However, there may be some potential issues:
- Concern #1 – Fernco’s installation instruction stresses that the bowl horn surface needs to be absolutely clean of oil or wax residue that might prevent the adhesive from sticking properly. But what about toilet surface imperfections like pits, bumps, or irregular bull horn shape?
- Concern #2 – The adhesive surface ring is approximately .29″ wide. What is the life expectancy of this adhesive under repeated exposure to liquid? I am not exactly sure how the gasket is made but maybe it is something like Loctite Elastomeric Adhesives and Sealants with Flextec™ Technology?
- Concern #3 – Barbed mating reduces the inner diameter of the waste pipe. Does that increase the likelihood of a clog?
- Concern #4 – Fernco’s advertising states that “… Toilet can be removed and reinstalled with the same Fernco Wax Free Toilet Seal still attached…”. Maybe that’s true but unseating a toilet places a lot of pulling stress on that narrow adhesive surface due to the barbed connection. If it were me, I would opt to install a new one and not risk getting a leak
Lastly, some users have complained that in contrast to Fernco’s advertising, this product does not fit well with certain cast iron waste pipes (click here for complaints). According to Fernco’s customer rep, FTS-4 works with cast iron pipes with inner diameter between 3.96″ to 4.02″ but some customers reported that their cast iron waste pipes measured 3.75″ I.D. In addition, unlike PVC or copper waste pipes, cast iron pipes tend to cling on to aggregates in its pipe, which might also contribute to poor-fitting.
Fluid Master
You’ve probably seen Fluidmaster’s plumbing products (manufacturer link) that come in red and green boxes and are ubiquitous in any plumbing sections at large home improvement stores.
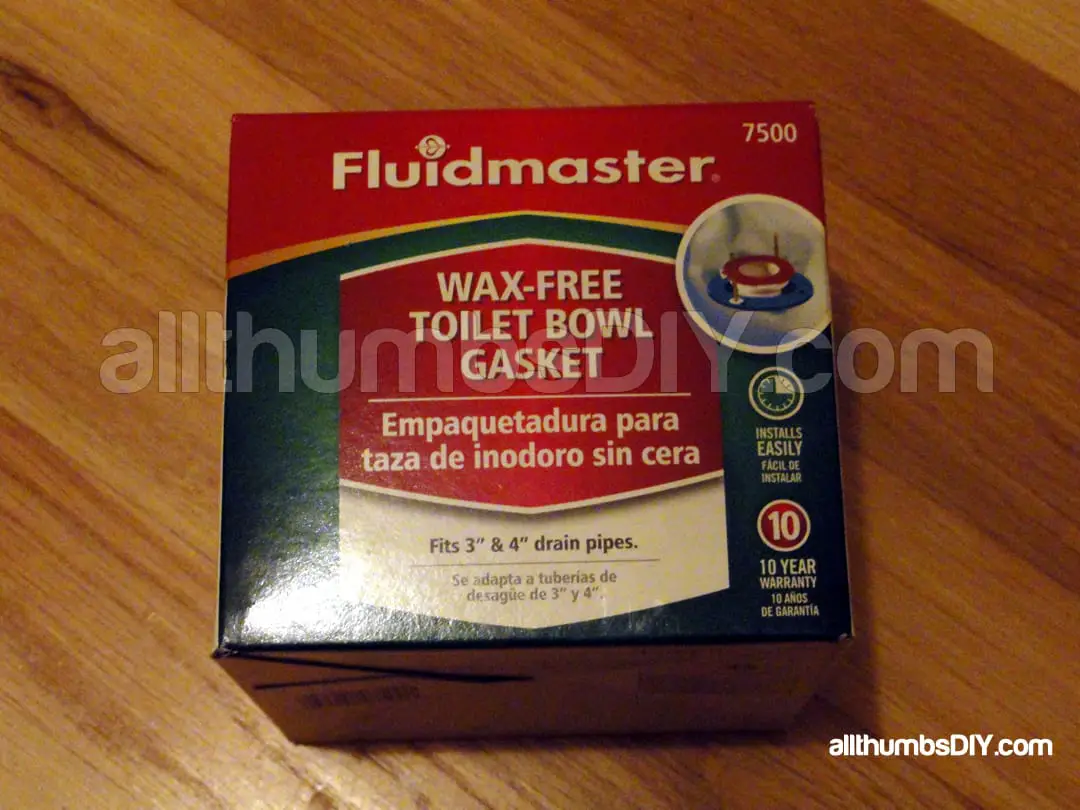
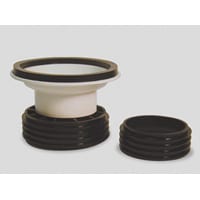
Unlike Fernco, Fluidmaster products are made in Mexico and utilizes a “special rubber”. Based on how it felt and looked, I believe the gasket is made from “red rubber” or styrene butadiene rubber. Red rubber is considered to be a low cost flange gasket material that is non-oil resistant compound and resists flow under compression.
Fernco’s Wax-free toilet bowl gasket is supposed to offer moderate to good performance against low pressure with good aging characteristics and abrasion resistance. On the flange side, it uses what looks like an closed-cell foam based O-ring to create a positive seal.
Here some potential issues that I thought of that may apply to your situation:
- Concern #1 – Fluidmaster extender is made of hard PVC. That means there is no “give” when compressed down by the toilet. If the toilet flange is too high or there simple is not enough clearance between the extender and toilet flange, one or both components might break
- Concern #1 – Although Fluidmaster 7500P is an universal model that can fit either the 3″ or 4″ waste pipe, using this model on a 4″ waste pipe may reduce the flow rate.
In addition, one user have complained that his older 1950’s toilet design (with protruding horn) prevented him from using this product so you may want to pay attention to when your toilet was made (if you were going to re-use it).
Zurn
Zurn (manufacturer link) products for use in commercial, municipal, and industrial markets.
As far as I can tell, Zurn’s Flo-Bowl Jr ( part # CF2991 ) is made in USA.
At $8, it is commonly found at plumbing supply stores. Information found on this product is non-existent but based on the picture, it follows the same design principle as the Fluidmaster’s wax-free seal products.
Toilet Flange Spacers / Extender Kids Reviews
If your floor surface is more than half an inch above the closet flange (in my case 1.25″), you must extend the flange so it’s flush with the new floor surface.
A closet flange extender or spacer ring(s) with flexible gaskets can do that job.
Oatey 1/2 inch Toilet Flange Spacer
have seen this product being recommended by professional plumbers in various forums.
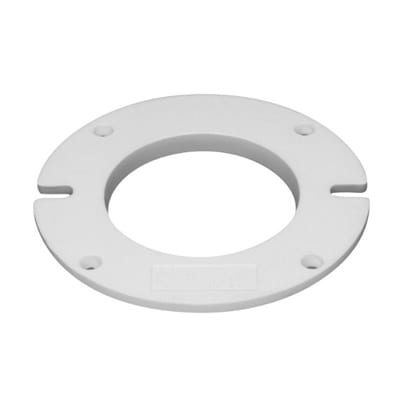
One distinguishing feature being promoted by the manufacturer is that its space rings are made of solid polyurethane (not hollow) and thus can be stacked with confidence.
Because these spacers are sold individually, you will need to purchase the hardware separately:
- You can always purchase longer bolts than necessary and cut the excess off. Rather than using 1/4″ bolts, I prefer 5/16″ like this Hercules 90174 Extra Long Johni-Bolt with 5/16″ Diameter
- Kohler GP1013092-0 Bolt Caps In White for all Toilets
- Deckmate 2.5″ and 3.5″ screws
- Cordless drill
- Metal hacksaw
Oatey Closet Flange Spacer Kit
Oatey parts (link) are widely available at various online and offline stores. Oatey is another trusted plumbing parts manufacturer that has been around for a long time.
Oatey’s spacer ring (Closet Flange Spacer Kit, Part # 43645) is constructed of solid polyurethane like Quik-Fix spacer rings, except that it does not come with built-in gaskets.
Unlike Q-F’s foam gaskets, Oatey utilizes O-ring gaskets with 2 channel rings to block out liquid and gas.
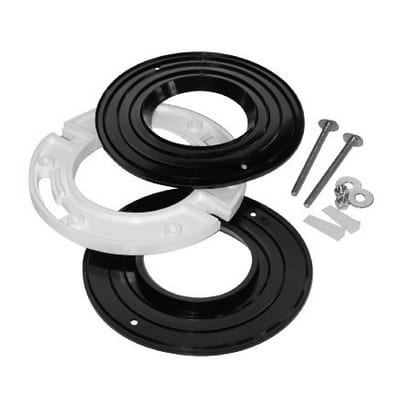
Set-Rite
Set-rite was one of the first manufacturers to patent a wax-free rings that stacked. Due to its success, the company was purchased by a plumbing supply behemoth, Oatey in 2017.
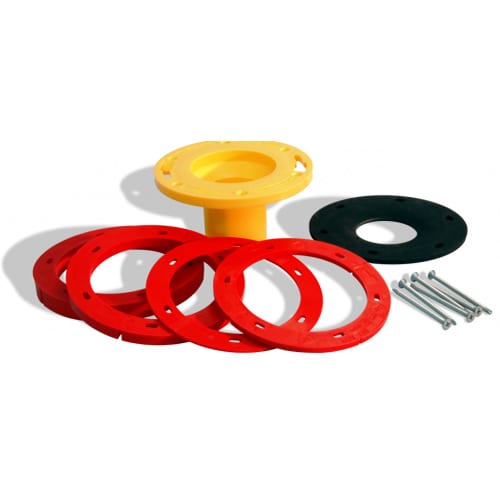
I like this Full Extender Kit containing everything I need to solve my toilet flange problem. The kit included:
- Four Spacer Rings – 1/8″, 1/4″, 1/2″ & 3/4″
- One Set-Rite Gasket
- One Set-Rite Extender
- Six 3-1/2″ Stainless Steel Screws
To complete the repair, you would also need to purchase a standard wax ring (without the plastic cone/funnel) as well as “Johnny” bolts or T-Bolts in proper length.
Installation process is simple: install the gasket on top of the toilet flange on the floor, add spacer rings to match the new floor surface level, add the extender, add a standard wax ring the set the toilet on top. I like the product but I see some potential issues:
- Set-Rite spacer rings are hollow.
- Rings also serve as bay flanges by having joints that can be snapped in half.
- One foam gasket (3/16″ thick) mounted on the flange serves to prevent both the liquid and sewer gas leaks
Although the ring is hollow, I don’t think that is a big deal since it has a sectional ribbing support so I doubt it will have a structural failure (I am guessing the toilet will break before the rings are crushed).
The part I do not like is that it has weakened joints to snap the ring in half (to convert it into bay flanges). I would like to see Set-Rite make two different types of rings for difference purposes.
The other part I do not like is that a 3/16″ thick foam ring sits on top of the toilet flange to seal out any liquid or gas. I think the thickness should be increased to provide seal to uneven surface but I would much prefer to see something like Fernco’s barbed pipe end or Fluidmaster’s foam ring that gets inserted into the waste pipe.
Conclusion
With so many good products on the market, it’s easier than ever to properly raise a toilet flange that is too low.
Just make sure to take your time to assess your own situation before making any purchases.
In my next post, I will show you how I corrected my low toilet flange.

PS. If you found this article to be useful, why not sign up for my newsletter? Just look for a signup form on the upper right hand side of your screen. Thanks!
Chris repaisman...
Thursday 23rd of March 2023
I didn't read all the comments, but I read the article twice. I'm glad the very 1st comment mentioned "code". Codes are here for a reason. Your safety ! I don't know the man that created this site, or wrote the column, so I won't bash anyone. On another positive note, he did not say any of these would be correct, incorrect or solve your problem. He simply stated that these are some of the options out there. So I can't say it's misleading. What I wish all the DIY'ers, 99% of the people that create these so called "helpful" sites, would do, is tell you there are a million ways to do things. But, there is only one right way. All these products were created as gimmicks. Yes, some may pass code, some may work, but that's not why they were created. They're all different versions of the same thing, made to take money from you, and put it in the pockets of the con man. Stacking wax, using silicone, spacing your flange, are all ways that will cost you more money in the long run. Usually, a whole new floor. Worst case, several floors, if you try these repairs on a multi story unit. I have to laugh, because one person did mention Marine Adhesive. Yes, that stuff is great. I use it on my boat, where it's supposed to be used. It does make one of the best, "emergency situation repairs" you could imagine. Once you put that on, it's extremely hard to remove. So, if your out in the woods, stores are closed for a long stretch of time, and you absolutely need to stop a leak, it works great. But expect to spend a lot of time removing it, so the job can be done right. Plus, it's an adhesive, and hold it does!!! Beware, you may break what your trying to seal, trying to remove the stuff. There can be more than one way to do something, and many situations that require it to be done a certain way. But, all these products out there, 99% of them, where made to take your money, not fix the problem. While we're on the subject..... 99% of these do it yourself blogs, articles, reviews, are the same. They're not made to help you, even tho a select few can be informative, they're made to get views, male the content creator money.
I can count the number of times I've walked in a customers house, and seen something that blows my mind. I ask what happened, the answer. We seen it in TV, seen it on the internet ! Emergency repairs can happen, do what you need to do, for the moment. Just always remember, it was temporary. Get the repair dome right, by code, ASAP. Or it could end up costing you 10 times more in the end. Don't believe all the ads, all the blogs, all the TV commercials that say it's an amazing new product. It's just another way to take our money, leave you wondering what went wrong. Call an expert. Call a licensed or experienced repairman. Trying to save a few bucks now, could cost you your home, maybe even your life, in the end. .
Need another example of a gimmick. Gutter Cleaning....... None of those products work. There's even law suits out now against them. Some don't do a thing, some make it worse. Some may keep everything out of your gutters, but end up clogging more often themselves, and require more work than you had originally. They're made to take your money, not help you. Very few inventions today were created to help you. They're just another way to con you. The bad guys have created a new angle of attack.
If you read this far, great. Because there is one product mentioned in this article that I like. I use it at home, and in homes of my customers, when I can. That's " sani seal ".... Compared to a wax ring, sani seal does a better job. I can't say how it will be 20 years from now, because I've seen old houses, that may have had the original wax ring. If yourtoilet, and flange, is solid, and stays that way, a wax ring can hold a very long time.
The way things are made now a days. I wouldn't bet a penny on ever seeing tht again. I've used sani seal on toilets I knew were gonna move around, and they held.
A house with cheap subflooring, and 6 adults, that don't know how to sit on a toilet, but just drop, with all their weight, can't be expected to hold long. It will move. Sani seal has held, when I never thought possible. I don't work for them, don't get a penny from them. I've just used them for the last q0 years or so, almost since the day they came put. And I've never had a problem. Please, beware of anything that says it will make your life simple. Most of the time, it's just a gimmick. Do things the right way. Even if it costs more now, it will save you in the end.
Tod
Thursday 26th of January 2023
Thanks for your detailed analysis!
Question:
How confident do we feel the wax method of sandwiching in-between flange and addtl layer(s) would hold up to extreme plunging forces? I am wondering how wax compares, for example, to the traditional gasket included with the oaty "set-rite" spacer kit (assuming, to your point, its properly used on top a clean/level flange surface.)
From a waterproof perspective, I'm actually less worried about water going down the drain, and more worried about water coming back up the drain!
Car thermostat gaskets seem to be made out of nothing too special and those can last 10 years. That same gasket, if made out of wax, however, would make me feel uneasy.
Perhaps this is not a fair comparison.
My biggest gripe against the oaty "set-rite" kit is that it is not a "twist-to-fit" style which makes it suspect on how sewer water coming into the house would flow. This is a real issue in apartment complexes where tenants upstairs flush towels down the toilet leaving first level tenants to deal with the consequences . In other words, I am inclined to opt for what Ill call the "wax sandwhich" method you describe but am a tad nervous about plunger blow-outs.
kevin
Thursday 2nd of February 2023
Hi Tod,
Unfortunately, I have never worked on toilets in an apartment setting.
But I can tell you that I have not experienced any sort of leaks in my home.
Good luck!
Anthony
Tuesday 31st of August 2021
I'm in the process of tiling an upstairs bathroom. The floor was rotten and the pipes were old cast iron. So since I was ripping up the subfloor I cut out a section of the cast iron and replaced with PVC. Now that I have the tile laid, I'm looking at flanges. I have just a 3" piece sticking out of the floor. I purchased a regular PVC flange, but I guess it isn't 3" all the way because it becomes very tight after about an inch. I'm thinking if it won't let me insert it all the way, how will I make it flush against the tile? I looked at all the flanges at home Depot and Lowe's but I feel like I'm missing something. I wanted to go around the 3" PVC so not to reduce the capacity, but I also want it flush on top of the tile. Any insight would be appreciated.
Scarlett
Sunday 27th of June 2021
Hi there,
I've got a situation that is nearly keeping me up at night. I'm almost ready to call in the "pros" but... being a stubborn lass I am giving it one last shot first at figuring it out myself. Hoping you might advise...
What I've got going on is a broken flange that needs to be extended up to the height of my soon-to-be-new tile floor (Ditra + porcelain tile will be going down). The outer ring of the flange is cracked. It currently sits about 1/2" above the sub floor (or about 3/4"—1.5" below when the Ditra and tile go down).
I'm thinking that I have a few options:
1) Fix the broken flange with a brass flange ring (or similar) then build up the extender like you said in your other post. Silicone caulk between the brass ring and the flange should keep things sealed. Wax between the extender bits should also keep things sealed.
2) Use an extender kit like you mention. Fix the broken flange first to reinforce things and then pop the extender in.
3) Remove the broken flange in it's entirety. Lay down the Ditra and the tile and top it off with a new flange.
To be honest, all options are pretty appetizing. Number three particularly, since with that option I wouldn't be faffing around with extenders or spacers. But... I'd have some hard work chipping away at the PVC flange. Not fun. Plus, I'm not sure that the waste pipe would come up far enough to meet the new flange without coupling on some extra length.
Question to you: what are your thoughts about this situation, particularly where the new floor hasn't gone down yet... if you could do your situation all over again differently, would you have tried to replace the flange instead of extending it?
Joe
Saturday 20th of June 2020
Unfortunately, I found this article after I rebuilt my upstairs toilet and its respective drain system. However, I thought I'd toss another comment into the mix. I'll provide the entire story so that you understand where my head was at during the process. For a little initial context, the toilet/home discussed below are approximately 12 years old.
The entire project started with a fluorescent light fixture replacement in our downstairs laundry room. I bought a replacement fixture (LED) and was ready to install. However, when I removed the fluorescent fixture I noticed a small spot of dry mold (maybe 4 inches in diameter) and what appeared to be an old water stain hidden behind the fixture on the ceiling. Immediately I recognized that I was directly beneath an upstairs bathroom, but I wasn't entirely sure what bathroom plumbing apparatus was above this exact spot. In addition, I also wasn't sure if the mold and the stain were new or old, which is important because we are the second owners. So, I thought about what I should do for 24 hours or so. Essentially debating on if I should hang the new LED light as planned or start pulling apart of the ceiling in the laundry room. Eventually, I decided it was best to cut a hole in the drywall so I could see what was going on inside the ceiling. Why? Well for one, we had recently completed some foundation work. So, I thought, what if the toilet shifted off it's wax ring during the slow settling of the foundation or the recent lift. It would have also kept me up at night not knowing what was going on behind the new light fixture. That said, I also had reason to believe (just by looking at how the fluorescent light had been installed) that someone had at least removed this light fixture in the past, and it wasn't anyone in my family. Did they also get into the ceiling at some point???? I could not figure this out - maybe or maybe not, it was difficult to determine. I might also add that this specific upstairs bathroom is rarely used.
So, I cut a small hole in the laundry room ceiling and found that I was staring directly up at the 3" PVC toilet drain piping. Specifically, I was directly beneath the toilet flange. So, I went upstairs and pulled the flapper valve and let the toilet run for a few minutes. To be honest, I was somewhat surprised by the drips that hit the laundry room floor in front of me every 10 - 20 seconds. I just knew that I was going to get into this drywall only to be on a wild goose chase and never find the source/cause of the dry mold.
I immediately go upstairs and start disassembling the toilet (a Mansfield) directly above this leaking flange. When I pulled the toilet from the flange most of the wax ring stayed on the toilet horn. The wax seemed fairly compressed, somewhat dried out on the edges around the toilet horn, and had what appeared to be mold growing in,on, and around it. When I looked at the toilet flange it appeared to be very rusty. But I could still see some stainless portions of the metallic flange. Upon further inspection, all 6 screws securing the flange to the wooden sub-floor were completely rusted away. Immediately my suspicions of foundation shifts causing the leak which caused the mold on the laundry room ceiling appear to be validated. The ring had hardened, the foundation moved, and now we have a gap between the horn and the wax causing the leak, which rusted away the flange bolts and only exacerbated the problem.
To solve the problem I decided that the best thing to do was cut away the 3" PVC in the sub-floor and install a new flange. I wasn't entirely sure I had a bad flange, but heck I've already got the ceiling open I might as well remove it from the list of possible root causes. I also thought having an open hole between the two floors would only benefit me while drying the sub-floor, which really wasn't that bad (again this bathroom is rarely used). So, I let the area dry for a week or two (I had other things going on at the time, so now that I knew the immediate issue was eliminated I could go back to what I was doing at the time) and go to the local hardware store (what felt like 100x) to get the parts I need to do this job (replace the 3" PVC connecting to the toilet flange (including a hydrostatic leak test), the toilet flange, all hardware connecting the toilet bowl to the flange, all hardware connecting the bowl to the tank, all hardware inside the tank, the valve lever, the water hose). The new pipe is 3" solid core PVC, the new toilet flange is PVC with a stainless ring, the new fasteners fixing the flange to the sub-floor are solid brass, all fasteners connecting the toilet bowl to the tank are stainless, and I decided on the ~$2 standard sized wax ring. I watched a few videos on how to install a wax ring on a toilet horn, cleaned the underside of the toilet real well, and proceeded to install the wax ring on the horn with the flat side towards the toilet bowl. I pick the toilet straight up and set it down on the flange with the bolts sticking through the porcelain and I can immediately tell that the wax ring never touches the toilet flange. I pick the toilet back up, lay it on its side, and confirm that the wax ring never touches the flange. Hrmmmm...... This was completely unexpected. I inspect the toilet horn, the wax ring, and the toilet flange and everything seems to be in order. I looked at the depth of the toilet flange beneath the tile floor and thought, that doesn't look like much (about a quarter inch of thinset and another quarter inch of tile, at a maximum there was no more than 3/4" in total distance between the top of the flange and the top of the tile). I then look at the toilet (again, a Mansfield) and realize that the toilet horn is so far up inside the body of the bowl there's really no way to connect this toilet to the toilet flange with a standard sized wax ring unless the flange is above the tile floor, which wouldn't make a lot of sense to me - long-term anyway. I can't imagine that people replace toilets more often than they replace floor coverings., but maybe that's an incorrect assumption.
So I go back to the local home hardware store and purchase the jumbo sized wax ring with the PE core. I then remove the standard sized wax ring from the toilet horn and install the new jumbo wax ring in its place (beveled side towards the toilet bowl and PE core concave down). I lift the toilet straight up again and set it down on the flange and the wax touches. SUCCESS!!!! I continue to push down gently on the toilet bowl to set the ring in place and the toilet doesn't move...... It's already touching the tile. I now have a little internal debate going on, do wax rings generally compress this easily or is the ring barely touching the flange. So, I pulled the toilet back up to take a look and found that only about 50% of the jumbo wax ring with PE core had touched the toilet flange, the remainder of the wax ring was likely fractions of an inch away from the toilet flange. Regardless, I now immediately know what happened sometime in the past - possibly when the home was built 12 years ago. A jumbo wax ring was installed, the person installing felt the wax ring make contact and assumed the ring had been compressed when in fact it did not have full contact with the flange.
Now the question is, do I go back to the home hardware store (for what will feel like the 1,000x) to see if they have another potential solution, or do I use the standard wax ring in conjunction with the jumbo ring in some way? Let's use them both I thought, but how? I inspect both of the rings and decide that the best option is to attached the standard ring to the bottom side of the jumbo ring (to form an oval like cross-section), which maximizes contact area between the rings and should reduce the potential for leaks. My assumption is that when compressed this approach will also cause the two rings to collapse together into the denser middle portion of the now oval shaped wax ring, which should also reduce the potential for leaks by forming a tighter seal on each component (the toilet flange and the toilet horn). We shall see I guess. Again, I wish I had found this article before I made my decisions. That said, I might have made the same choices.
I would be interested in hearing what everyone thinks. Do you think I'll have another leaking wax ring issue with this toilet sometime in the next few years?
kevin
Wednesday 24th of June 2020
Awesome write-up Joe. Thanks! Kevin