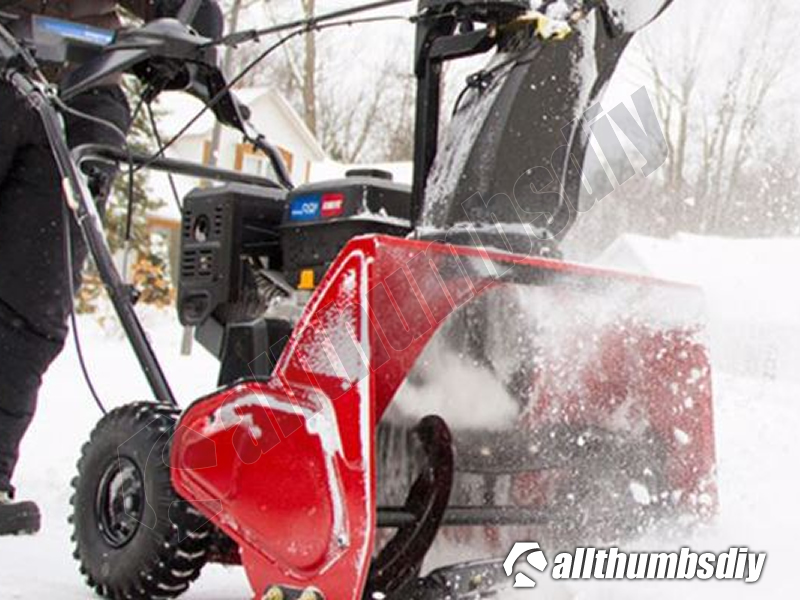
When evaluating a snow blower’s performance, it’s crucial to recognize that throwing distance is not solely determined by the chute’s height.
Instead, it’s the result of an integrated design involving various parts working in unison and the challenge for engineers lies in balancing throughput with distance.

A machine capable of throwing snow far may struggle with large volumes of snow, and vice versa. This balancing between throwing distance vs. throughput is essential for efficient snow clearing in varying conditions.
Snow Blower Performance in Varied Conditions
A snow blower’s effectiveness is determined by its ability to operate efficiently under various conditions. It must progress at a consistent rate, adeptly collecting and dispensing snow. The challenge lies in the diversity of snow types and depths encountered.
For instance, the machine must be equally capable of handling light, fluffy snow and the more challenging wet, heavy snow. Each type requires different mechanisms for effective collection and ejection, demanding versatility from the snow blower.
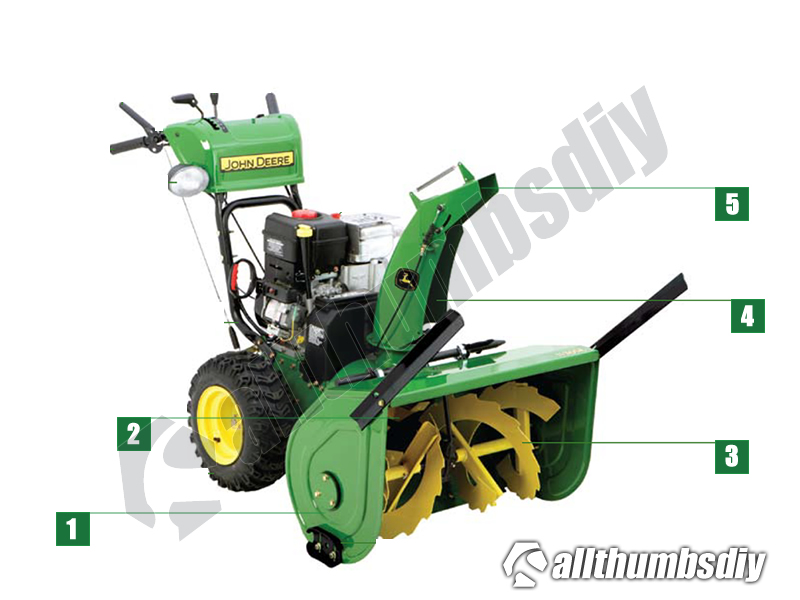
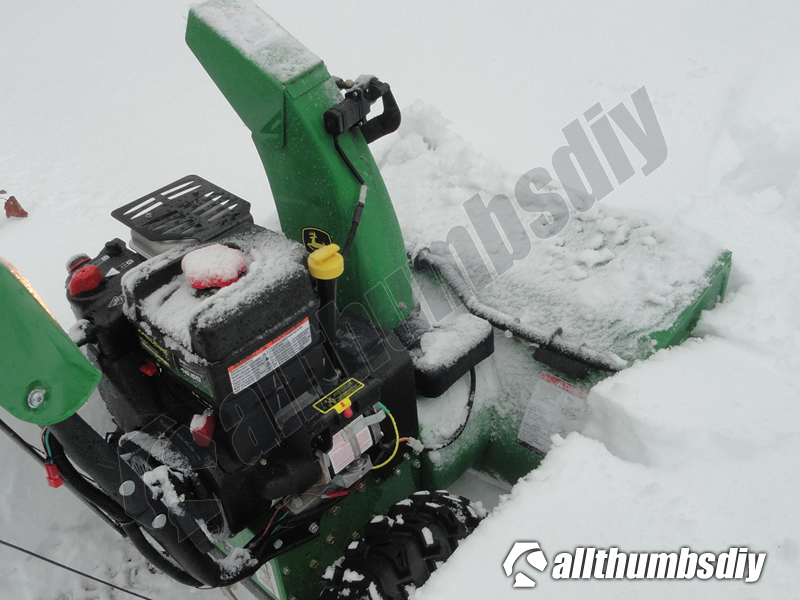
- (1) intake housing
- (2) Impeller
- (3) auger
- (4) chute
- (5) hood (a.k.a. chute deflector)
Furthermore, snow depth plays a critical role in performance. The machine’s design must account for varying depths, whether it’s a light dusting of 2 inches or a more substantial accumulation of 4 inches. This adaptability ensures consistent clearing efficiency across different snowfall scenarios.
Another consideration is the differing conditions typically found at the end of driveways. Here, snow often accumulates into densely packed mounds, significantly different from the less compressed snow covering the rest of the driveway.
This end-of-driveway (EOD) buildup presents a unique challenge, as its density often impedes the snow blower’s ability to throw the snow as far as it would with less compacted snow.

Addressing these varied conditions is essential for a snow blower to perform optimally in all scenarios, ensuring thorough and effective snow removal.
Design Changes
Designs have changed over the years improving distance and throughput but at times it seems a high marketing distance number overweighs the design. The parts making up the design are:
Intake housing shape
The width, height, and overall shape of the intake housing are meticulously engineered to optimize snow collection under various conditions.
For instance, the effectiveness of throwing 2-3 inches of light snow is markedly different from handling denser accumulations.
Consider a snow blower with a 22-inch wide intake: its capacity to gather snow is somewhat limited, consequently affecting the distance it can throw the snow. Conversely, when two snow blowers are equipped with identical engines but differing in intake width, the one with a intake housing has an advantage in throwing light snow further, owing to its greater collection volume.
However, this advantage can turn into a drawback when a very wide bucket collects an excessive amount of wet snow, hindering its ability to project it to a far distance.
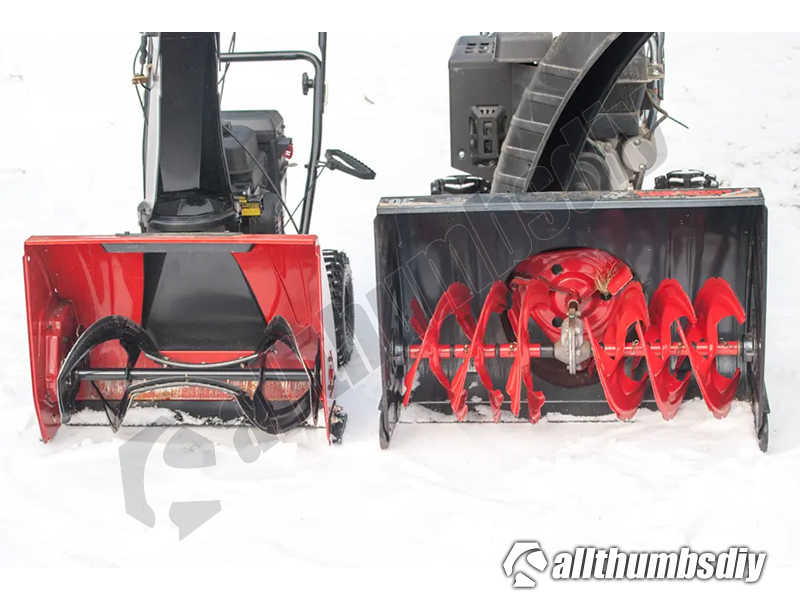
Auger diameter
Typically ranging from 8 to 14 inches, the diameter of the auger is a critical factor in determining the volume of snow that can be drawn into the impeller for ejection. The larger the diameter, the greater the capacity for snow collection.
The auger blades play a pivotal role in gathering the snow and feeding it into the impeller. Once the snow reaches the impeller, it’s the impeller blades that take over, effectively propelling the snow upwards and through the chute.
This interaction between the auger and impeller components is essential for the efficient functioning of a snow blower, ensuring that it can handle varying snow depths and types with ease.
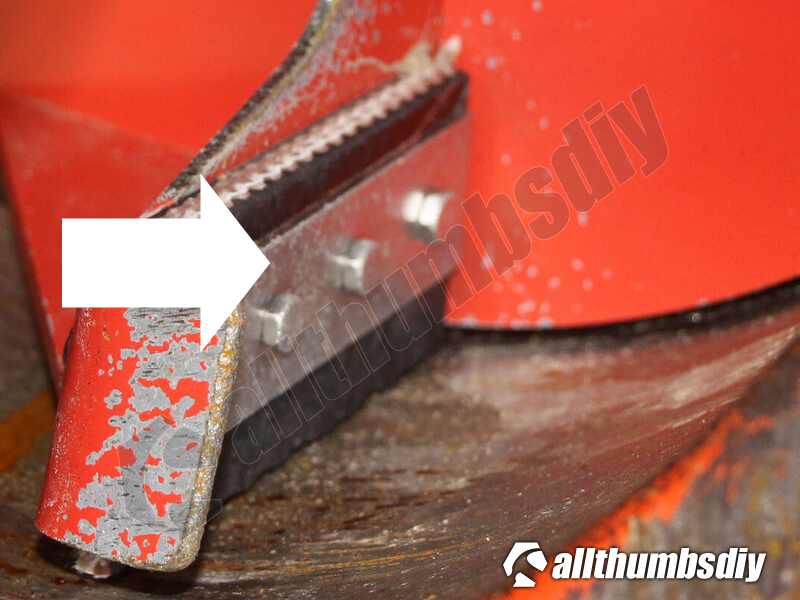
Auger shape
Augers come in various configurations, each tailored to enhance snow intake efficiency. Some augers feature a pronounced tilt, specifically engineered to sweep in snow more effectively. This tilt angle plays a significant role in guiding the snow towards the center of the machine, where it can be efficiently processed.
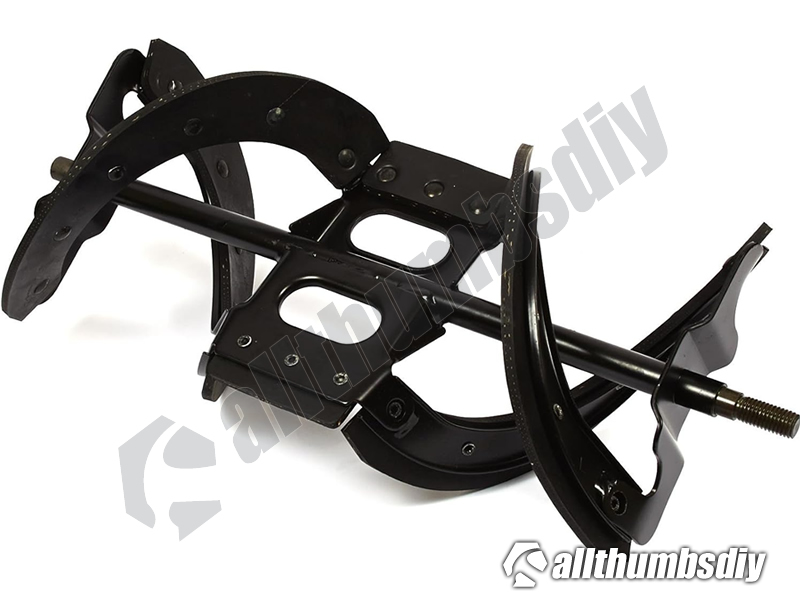
Another key aspect of auger design is the presence of serrated blades. These blades vary widely in their design, ranging from subtle wave-like patterns to more aggressive, pointed teeth protruding from the blade surface.
The serration pattern is not merely aesthetic but functional, designed to break through and capture compacted or icy snow. This feature ensures the auger can handle a diverse range of snow conditions, from powdery and loose to wet and densely packed. The combination of tilt angle and blade serration in the auger’s design is a testament to the intricate engineering that goes into optimizing a snow blower’s performance.
Auger speed
Auger speed is one of the biggest input to the distance (output) a snow blower can throw snow.
Generally, the rotational speed of augers in snow blowers varies from 120 to 160 revolutions per minute (RPM). This range reflects the evolution of snow blower technology over the years. In the earlier models, particularly those from the 1960s through the 1980s, auger speeds were typically set around 100 to 110 RPM. These speeds were adequate for the snow conditions and clearing requirements of that era.
However, towards the end of the 1970s, there was a notable shift in this design aspect. Manufacturers began to increase the auger speed, elevating it from around 100 RPM to approximately 120 RPM. This increase in speed was not arbitrary; it was a calculated move to enhance the snow blower’s efficiency in snow collection and ejection.
The higher RPM allowed for quicker and more efficient snow intake, which in turn contributed to a greater throwing distance.
This adjustment in auger speed over the years underscores the ongoing advancements in snow blower technology, aimed at improving performance to meet the evolving demands of snow removal.
Impeller diameter
The impeller diameter in snow blowers is also a critical component that significantly impacts the machine’s snow throwing capability.
Functioning as a rotating disk outfitted with arms or vanes, the impeller’s primary role is to catch and propel the snow upwards into the chute. The diameter of the impeller, typically ranging from 10 to 14 inches, plays a pivotal role in determining the velocity at which the snow is ejected.
A larger diameter impeller has a distinct advantage: it achieves higher speeds at the outer section, which is crucial for effectively throwing snow. This is because the speed at the periphery of the impeller disk is greater due to the longer rotational path.
As a result, snow caught by the vanes at these outer sections is thrown with more force and over a greater distance. The choice of impeller diameter is therefore a key consideration in the design of a snow blower, directly influencing its efficiency and effectiveness in snow removal tasks. The balance between the impeller size and the machine’s overall design ensures optimal performance in various snow conditions.
Impeller Shape & Speed
The impeller shape in snow blowers is an aspect that significantly influences their snow-throwing efficiency. Typically, impellers are round, equipped with vanes that play a crucial role in catching and propelling the snow.
The rotating disc usually has 3 or 4 built-in “vane” that acts as a mini scoop to push the snow upward. The size and thickness of vanes ranges from narrow to wide and some are engineered to be thinner at the center and gradually widen towards the outer diameter, optimizing the snow-throwing process.
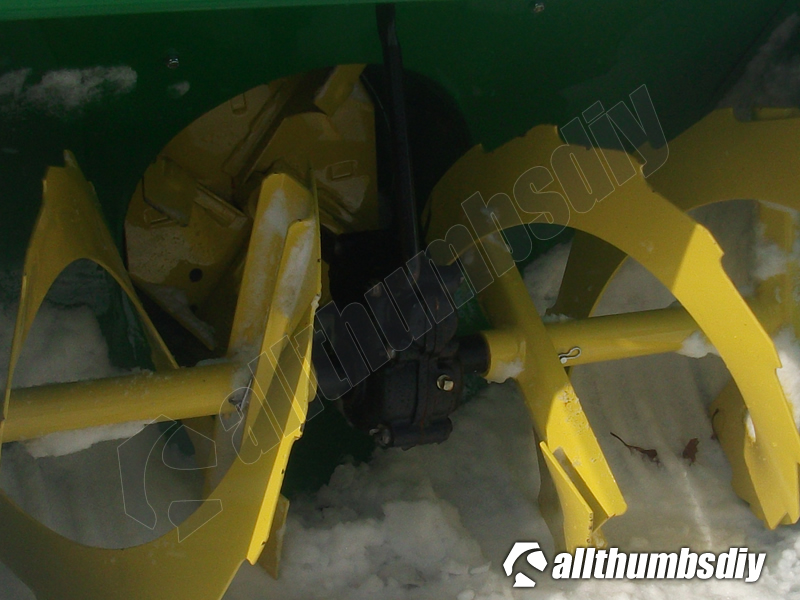
Additionally, the shapes of these vanes vary, including rounded, V-shaped, and even forms that are bent upwards at the ends. These varied designs are intentional, each tailored to enhance the impeller’s ability to effectively gather and eject snow.
Alongside shape, the impeller speed is another vital factor.
Generally, the impeller rotates at a speed ratio of 10:1 compared to the auger speed. This ratio ensures that the impeller operates at a significantly higher speed, essential for effective snow ejection.
In modern snow blowers, impeller speeds typically range from 1200 to 1300 RPM, a notable increase from models produced before the mid-1980s. This higher speed translates to enhanced performance, allowing the snow blower to throw snow farther and more efficiently.
The optimized combination of impeller shape and speed is a key factor in determining the snow blower’s overall performance, reflecting the advancements in technology and design over the years.
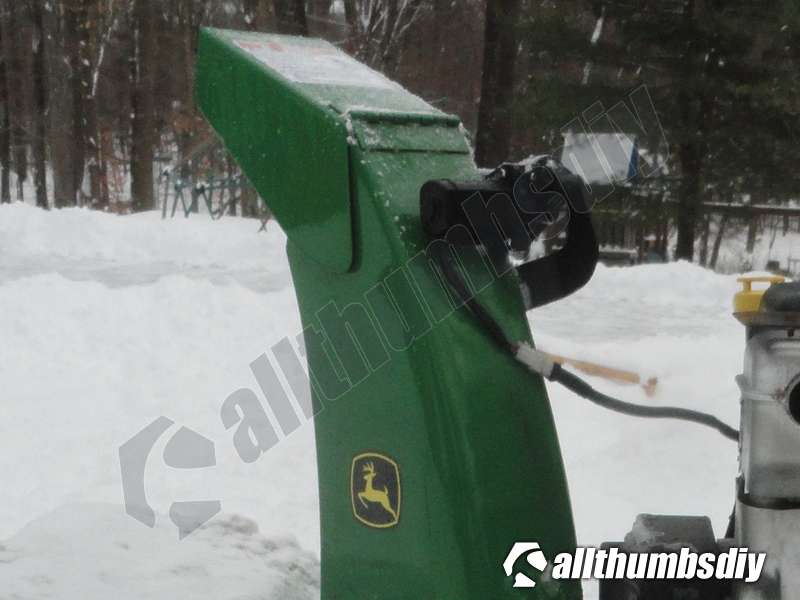
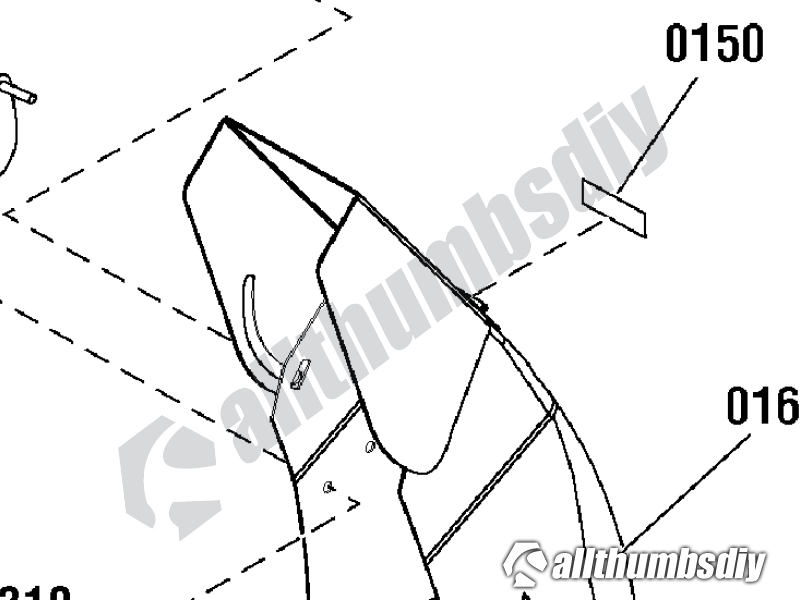
Chute shape
In earlier models, chutes typically featured wide U-shapes. However, more recent designs have shifted towards more curved and rounded profile which is strategically designed to redirect the snow, preventing it from being propelled straight up vertically, while maintaining optimum throughput.
The angle and length of this curve within the chute are crucial as they dictate the exit angle of the snow. A longer curve over the chute’s length means the snow travels a greater distance before exit, which can reduce its speed more than a shorter curve would. This design consideration is essential for controlling the trajectory and velocity of the ejected snow.
Additionally, some chutes are designed to taper from the base to the final exit point. This tapering can influence the speed and direction of the snow as it exits the chute. It serves to streamline the flow of snow, reducing resistance and potentially increasing the throwing distance.
Hood shape (a.k.a. “chute deflector”)
The design of the hood in snow blower chutes is a subtle yet critical feature that significantly influences the direction and control of the snow output.
The hood (or sometimes referred to as the chute deflector), typically attached to the top of the chute, can be adjusted to modify the trajectory of the ejected snow.
When the hood is retracted or pulled back, it allows the inherent design of the chute to govern the snow’s flow, typically facilitating a more upward or outward trajectory.
Conversely, extending the hood over the chute’s output stream alters the flow dynamics significantly. By doing so, the snow is directed downwards at a lower angle. The degree to which the hood is extended over the stream dictates the angle of ejection. This adjustability is crucial for users who need to control the direction of the thrown snow, especially in a tight clearing environments (i.e. close proximity to neighbors yards) where the direction of snow discharge can be important.
Engine size
With so many moving parts, the engine size in snow blowers is a critical factor that directly impacts the machine’s ability to throw snow effectively.
The general principle is straightforward: a more powerful engine, often measured in horsepower (hp), can muscle out snow over greater distances. However, it is important to note that the relationship between engine size and snow throwing capability is not purely linear.
Snow blower design, including aspects like the auger and impeller mechanics, plays a more significant role than merely engine power.
For instance, a 5.5 hp snow blower can compete with an 8 hp model in terms of throwing distance, despite its lesser snow collection capacity. This demonstrates that efficiency in design can compensate for lower horsepower. Similarly, a 6.5 hp snow blower can match the performance of a 10 hp model, especially if the former has an impeller running at higher speeds, like 1400 RPM.
This highlights the importance of the impeller’s rotational speed in enhancing snow throwing distance, irrespective of engine size.
The interaction between engine power and other design elements like impeller speed and chute design is complex. A well-designed snow blower with a moderately powerful engine can outperform a higher horsepower model if it has superior mechanics and efficiency.
Troubleshooting a Low Performing Snow Blower
Troubleshooting a low-performing snow blower involves a systematic approach to identify and resolve issues that are impacting its efficiency. Here are key steps to follow:
Step # 1 – Fuel System Check
Inspect for clogs and ensure the fuel is fresh. If you have old leftover fuel from previous season, you may want to remove the carburetor bowel to check for obstructions.
Step # 2 – Air Filter and Spark Plug Inspection
It is very common to find spiders and critters blocking the air filter. Fouled spark tip will also prevent the engine from running smoothly. Replace if they are dirty or worn out.
Step # 3 – Auger and Impeller Examination
Make sure that auger is not free-turning (if it does, your shear pins are broken and need to be replaced). Also look for the impeller vane (fin tabs) damage or wear that could impede performance.
Step # 5 – Belt Inspection
Belts usually last about two seasons before they need to be replaced. Old, frayed or stretched belts will prevent the driveshaft from transferring maximum power to auger and impeller. Ensure the belts are in good condition and properly tensioned.
Step # 6 – Chute Check
Make sure the chute is clear of debris and functioning smoothly. Pay attention to peeling paint or rust as they increase friction
Step # 7 – Electrical System Check (for electric models)
Examine connections and rechargeable batteries are fully charged
Step # 8 – Lubrication
Confirm that all moving parts are adequately lubricated.
Step # 9 – General Maintenance
Perform oil changes twice a year (start and end of the season). Regularly check and address minor issues to prevent larger problems.
DIY Hacks to Improve throwing distance
Improving the throwing distance of a snow blower can significantly enhance its snow clearing efficiency. While some might consider professional upgrades, several DIY hacks can achieve similar results.
These DIY approaches provide cost-effective solutions for those looking to upgrade their snow blowers’ performance without extensive technical modifications.
Clarence Impeller Kit
One significant enhancement for snow blowers is the installation of the Clarence Impeller Kit, designed to refine the performance of the impeller. This kit functions by extending the length of the impeller vanes, which are crucial for collecting and ejecting snow.
Typically, there is a gap between the end of the vane and the impeller housing. This gap varies across different snow blower designs.
The Clarence Kit effectively eliminates this gap by attaching hard rubber tabs to the ends of the vanes, extending them to reach the interior wall of the impeller. This modification has a dual advantage: it enables the snow blower to throw more snow and slightly increases the speed of the rotating vane. As a result, snow is gathered and propelled faster, and more of it is directed towards the impeller exit and into the chute (check out the latest prices on snow blower impeller kits here)
However, this enhancement comes with a trade-off. The elimination of the gap means that debris like dirt, sand, small stones, and twigs may rub against the impeller housing wall, potentially causing wear.
Feedback from users who have installed the Clarence Impeller Kit generally indicates a notable improvement in throwing distance, with many expressing satisfaction with the upgrade.
This kit is particularly beneficial for those with clear driveways seeking to enhance throwing distance. However, it might not be the best choice for those with gravel or loose stone driveways, where the risk of debris causing damage is higher.
Slick chute
Enhancing the snow blower’s chute with a slick coating is another straightforward yet impactful method to boost performance.
Applying lubricants inside the chute can significantly reduce friction, allowing snow to slide out more smoothly and efficiently.
Various substances can be used for this purpose. Some individuals opt for silicone sprays, which provide immediate but short-lived results. Others prefer using wax or similar materials to create a slippery surface inside the chute.
An alternative is applying a durable gloss paint, like Rustoleum, which offers a longer-lasting solution. Additionally, fitting the chute with a high-quality slick plastic liner has proven beneficial, although it’s crucial to choose a material that resists scratching and wear over time.
For many, regularly painting and repainting the chute every few years is a convenient and effective way to maintain a slick surface, thus enhancing the snow blower’s throwing distance and overall efficiency.
Bigger motor
Upgrading the engine motor to a more powerful variant is another method to enhance the snow blower’s throwing distance, but it’s important to note that this is not typically a feasible option for the average DIY enthusiast.
The complexity and technical expertise required for such an upgrade can be significant.
Most snow blower frames come predrilled from the factory to accommodate a range of motor sizes. For instance, Ariens has manufactured models with tractor bases designed to support engines from 6 to 11 horsepower, and MTD follows a similar approach.
While it might be technically possible to replace an aging motor with one of the same or higher horsepower, this process involves intricate mechanical know-how and possibly specialized tools.
Wrapping Up
Enhancing the performance of a snow blower involves a multifaceted approach.
From the meticulous inspection and troubleshooting of various components like the fuel system, air filters, and spark plugs to examining the auger, impeller, and belts, each step is crucial for maintaining optimal functionality.
Additionally, implementing DIY hacks such as installing the Clarence Impeller Kit, lubricating the chutes, or upgrading the engine motor can significantly improve the throwing distance, elevating the overall efficiency of the snow blower.
These measures, both in maintenance and enhancement, are key to ensuring that your snow blower remains a reliable tool for tackling snow removal with ease and efficiency.