
Although Echo PB-413H/T models went through many reiterations over the years, Zama C1M-K77 carburetor remained the same.
Because a leaf blower operates in a very dusty environment, it may be necessary to clean and rebuild a Zama carburetor to resolve a problem.
YOU MAY ALSO WANT TO READ THESE POSTS:
- Basic Maintenance
- Symptoms and Repair Solutions
- Zama C1M-K77 Carburetor Rebuild (You are here)
- Zama C1M-K77 Carburetor Adjustment
- Gas in the air filter
- Non-OEM vs OEM Air Filters
- Resource Page for Echo PB-413H Backpack Leaf Blower
This article will show you how to disassemble, clean and rebuild a Zama C1M-K77 carburetor.
REQUIRED PARTS
I always found it to be more convenient to have spare parts on hand before starting any repair projects. You may want to buy some extra parts in advance (just return them if you end up not using them) to ensure that your repair job is done in a timely fashion.
- Gaskets – external gaskets do not come with a new carburetor. There are 3 gaskets that will need to be replaced. Your option is to buy them individually (see below) or make them yourself (Read my post on Make Your Own Carburetor Gasket and Save Money here):
- (13) Gasket, air-filter-to-carb side, OEM, Part # 13001603731
- (15) Gasket, carb-to-insulator side, OEM, Part # 13001606434
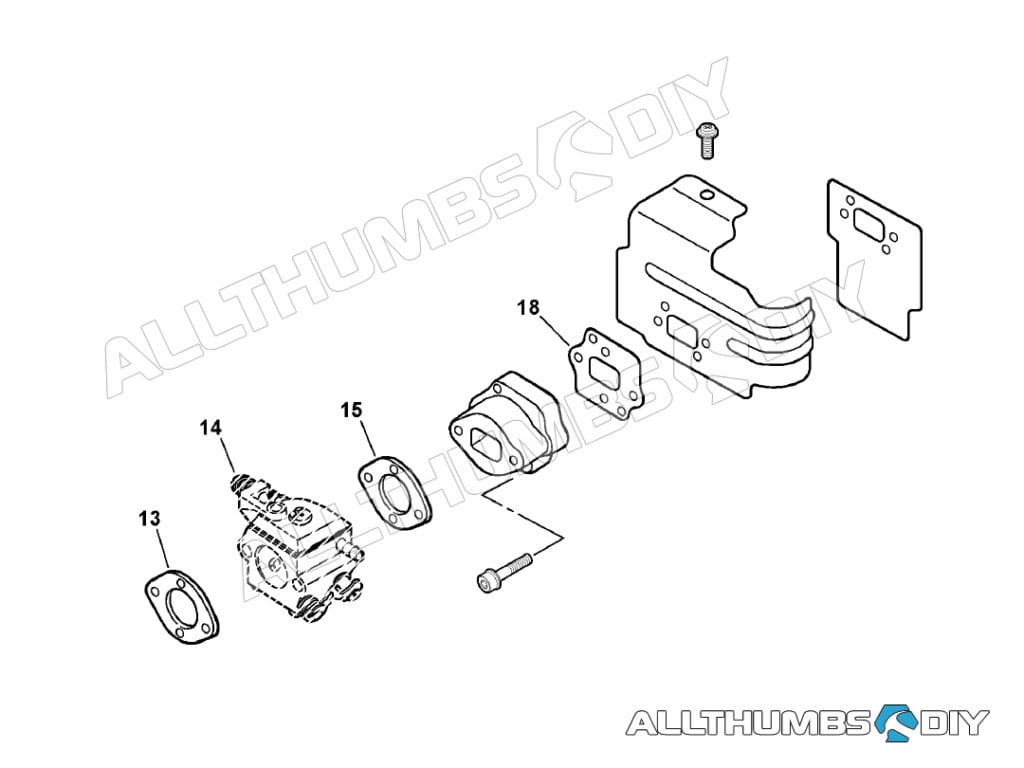
- (18) Gasket, insulator-to-engine side, intake, OEM, Part # V103000000
- Zama C1M-K77 Carburetor Rebuild Kit – OEM, Part # 12530008360 (comes with all internal diaphragms and gaskets;
- Zama C1M-K77 Carburetor – Replacement, pre-assembled, OEM, C1M-K77
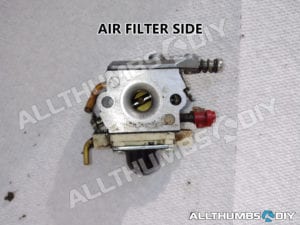
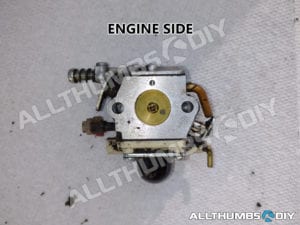
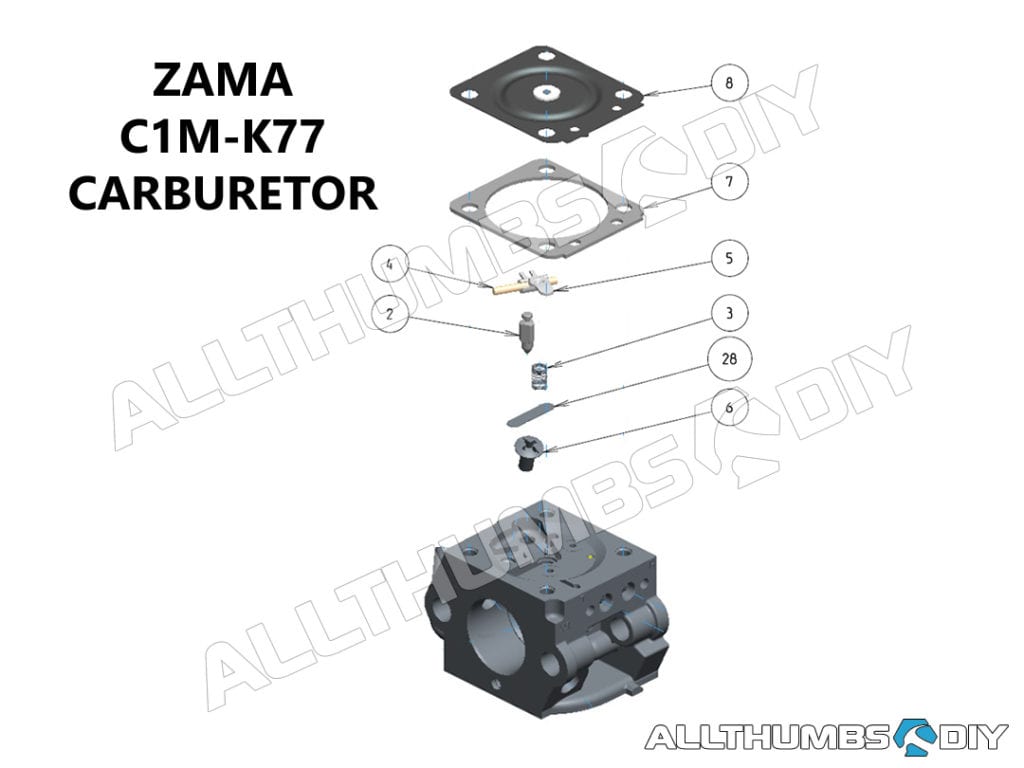
ZAMA C1M-K77 PARTS DIAGRAM
Although I am listing out the parts, it is not economical to buy few individual internal components.
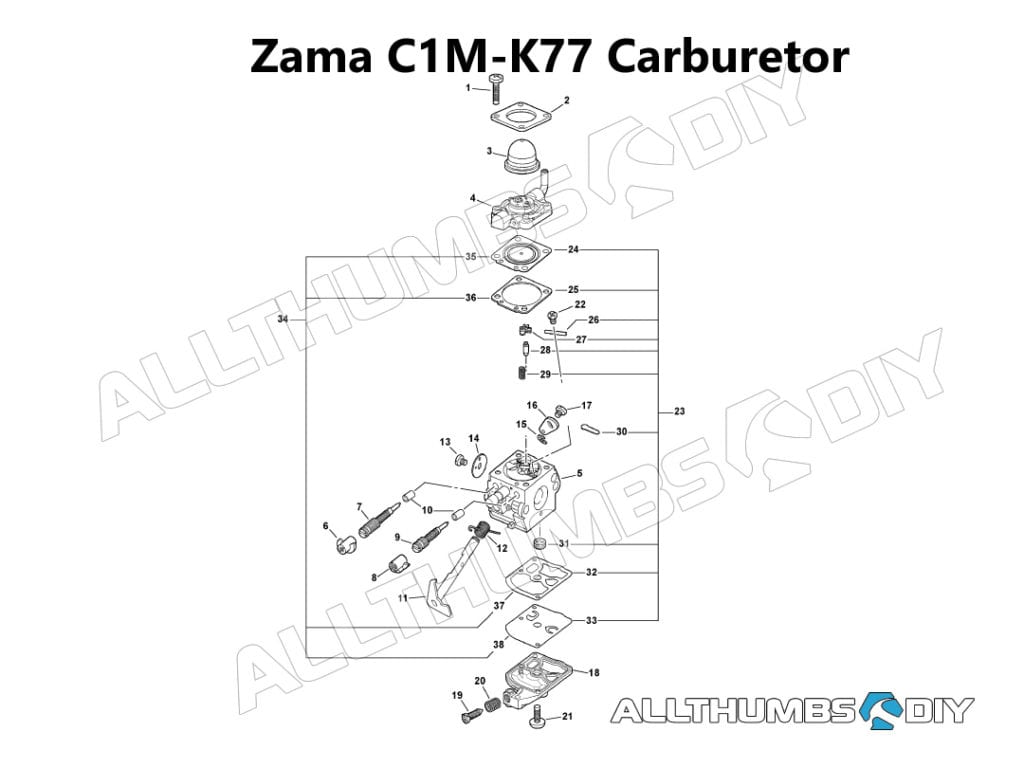
| Item | Part # | Description |
| 00 | A021000890 | Zama C1M-K77 carburetor assembly |
| 01 | P005000980 | Screw, purge/primer bulb base |
| 02 | P005000620 | Purge/primer bulb base retainer |
| 03 | 12538108660 | Bulb, purge/primer |
| 04 | P005000610 | Base, purge/primer bulb |
| 05 | —————— | Carburetor body (not avail. individually) |
| 06 | 12532909860 | Cap, low-speed limiter |
| 07 | P005000460 | Needle, low-speed limiter |
| 08 | 12532908560 | Cap, high-speed limiter |
| 09 | P005001650 | Needle, high-speed limiter |
| 10 | 12536312820 | Retainer |
| 11 | P005001640 | Shaft, throttle |
| 12 | 12531308360 | Spring, throttle return |
| 13 | 12531413930 | Screw, throttle return |
| 14 | 12531613930 | Valve, throttle |
| 16 | 12532713930 | Clip, throttle shaft |
| 16 | 12535008360 | LEVER, THROTTLE |
| 17 | 12534813930 | SCREW, THROTTLE LEVER |
| 18 | 12532408360 | COVER, FUEL PUMP |
| 19 | 12534408560 | SCREW, IDLE ADJUST |
| 20 | 12533308560 | SPRING, IDLE ADJUST |
| 21 | 12531013930 | SCREW, FUEL PUMP COVER |
| 22 | 12533913930 | SCREW, METERING LEVER PIN |
| 23 | 12530008360 | REPAIR KIT INCLUDES ITEMS 24-33 |
| 24 | —————— | DIAPHRAGM, METERING |
| 25 | —————— | GASKET, METERING DIAPHRAGM |
| 26 | —————— | PIN, METERING LEVER |
| 27 | —————— | LEVER, METERING |
| 28 | —————— | VALVE INLET, NEEDLE |
| 29 | —————— | SPRING, METERING LEVER |
| 30 | —————— | WELCH PLUG |
| 31 | —————— | STRAINER |
| 32 | —————— | DIAPHRAGM, FUEL PUMP |
| 33 | —————— | GASKET, FUEL PUMP |
| 34 | 12530308360 | DIAPHRAGM/GASKET KIT INCLUDES ITEMS 35-38 |
| 35 | —————— | DIAPHRAGM, METERING |
| 36 | —————— | GASKET, METERING DIAPHRAGM |
| 37 | —————— | DIAPHRAGM, FUEL PUMP |
| 38 | —————— | GASKET, FUEL PUMP |
TEARDOWN / CLEANING INSTRUCTIONS
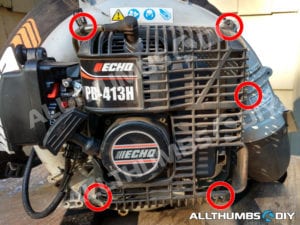
- Disconnect the spark plug cable
- Detach 2 ignition wires from the hold down clip; clip is part of the engine cover
- Remove 5 screws holding down the engine cover. Remove engine cover;
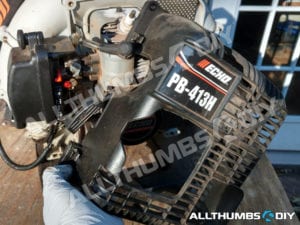
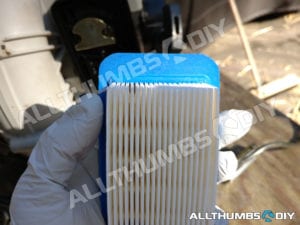
- Remove the air filter housing cover & air filter and set them aside in a clean environment (i.e. inside zip lock bag);
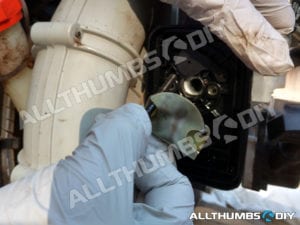
- Using a metric Allen wrench, unscrew 2 long screws holding down the retention metal plate inside the air filter housing base;
- Gently pry off the air filter housing from the rest of the leaf blower;
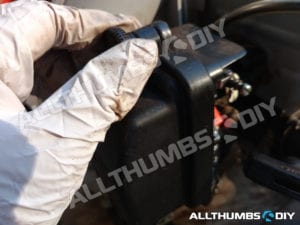
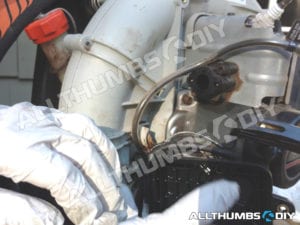
- 2 long screws are used to hold down the: (a) air filter housing (b) carburetor and (c) intake insulator;
- Plug the hole on the insulator intake to prevent dirt penetration;
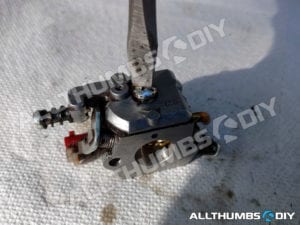
- In my case, the carburetor came off with the air filter base;
-
-
-
-
-
-
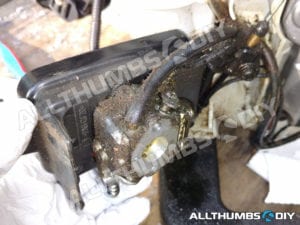
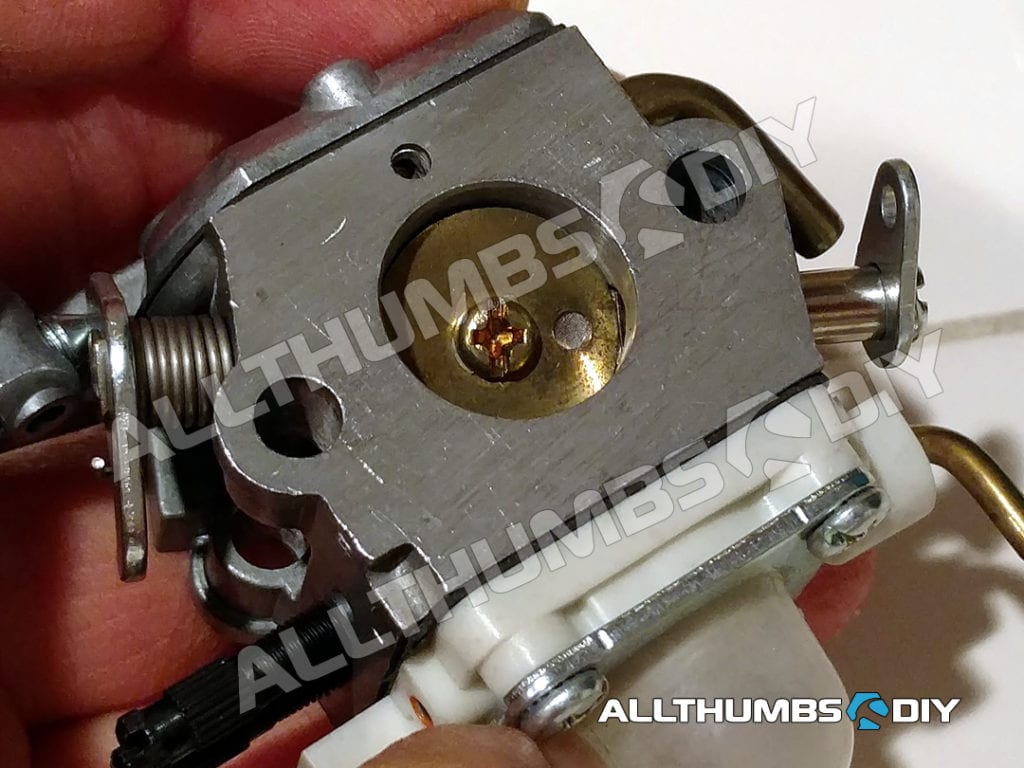
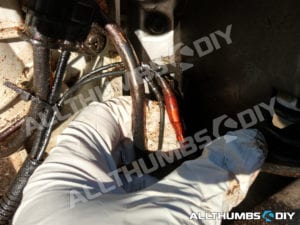
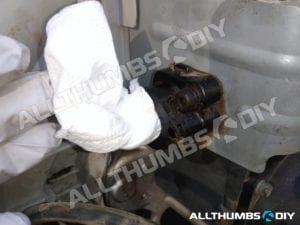
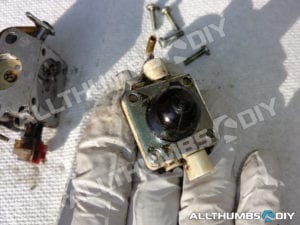
- With the carburetor free, gently slide off 2 fuel lines (have some paper towel or drop cloth underneath to catch fuel/oil mixture;
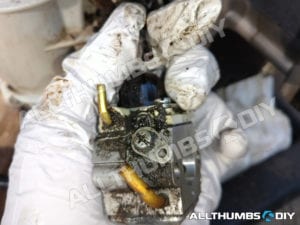
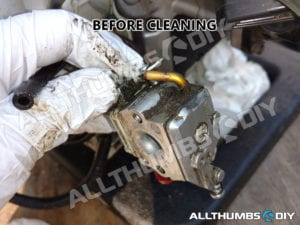
- As you can see my carburetor was full of oily grime on the outside;
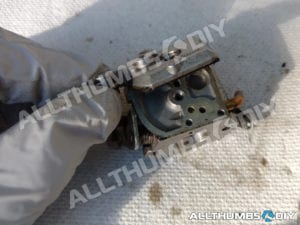
- Using a Phillips screwdriver, remove 4 screws holding down the purge / primer bulb assembly;
- Aim 2 fuel line nozzles down to some paper towel and gently press the primer bulb to expel any remaining fuel;
-
-
-
-
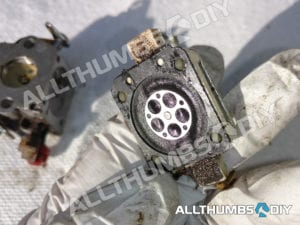
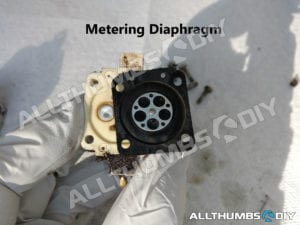
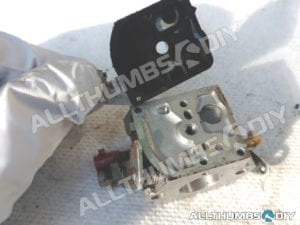
- While pointing the bulb downward, remove the metering diaphragm and metering diaphragm gasket;
- Because the metering diaphragm is black, it is very difficult to determine the level of varnish build up; I highly recommend that you replace both metering diaphragm and gasket (found in this kit);
-
-
-
-

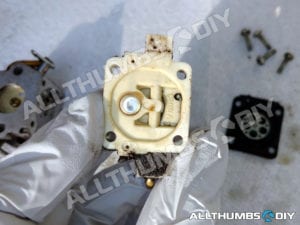
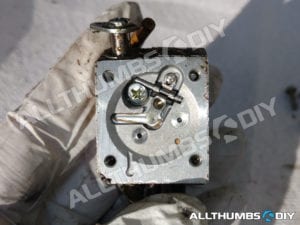
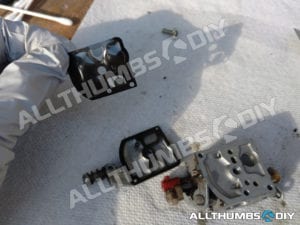
- At this point, I saw some debris just underneath the metering lever and remove them using cotton swabs;
- Remove and clean the needle; if the needle is not working or the neoprene tip is swollen your needle adjustment will be out of operational range;
- Sometimes carburetor cleaner will make it swell up to where it won’t open enough to get fuel through it;
- Adjust and confirm the height of the tab to flush with the body of carburetor;
- Verify primer bulb integrity; it should be pulling fuel through the filter to carburetor, then carburetor back to tank;
-
-
-
-
-

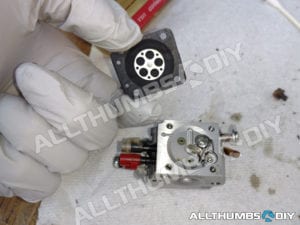
- I placed the now-partially disassembled carburetor on clean paper towel to remove the fuel pump cover;
- Fuel pump diaphragm and gasket came off with the cover. . Hold it up to a light source. If you cannot see thru it, replace it. Although they might look okay, I recommend that these parts be replaced as part of the rebuild process;
-
-
-
-
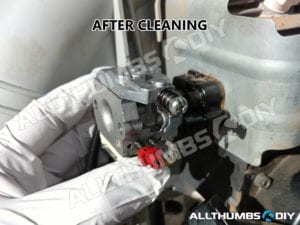
- Using plenty of cotton swabs and paper towel, clean off all exterior gunk;
- Re-assemble the carburetor
| Item | Zama Part # | Description |
| 02 | 0018004 | Valve, inlet needle |
| 03 | 0019002 | Spring, metering lever |
| 04 | 0021001 | Pin |
| 05 | 0020012 | Lever, metering |
| 06 | 14803005 | Screw (meter levering pin) |
| 07 | 0016007 | Gasket, metering chamber |
| 08 | A015080 | Diaphragm assembly, metering |
| 28 | 0005004 | Welch Plug |
WRAP UP
With some cleaning and replacing internal metering diaphragms and gaskets, I expect this rebuilt carburetor to last a long time.
I hope this article was helpful to you as you look to rebuild your Zama C1M-K77 carburetor found in Echo PB-413H leaf blowers. When you get a chance, can you do me a favor and sign up for my newsletter so that I can send you updates on my DIY projects?
If you have any questions, please leave a comment below.
Thanks and good luck with your DIY project!

REFERENCES
- Zama – C1M-K77 Parts list
- Zama – C1M-K77 Parts List (PDF)