
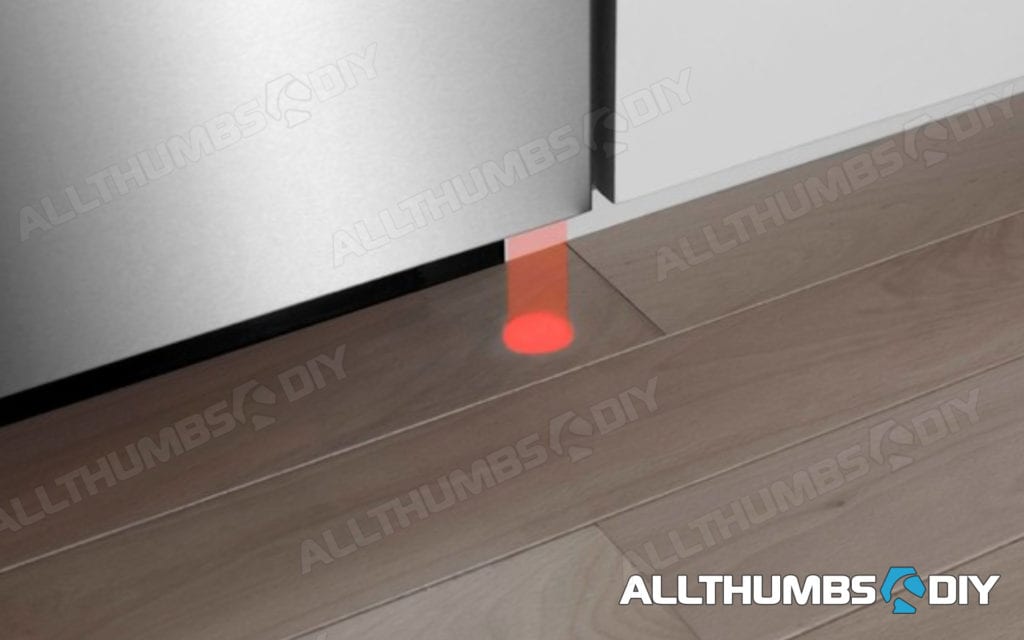
Bosch Dishwasher has a nifty feature called InfoLight (a.k.a. indicator light or Info-Light), where a small red LED light is projected onto the floor to indicate whether the dishwasher is running or not.
The control panel display and other lights on my Bosch Integra (Model SHX45P06UC/64) dishwasher are tucked underneath the counter top so this InfoLight feature is very useful.

Problem
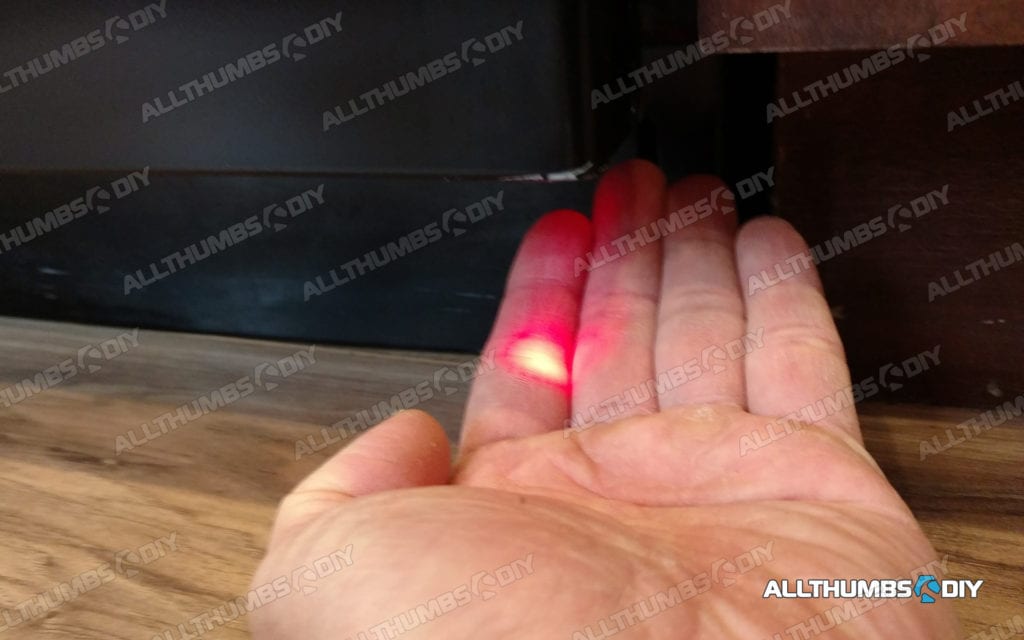
After my latest dishwasher repair (replacing my circulation pump), I was surprised to see that my beloved InfoLight was no longer working.
I knew that the light was generated by a single LED “bulb” with plastic diffuser tube so the light itself should have had a very long lifespan.

Rather than spending $30 bucks on a replacement part, I decided to take apart the dishwasher first to see what was going on.
Required Tools
- Torx T20 bit + driver (if you don’t have one, I recommend this inexpensive pocket set)
- Phillips screw driver
- Rags / Towels
Replacement part
Obviously if you do find your bulb to be broken, you need to replace it. Unfortunately, Bosch InfoLight (a.k.a. Info-Light, Statusanzeige fuer Programmende, red) – Bosch OEM Part # 424819 is rather hard to find.
- I recommend buying one from my favorite appliance replacement parts store, Appliance Parts Pros (click here for the latest price)
- If they are out of stock, you can buy one at Amazon (click here for the latest price)
If you buy one elsewhere, please remember that an “OEM authorized part” does not necessarily mean a “Genuine OEM part”
Step-by-Step Instructions
- STEP #1 – Turn off the circuit breaker to the dishwasher
- STEP #2 – Turn off the water supply via shutoff valve
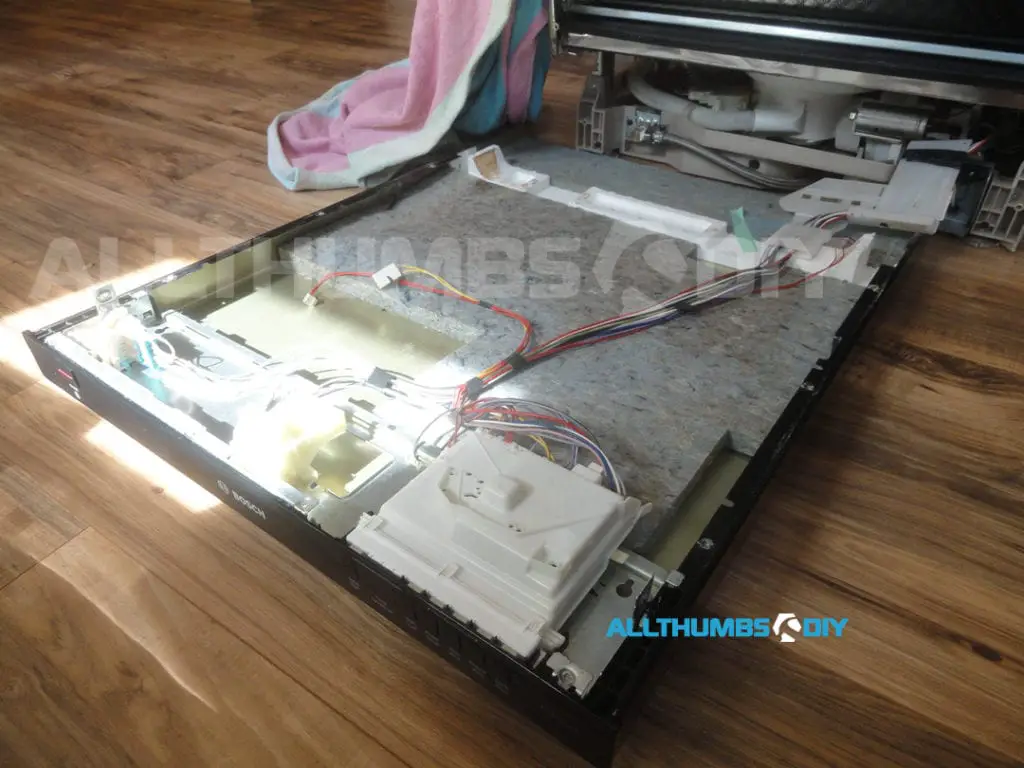
- STEP #3 – For this particular Bosch dishwasher model, the entire door cover assembly comes off as a single unit so roll up 3 or 4 thick beach towels for support (I ended up using my leg)

- STEP #4 – Open the door all the way down (door should be PARALLEL to the floor)
- STEP #5 – Place rolled up towels (or legs) under the door for support (Fig. 2.1)
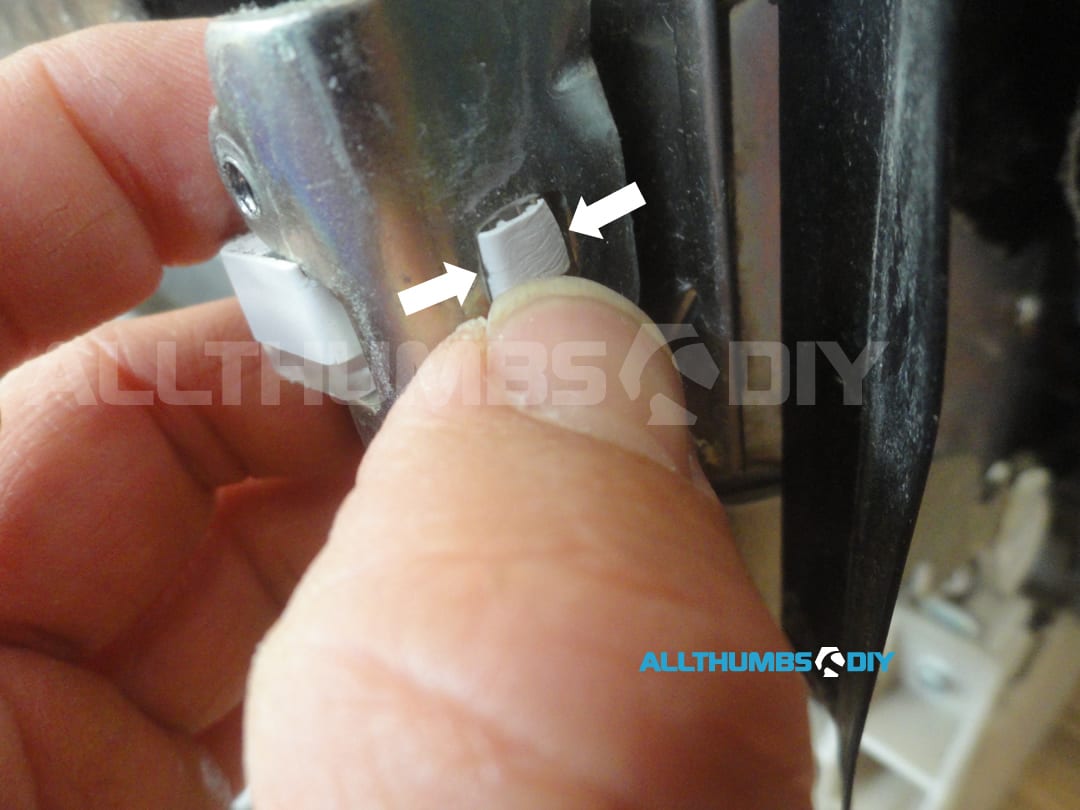
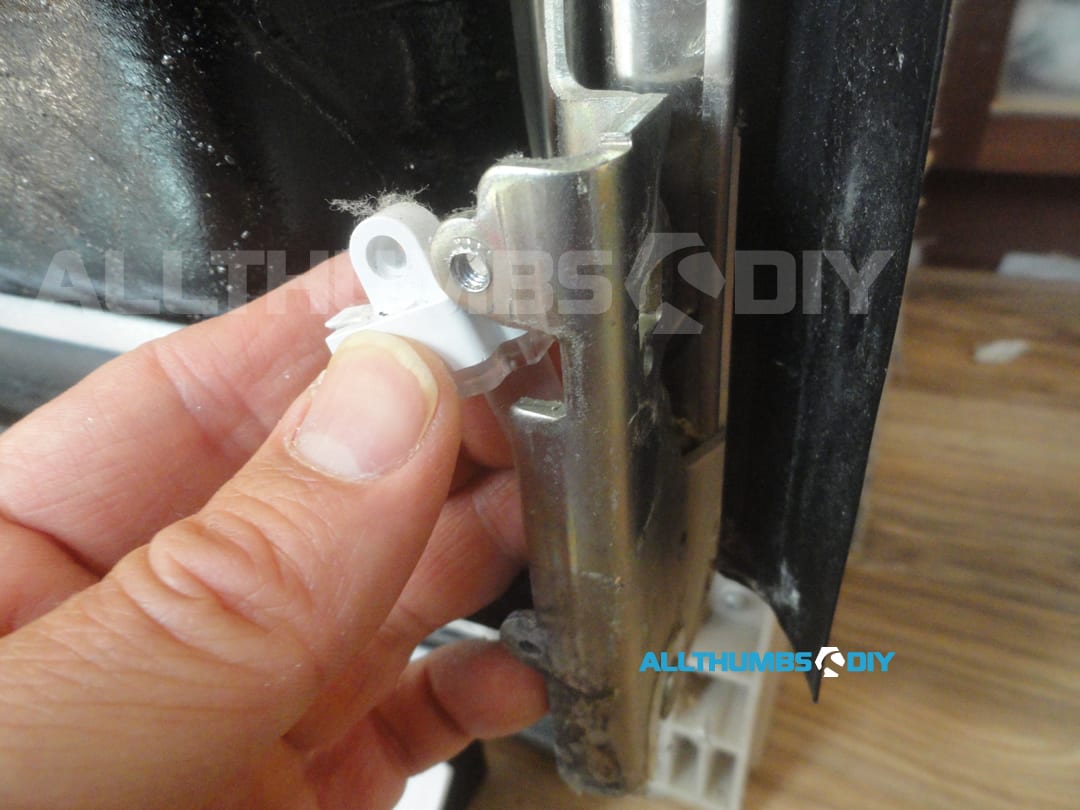
- STEP #6 – Using a T20 Torx bit, remove 8 screws from the door perimeter (4 on the left, 4 on the right, 4 on the top); place them in a bowl (Fig. 2.2) ; Keep track of these screws as they they are expensive to replace. I use Titan Mini Magnetic Tray (Model TIT11061) which works great;
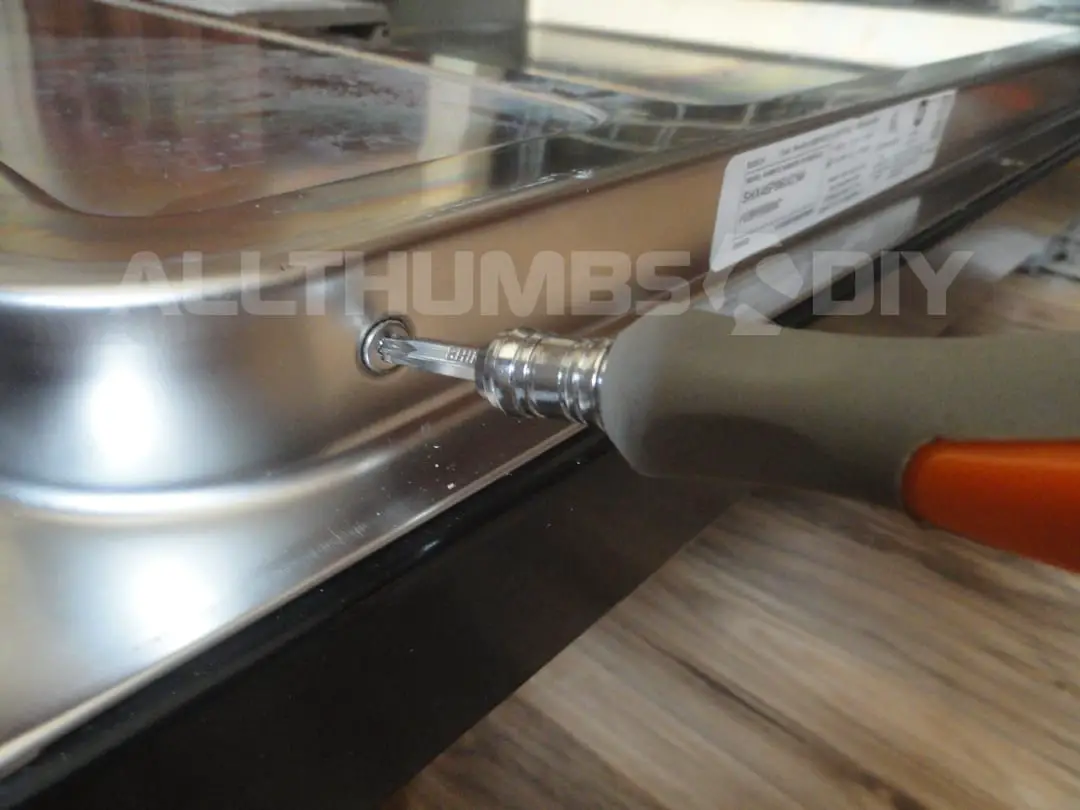
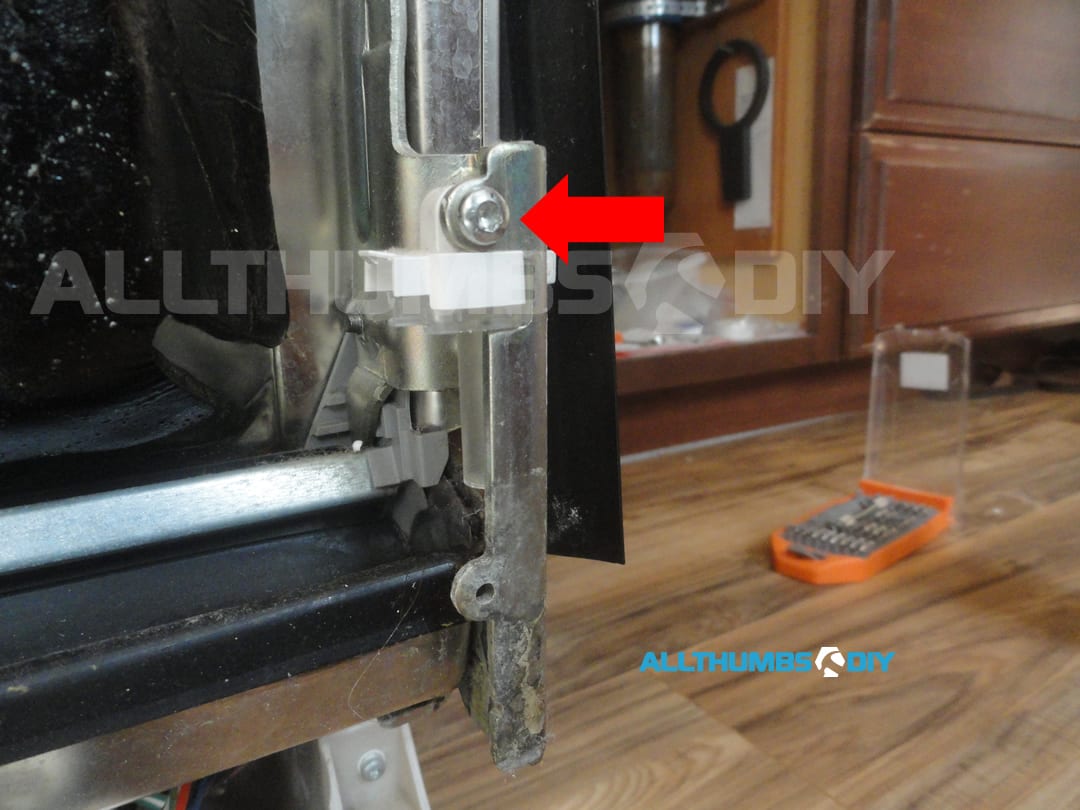
- STEP #7 – You will need to remove 2 additional Torx screws (Fig. 2.3; one screw on each side, facing perpendicular to the perimeter edge);
- STEP #8 – Place a dish towel near the latch locking mechanism so the door assembly won’t slam shut
- STEP #9 – Gently slide the door cover assembly towards the top for 1/4″ to disengage the cover from the door
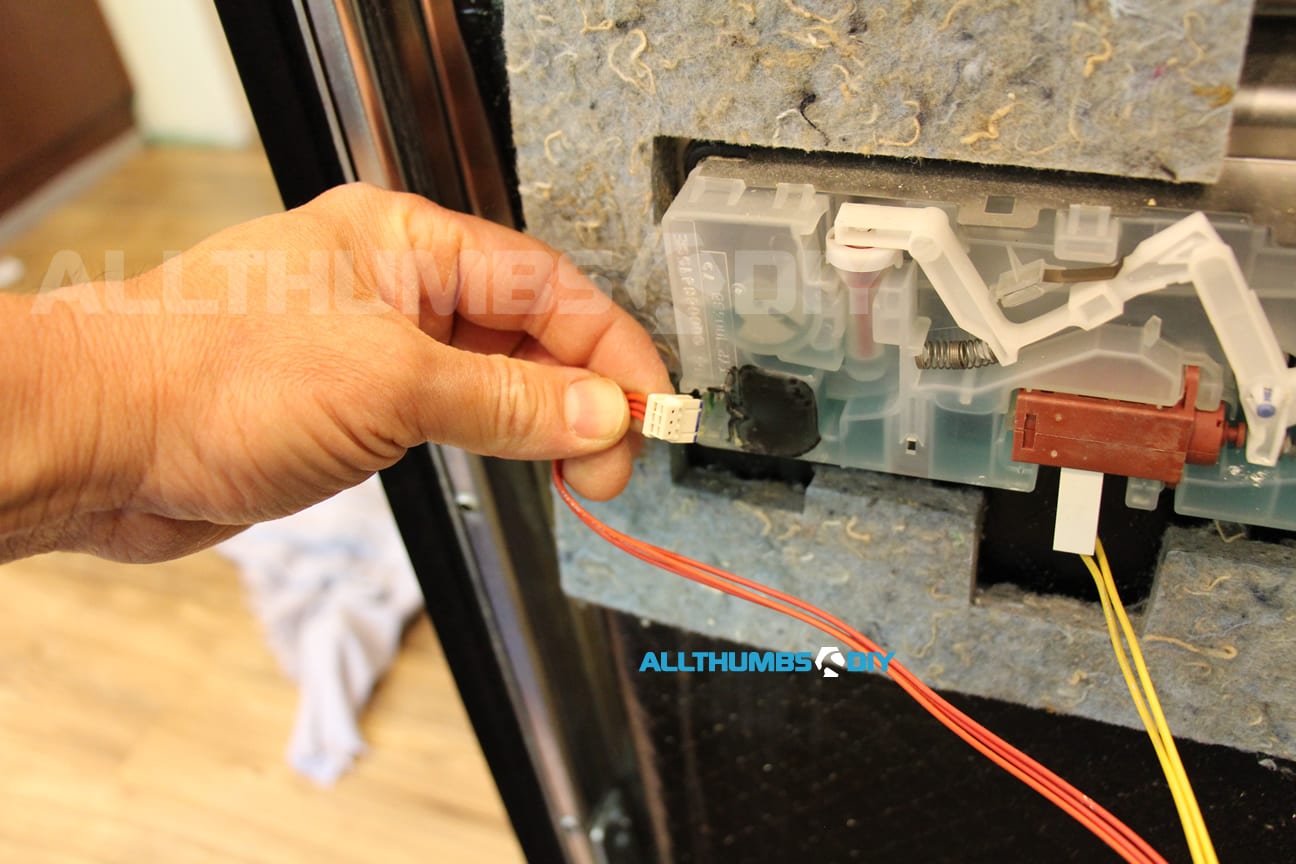
- STEP #10 – Gently separate the cover from the door assembly and place it on the floor (remove support towels or your legs at this point). Slowly pull up the door assembly upright towards the dishwasher. Make sure to control the door movement as it is now lighter without the cover assembly so the door springs will feel stronger; Please note that there are multiple wires attached between the door cover and door assembly
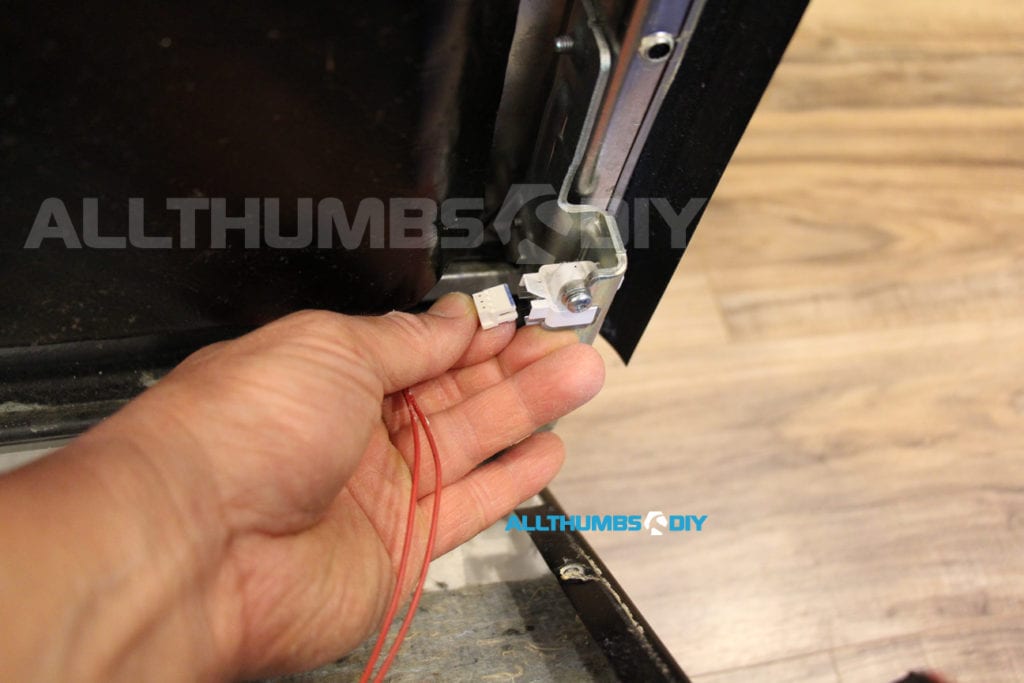
- STEP #11 – Disconnect 3 wires as shown
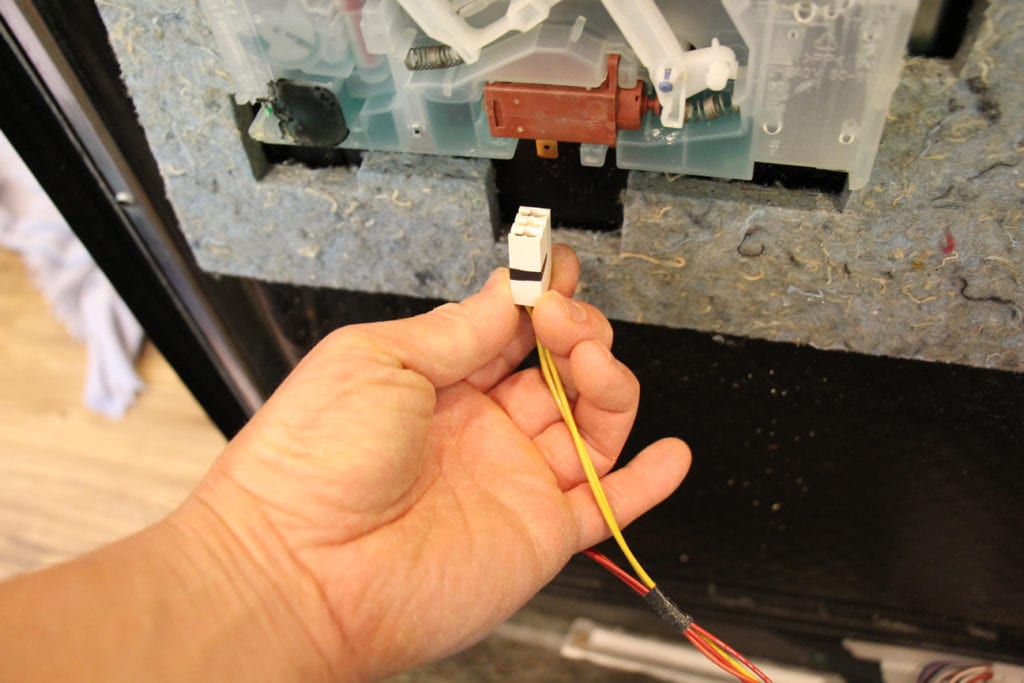
- STEP #12 – Please note in Fig 3.2, I applied a small piece of black electrical tape to indicate the original plug orientation
- STEP #13 – Locate the Info-Light (Fig. 3.3; lower right hand corner on the door assembly)
- STEP #14 – Using the same Torx bit, remove one hold-down screw from the InfoLight assembly
- STEP #15 – Crimp both side of the push tab to remove the bulb from the door;
- STEP #16 – This “bulb” is nothing more than a single LED light with diffuser attached to it; it is rare to have a LED light go bad but stranger things have happened so if you see a burnt mark on the diffuser, you will need to you will need to replace it;

- STEP #17 – If the light bulb checks out, look closely where the light bulb is located. In my case, a small piece of insulation (Styrofoam) broke off and it was blocking the light path
- STEP #18 – Take some damp paper towels and thoroughly clean up the surrounding area of dirt, hair, debris, etc.
- STEP #19 – Before putting the door back together, check all wiring connections to make sure that nothing came loose during disassembly
- STEP #20 – Reverse the steps to re-assemble the door;
Conclusion
Before you go, can you do me a favor? If you found this article to be useful, can you sign up for my free newsletter?
Thanks and good luck with your DIY project!

Ben
Friday 12th of May 2023
Kevin,
I want to connect an LED to the control board that will turn on at the same time as the infolight. I will mount this to the face of the dishwasher so it is more visible. Do you have any idea what type of voltage/amps come out of the control board or any tips on how to do this?
matt
Sunday 26th of February 2023
I ordered a replacement info light. It just came in mail(you are only info on this topic I could find in weeks of searching, thank you) anyways… just opened envelope and it’s just a little tiny 1/2” by 1/2”(12.7mm/1.27cm x 12.7mm/1.27cm) with a black two prong female receiver clip and on other side of tiny circuit board is two leds in a tiny black plastic box 1/4” wide, 3/16” wide, 1/8” tall(housing the two leds attached to the green 1/2” circuit board) do I need to have them send the white housing also? Or is that a different model. Also my washer said it had infomlight in the description but doesn’t work. So I called them and they sent this but before I took it apart I was researching so I had an idea of what I was doing. I’m eventually going to try and switch to the led that displays the time but first step is getting this installed lol. Let me know, thanks. It’s a ascenta model about three months old. Buttons are on outside of door at the top and it supposed to be super quiet( not that incare because none are loud anymore anyways. Would’ve rather had Wi-Fi and a third rack with time light) thanks for any help. My name is matt. Email: [email protected] In case I lose this website or you find it easier to email me, or do both. Thanks for help
Rob Mellor
Saturday 15th of October 2022
Thanks for the excellent guide. My Infolight was intermittent, then flickering, then died. Stripped it down and one of the wires into the pushfit plug had sheared. I don't think it's possible to reuse the pushfit connectors so it looks like I need to replace the cable, but thanks again for showing me that the innards of a dishwasher are nothing to be afraid of!
kevin
Saturday 15th of October 2022
Hi Rob,
Thanks for your kind words! I think I may still have some parts that I salvaged before recycling the broken dishwasher.
If you want, let me know what you need and I will take a look to see if I have it.
Kevin
Barth Getto
Saturday 8th of October 2022
This was the ONLY site on which I could find this info. Thank you! A friend gave me the dishwasher used. I replaced the soap dispenser assembly.. While doing so, I realized the InfoLight housing was crushed. It was inside the door, so no light shone down. Taped in the original and ordered the new part.. Your photos will make it easy to swap!
kevin
Thursday 13th of October 2022
Hi Barth,
Thanks for your kind words! Good luck with your project!
Kevin
Jody
Monday 30th of May 2022
I have a SHS5UC/22. I replaced Facia panel and infolight was dangling. Any idea of where to mount?