

When you buy a dishwasher, you can usually have the store install it for you. Sometimes you can get the installation for free, but most times it cost around $75. I will show you how I installed mine (if you need to uninstall your old dishwasher, check out this article first – how to remove an old dishwasher)
STEP-BY-STEP GUIDE
STEP 1 – The very first thing I did was to read the manuals. I know I know, like most of you, I like to just skip the reading and dive right into assembling my lego blocks dishwasher but dealing with electric shock and/or plumbing leak is not fun either. So go ahead and grab a beer and read the manual first!
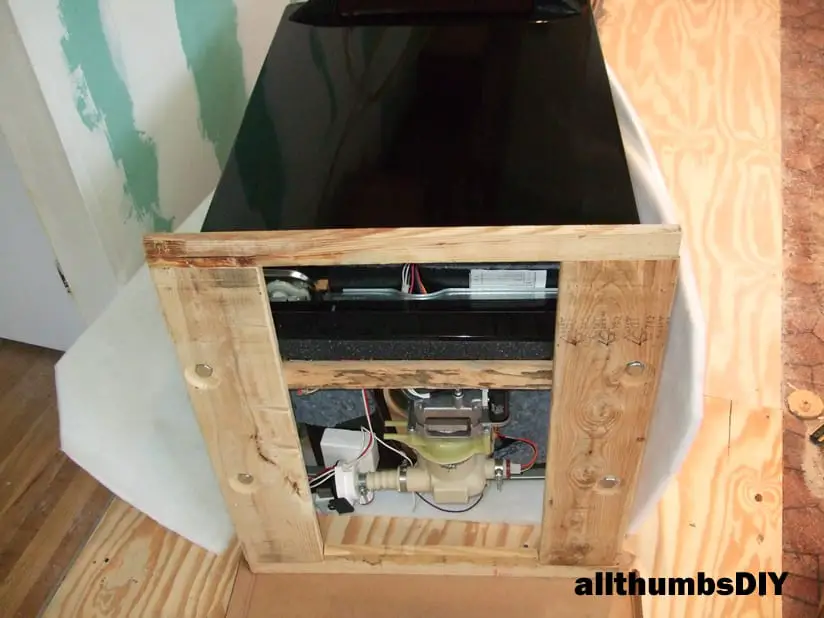
STEP 2 – If you had it delivered, check for parts (draining hose, etc.) and make sure there are no physical damages. I had to remove wooden skids with a ratchet (fig.2.1).
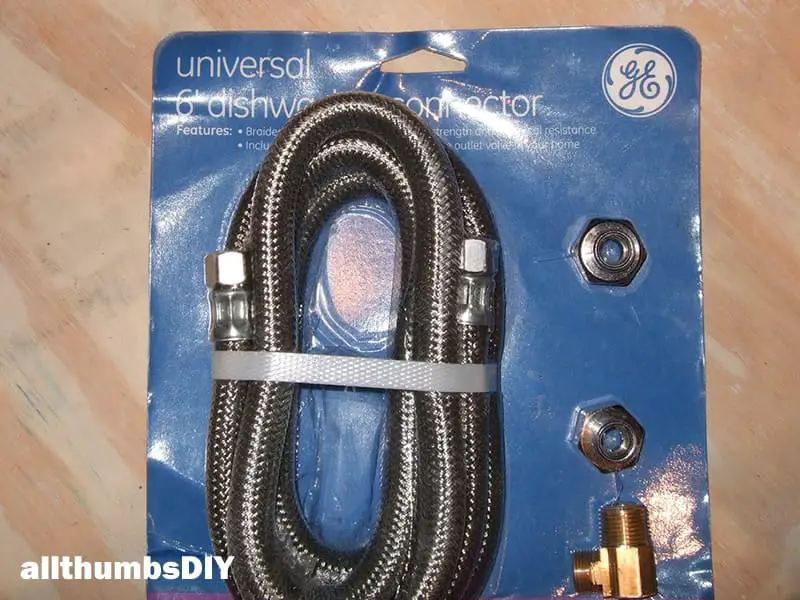
STEP 3 – My dishwasher was supposed to be hardwired but I learned from my past experience that a short wire run makes it a lot harder to remove the dishwasher in the future for service/maintenance. So I decided to buy two things that will make my installation go faster and make it easy to remove in the future: Universal 3 Wire Dishwasher Power cord (part number wx09x70910 – see fig 2.2) and Universal 6′ Dishwasher Connector (part PM28X319 or PM28X10001 – see fig.2.3). These two items will make it much easier to jostle the dishwasher into its final resting place 🙂

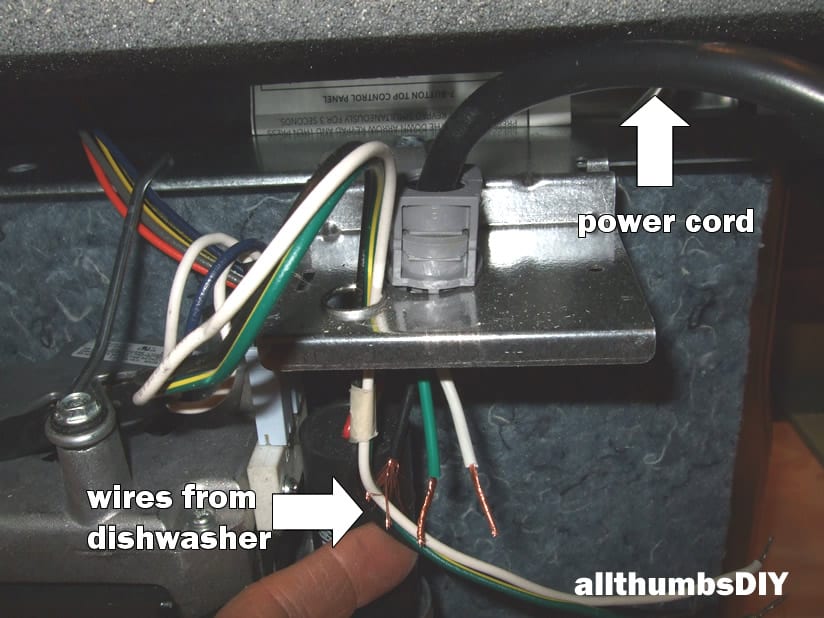
STEP 4 – To install the dishwasher power cord (fig.2.4 and fig 2.5): a) turn off circuit breaker of disconnect fuse b) remove the junction box cover; c) snap the plastic retainer end of the power cord through the large hole in the back of the junction box; d) locate the three dishwasher wires (white, black and green) with the stripped ends; e) Using UL listed wire nuts included in the kit, connect incoming white to white, black to black and ground to green wire; f) reinstall the junction box cover; g) check that wires are pinched under the cover. Even though the Sheetmetal opening was rolled, I like to use a simple simple plastic wiring protector in this case.
STEP 5 – Using a worm gear hose clamp (I do not like to use the quick assembly clamp that comes with the dishwasher), attach the drain hose (fig.2.3)


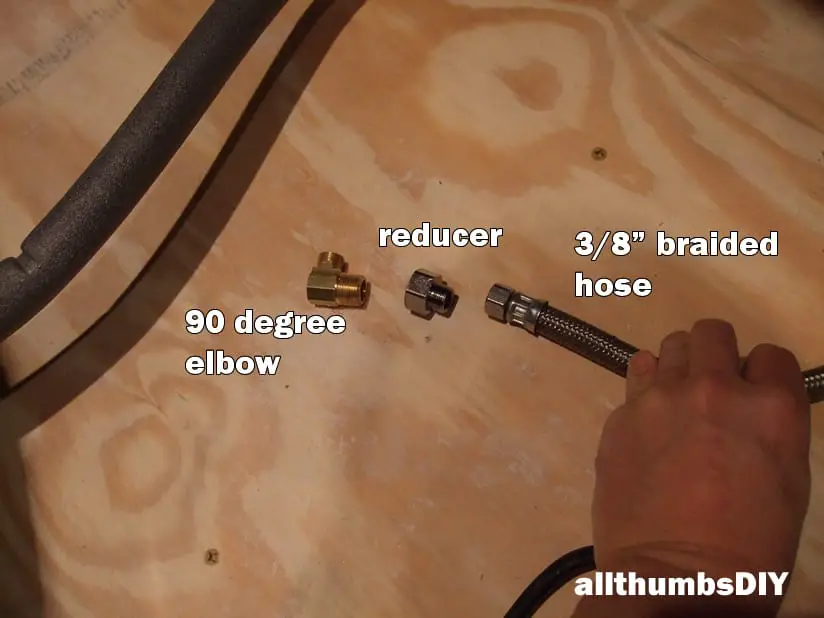
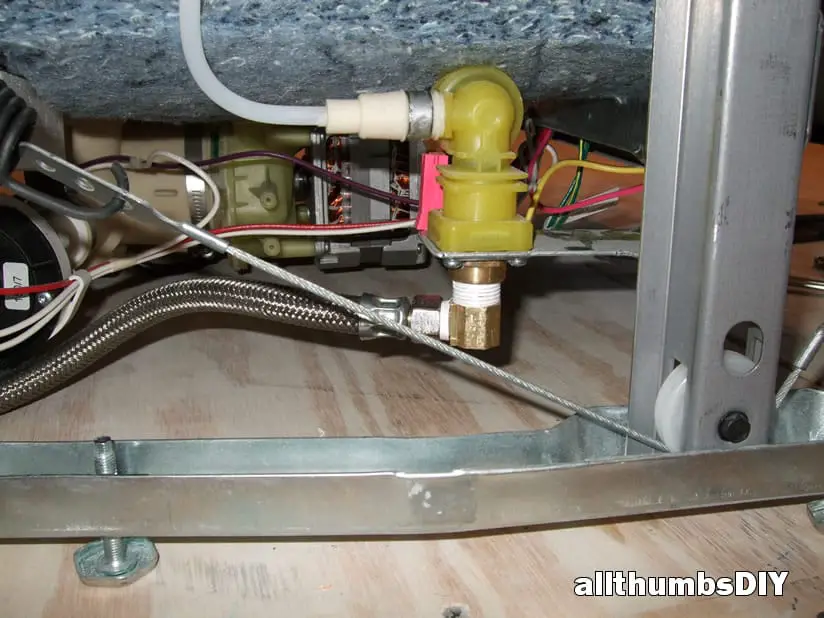
STEP 6 – Take a braided hose from the dishwasher connector kit and assemble fittings (make sure to use white Teflon tapes) (fig.2.7). Brass fitting gets attached to the dishwasher first. Then reducer, then the hose.
STEP 7 – Plug in the power cord, then route the drain and water hoses into the cabinet and slide in the dishwasher into place. Make sure that power cord end will not be squashed by dishwasher back panel (Note: I recessed my receptacle).
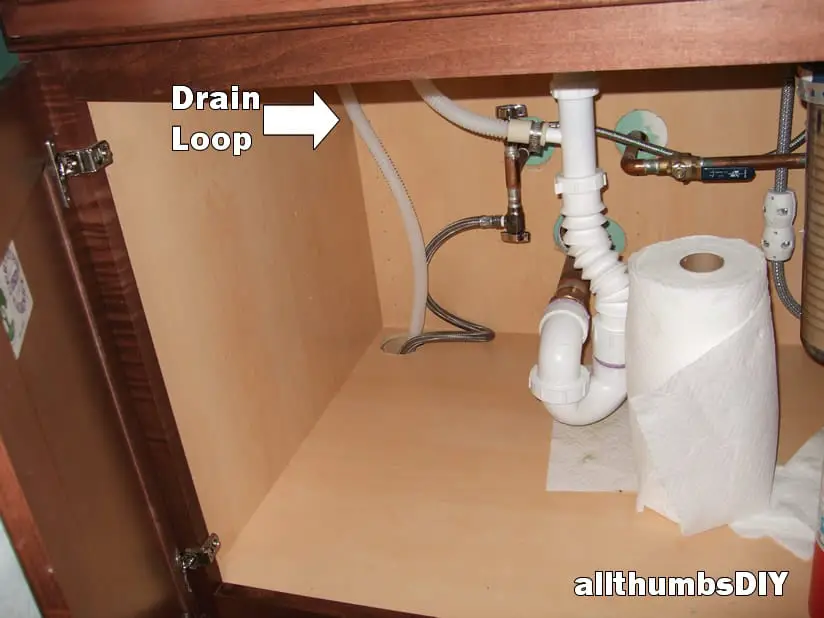
STEP 8 – Connect the water hose and drain pipe under the sink. Turn on electric and water.
STEP 9 – Turn on the dishwasher do a sample run
STEP 10 – Check for any leaks by looking under the dishwasher. Also check for level and plumb and adjust base leg screws as necessary
STEP 11 – Once everything checks out, attach dishwasher to either the counter top or cabinets.
Did you find this article to be useful? If yes, why don’t you sign up for our newsletter? It contains chockful of actual DIY projects done by someone like you. Thanks!
Please note that I have had nothing but problems with this dishwasher and finally replaced it with a Bosch unit in 2011. Once I publish the article, I will post a link here.
Mike
Saturday 21st of October 2023
In figure 2.4how do you get cord out of plastic holder if replacing cord.
kevin
Saturday 21st of October 2023
it's a twist lock. grab the gray plastic piece and twist a quarter-turn and pull it out
Rhea98
Thursday 23rd of June 2022
Thanks for the reply, Kevin. I had the dishwasher totally out of the enclosure but did not detach electric connections. The current male fitting has tape (which I would replace), but the O-ring/washer inside the current hose fitting has deteriorated. In any case, I still only have enough room to get a wrench (of any type) around the fitting but not enough room able to move the fitting nut. Next try will be to raise from the floor about 4".
Rhea98
Thursday 23rd of June 2022
I've been hoping to find installation for this dishwasher (the installation manual really doesn't get very detailed) mainly to affirm my conclusion that my installers must have been idiots. Figure 2.8 was proof. That connection was made at about a 45 degree (instead of 90) angle turning away from the side and ending up under the valve. I was able to remove the leaking line but do not have room to get a any type of tool in to turn the fitting on a new line. I'm going to try raising the dishwasher before I have to totally remove it and lay it on it's side or back just to replace the water line. Thanks for posting this--and the entire section on installing/replacing a dishwasher.
kevin
Thursday 23rd of June 2022
Hi Rhea98,
It will be very difficult to tighten the nut with the dishwasher in-place (which may leak later). I would prefer to remove the entire unit, wrap the male fitting with some teflon tape and tighten it.
Either way, good luck!
How to Install a Bosch SHX45P06UC Dishwasher
Saturday 29th of September 2012
[...] How to Install a GE Profile PDW9200 Dishwasher [...]