
Purchased back in 2007 as a bundle set (refrigerator, stove/oven and a dishwasher), my GE Profile PFCF1NFWA Refrigerator (my black model is PFCF1NFWABB) has been a workhorse.
Of course, if you have read my other posts, I’ve had to replace very expensive inverter boards three times (How to Fix a GE Profile Refrigerator that is Not Cooling (Ugh, Again) ) but I feel that even with those expenses factored in, the refrigerator has been good to my family.
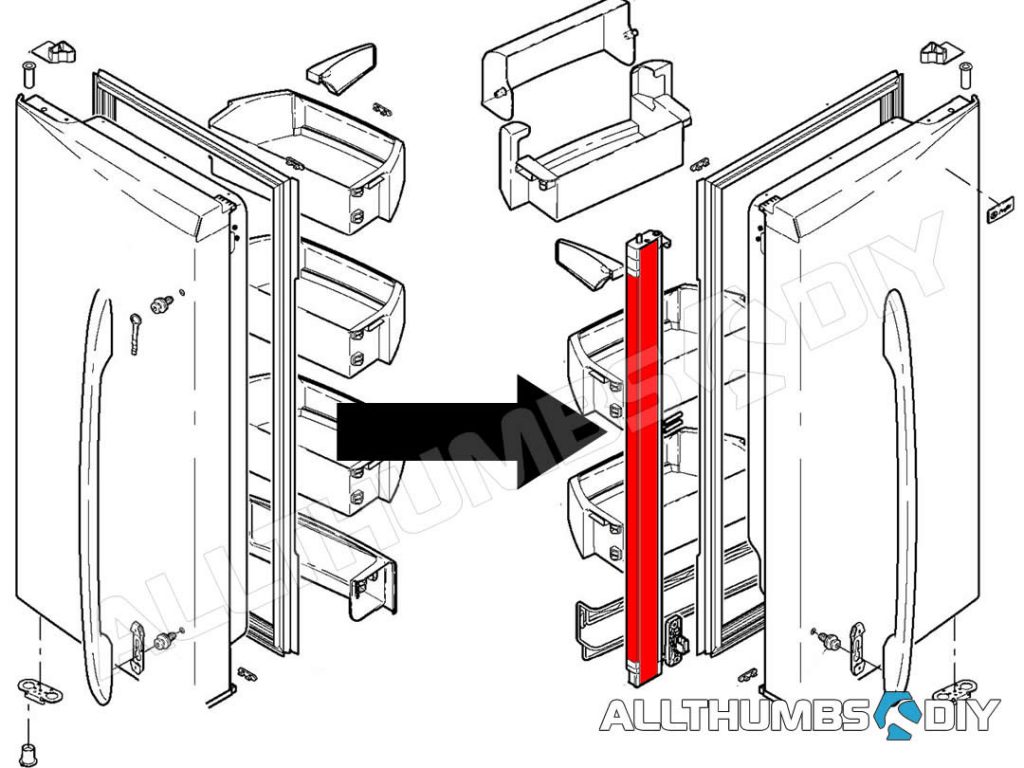
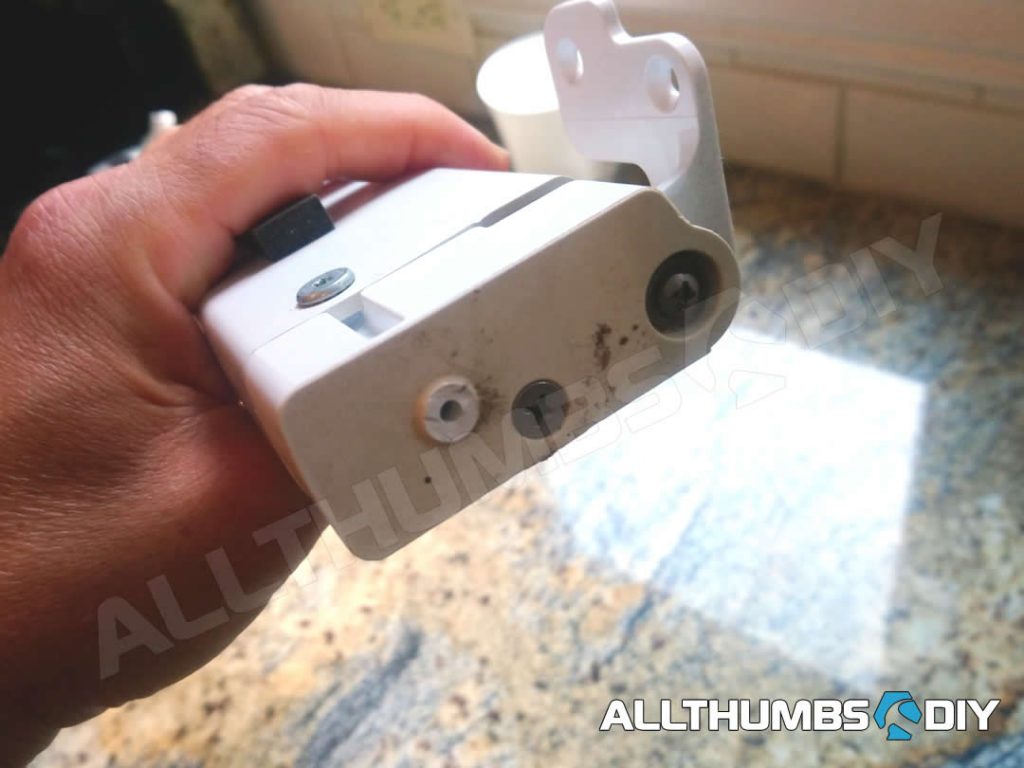
one gripe I have is with a GE product engineer who designed the door flapper (a.k.a. Articulating Mullion Assembly; it’s the middle piece that moves back and forth to seal French-style, dual door refrigerators).
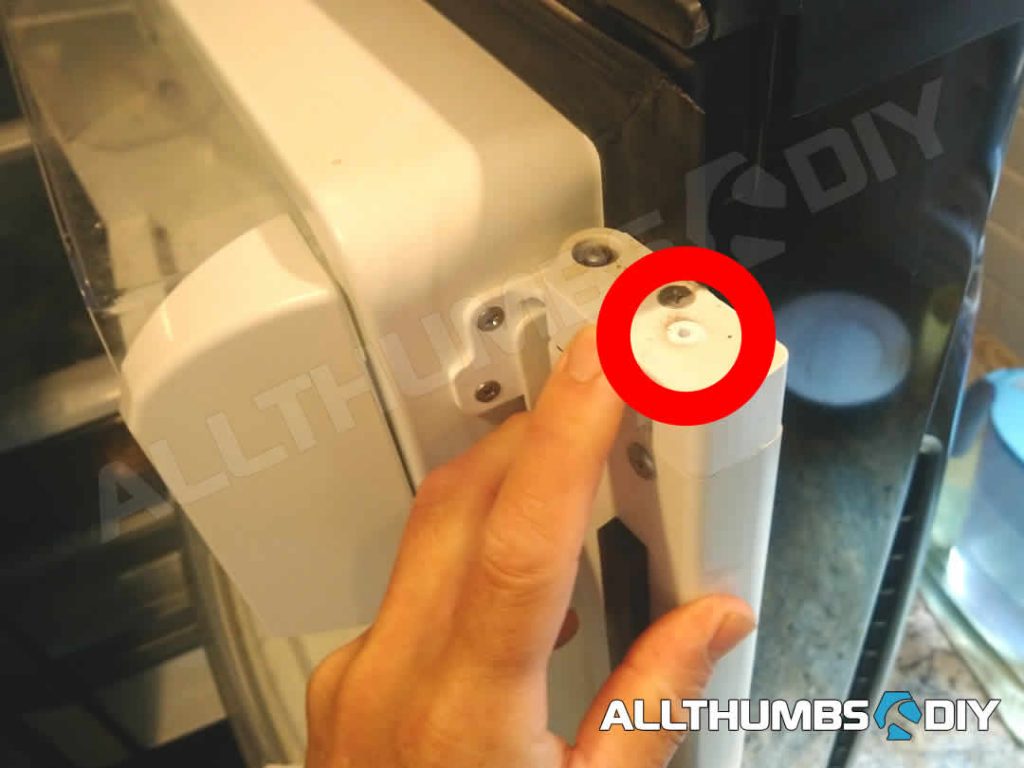
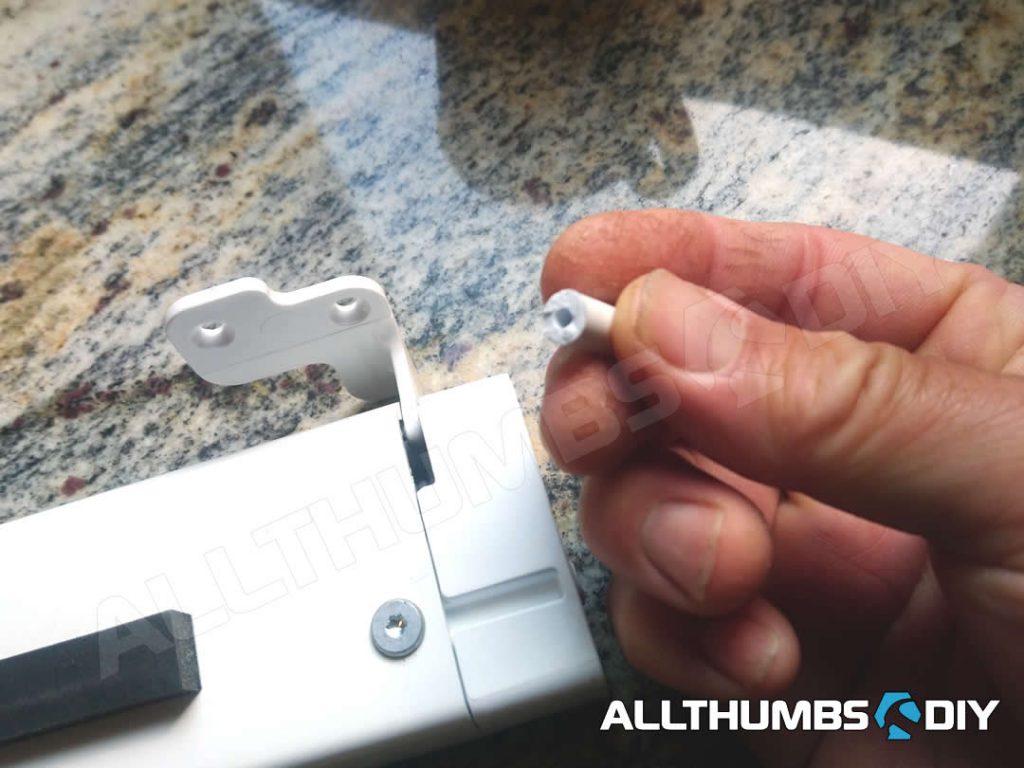
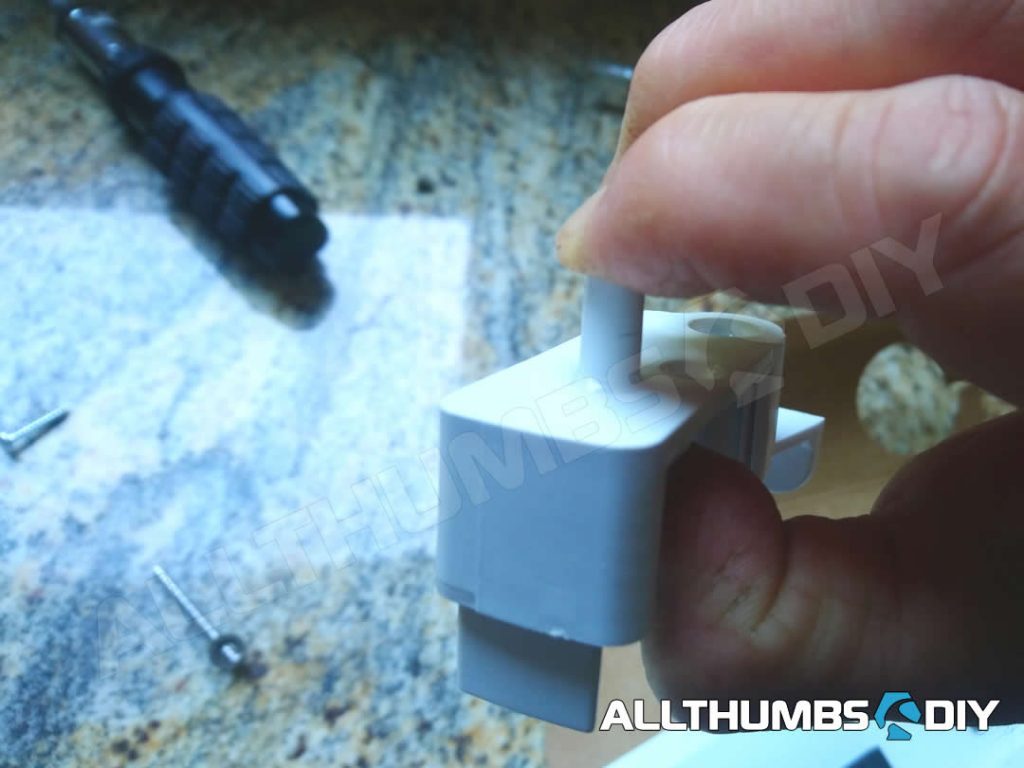
The “Articulating Mullion Assembly or part # WR17X12302” (this part has been replaced with WR17X12753 as of November 2020) has a very crucial small part that looks like the end of an un-sharpened pencil which allows it swing 90 degrees whenever a door is opened.
Since this part is in constant use whenever doors are opened, you would think an engineer would design it to be rock solid, right?
Wrong. This plastic “knob” is constructed from a molded PVC material and it’s hollow. Although it lasted 7 years, a simple 3/8″ metal rod would have made it last forever.
Well, the thought of throwing out a perfectly operating mullion because of one small broken part seemed silly; and I really didn’t feel like paying $150-180 for a brand new assembly so I decided to fix it myself.
MATERIALS YOU WILL NEED FOR THIS JOB
- Dish soap (to remove grease from the broken knob area) – do not use nail polish or any other chemicals to clean!
- Krazy Glue (click here to buy one)
- One, #8 x 1.5″ Stainless Steel Sheet Metal Screw (coarse thread)
TOOLS YOU WILL NEED FOR THIS JOB
- Adjustable pliers
- Phillips and flat head screwdrivers
- Torx T-15 screwdriver (if you don’t own a T15 screwdriver, I recommend you read my article Review of Neiko 10070A Torx Bit)
ALLTHUMBSDIY STEP-BY-STEP INSTRUCTIONS
- Step 1 – cut electricity to the refrigerator
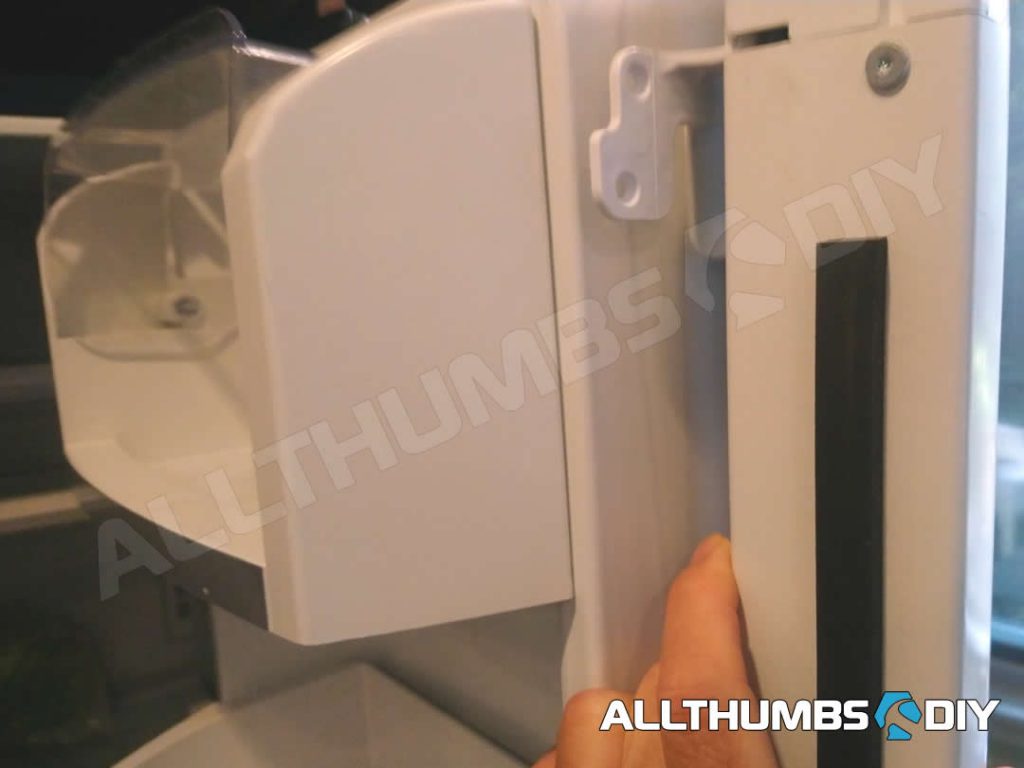
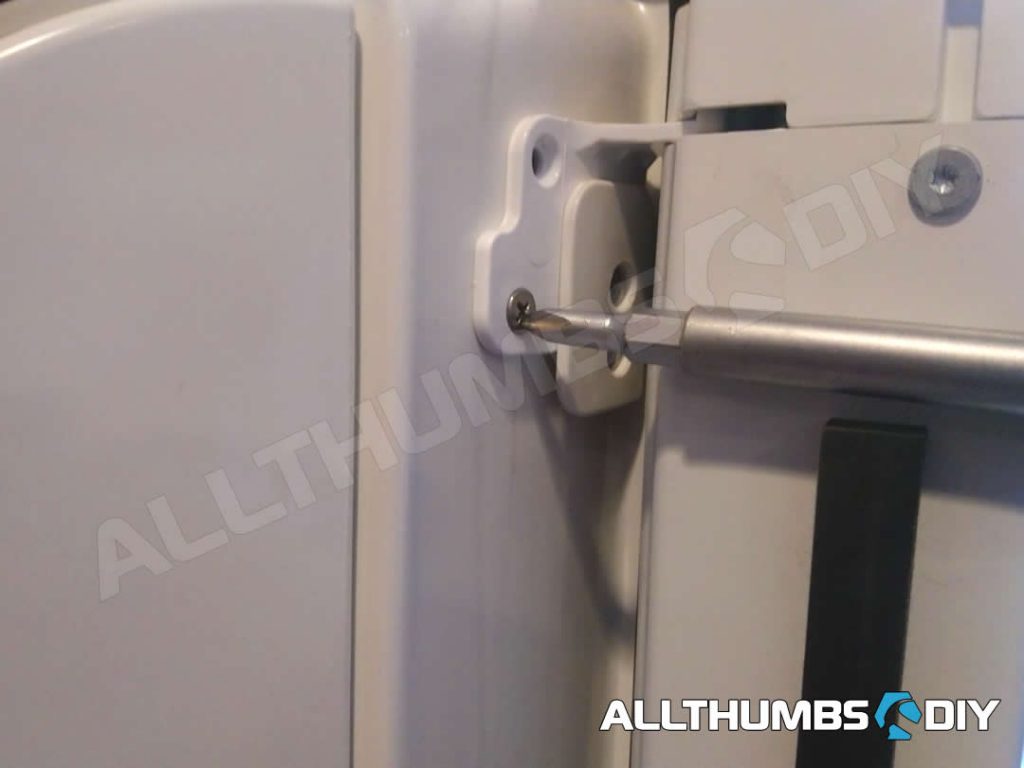
- Step 2 – use a Phillips screwdriver and un-do the screw holding down the retainer clip located on the bottom of the articulating mullion assembly; remember to securely put aside the screw!
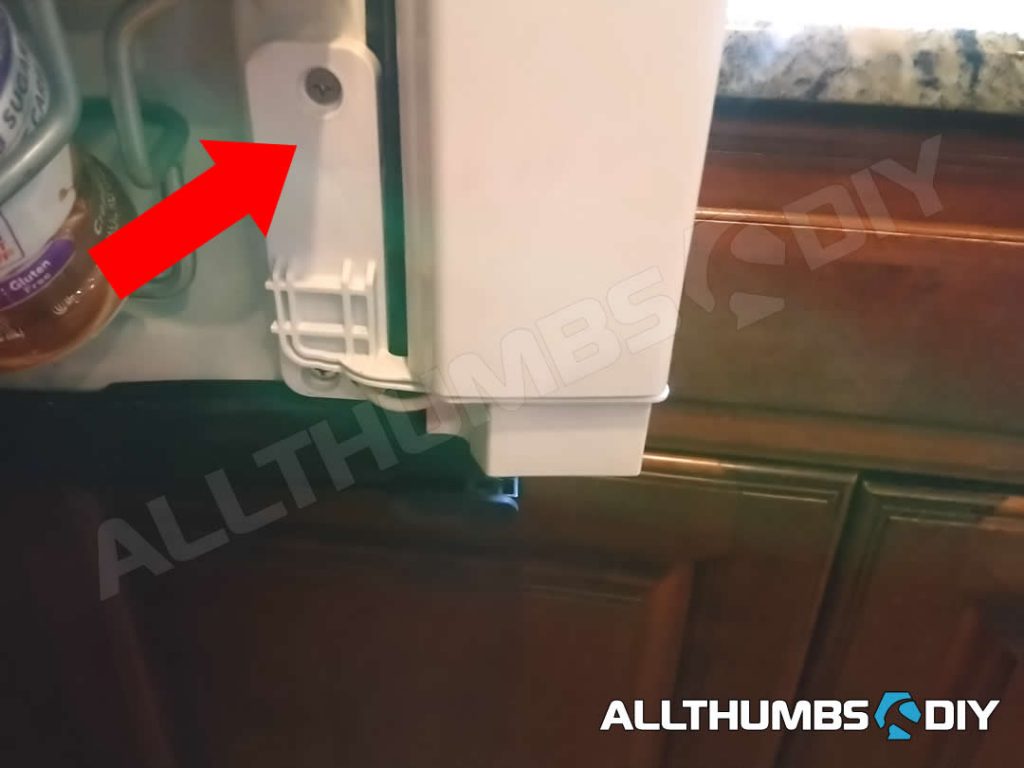
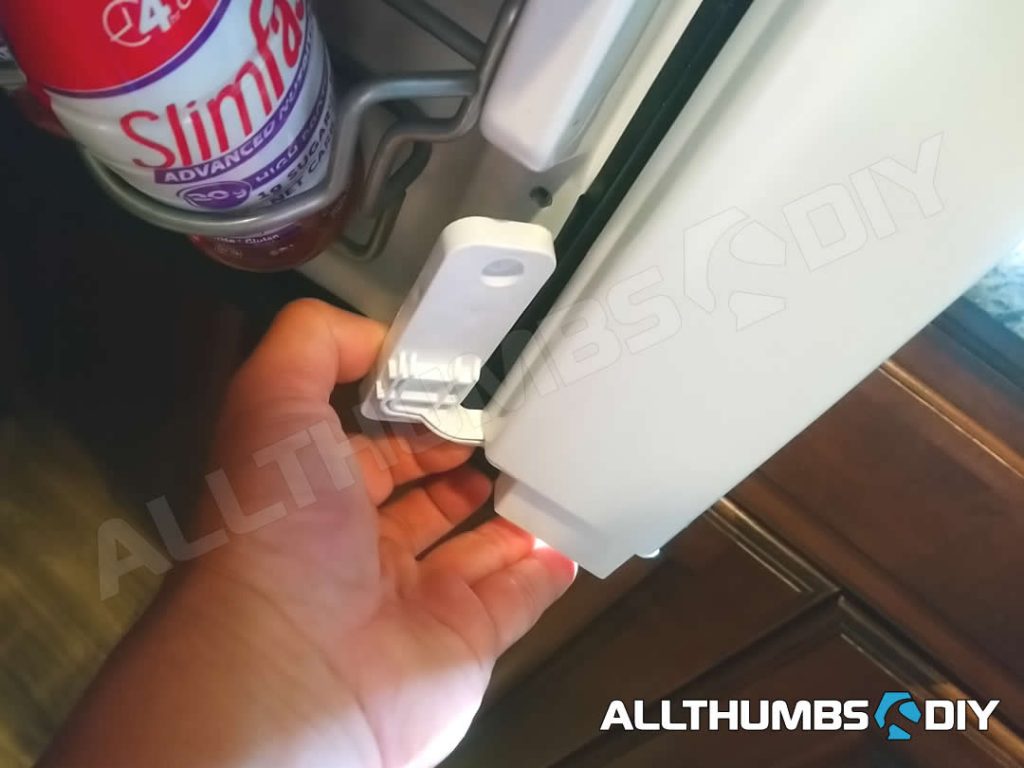
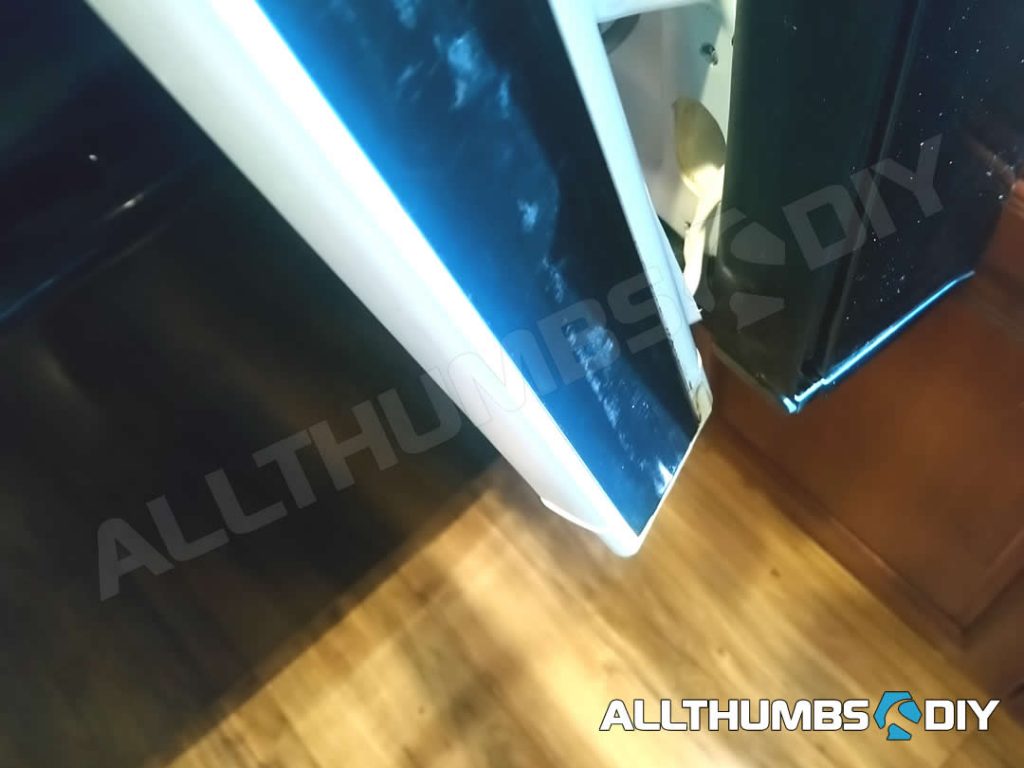
- Step 3 – repeat the same step for the top retainer clip; you will need to hold the assembly with your left hand as you jiggle it loose from the door;
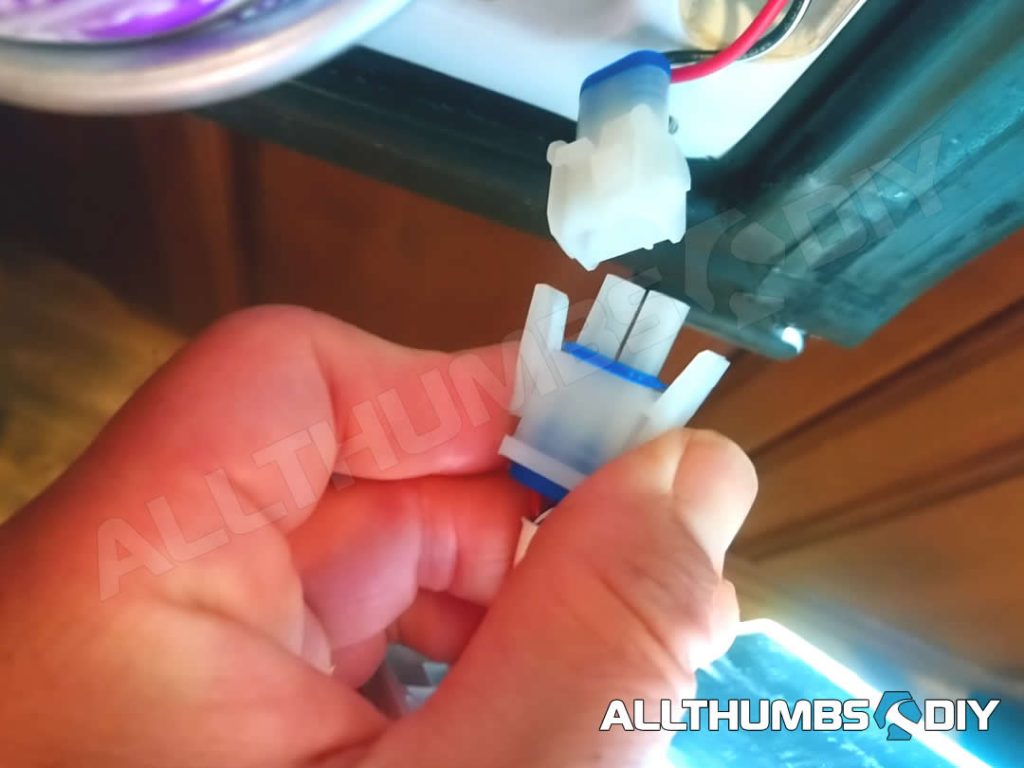
- Step 4 – you will see a wire connection on the bottom; gently pull on the wires to expose the connectors; disconnect it by squeezing the alligator clips on the side the pulling them apart;
- Step 5 – With the flapper assembly removed, we can take a closer look at the broken part; note that this top side is exposed so over the years, it has gotten quite dirty; I will use some dish soap and paper towel clean the dirt and grease off.
PLEASE NOTE – the type of PVC used in this part is sensitive to harsh chemicals so please use ONLY soaps! Also, we want the broken site to remain jagged for increases surface area. Please do not sand off to make it smooth.
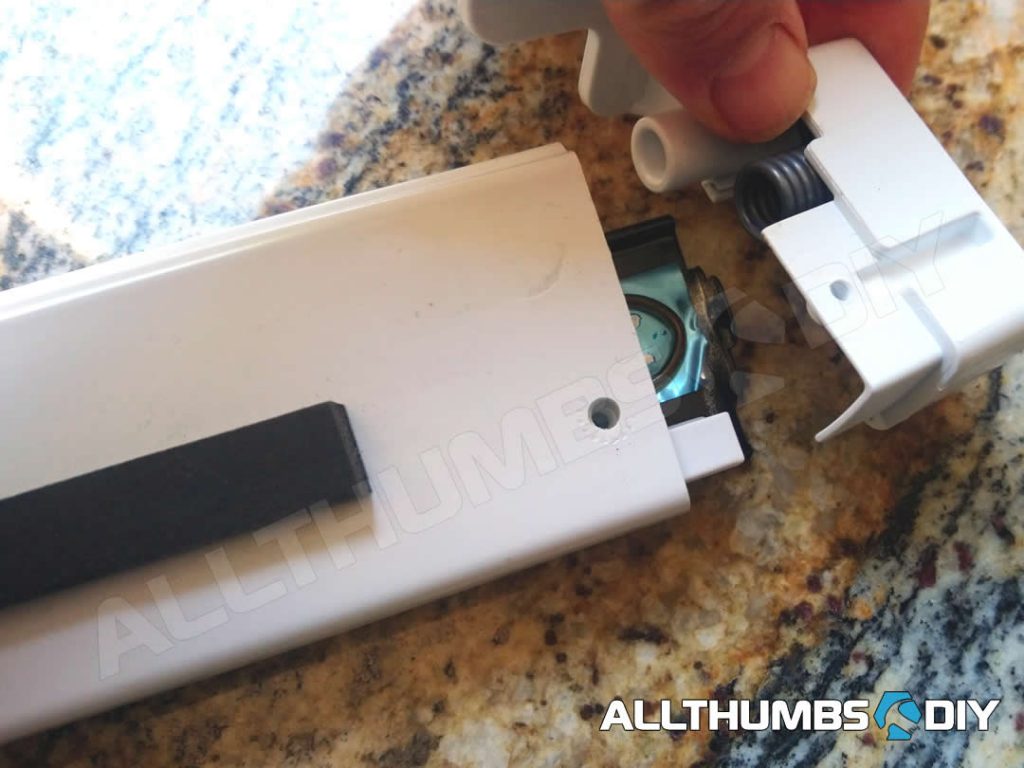
- Step 6 – We need to remove the top section in order to install a reinforcement screw; Use a T15 Torx screw driver to remove the fascia screw ,then use a Phillip screwdriver to remove two retainer screws (2″ and 1/2″ screws)
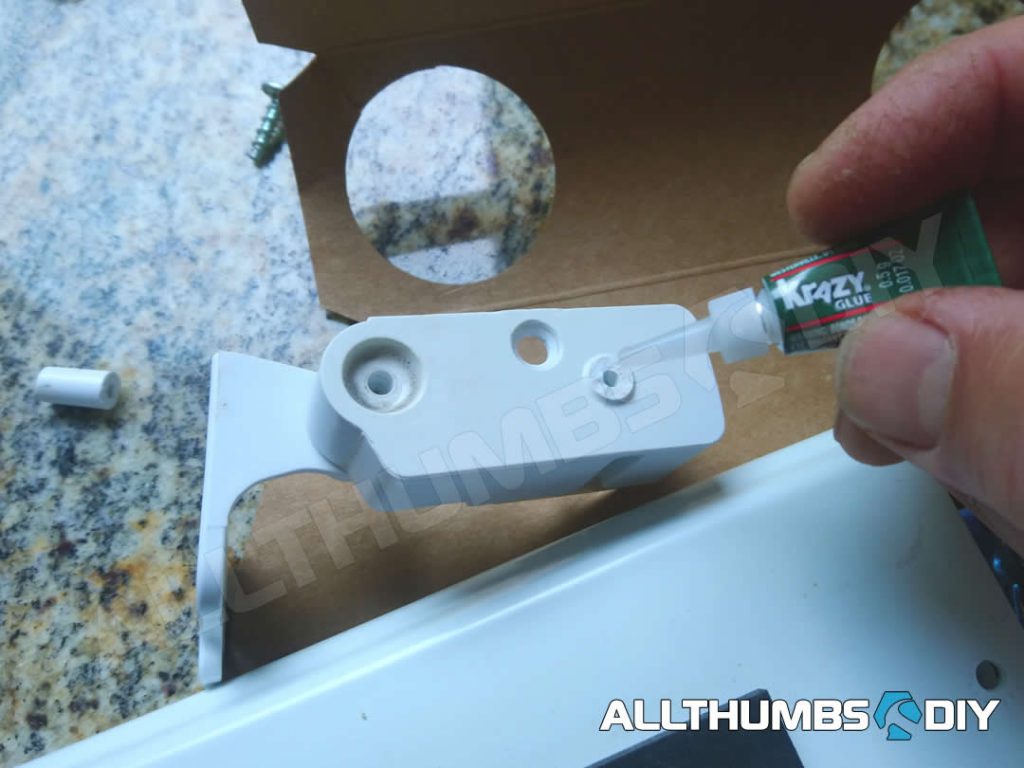
- Step 7 – Use a hairdryer to remove moisture and also to increase surface area temperature just before applying some Krazy Glue. Higher temperature will allow enhanced bonding
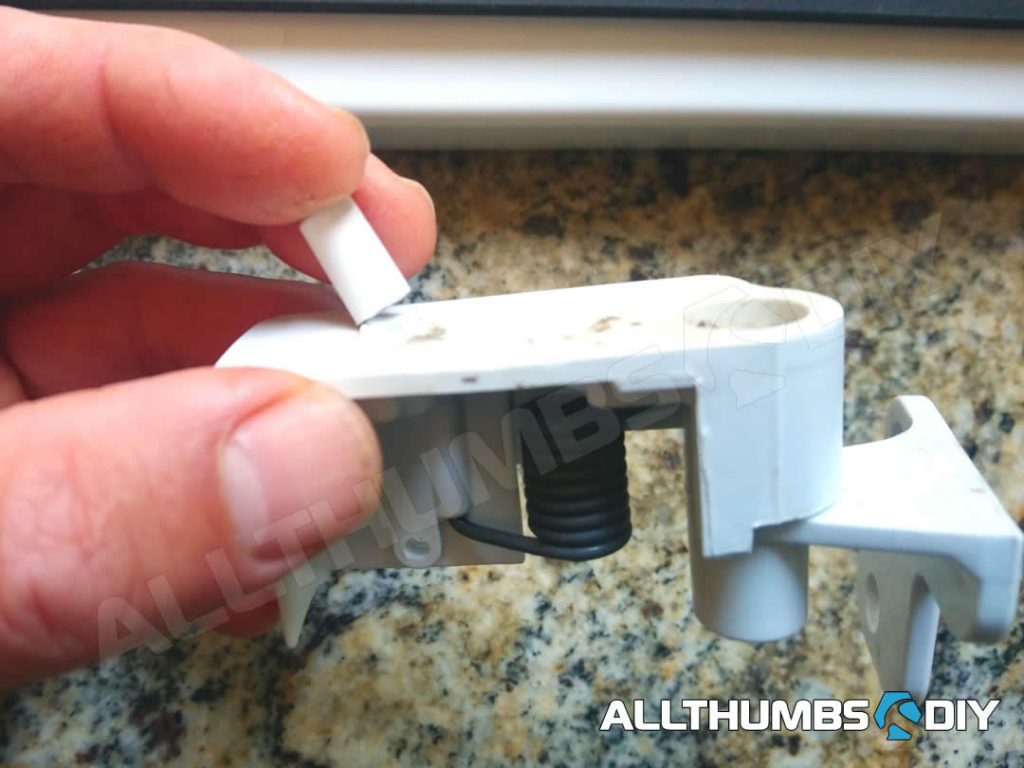
- Step 8 – Before gluing back the broken piece, dry fit to ensure that grooves are matched up properly; you may want to use a sharpie to mark off both the know and top piece to use as an alignment marker
- Step 9 – Apply Krazy Glue and hold down the knob tight against the top piece; don’t go crazy and slather on Krazy Glue as it will melt the plastic. You just need 3-4 drops (each on the top and the broken part); let it sit for 10 minutes to cure;
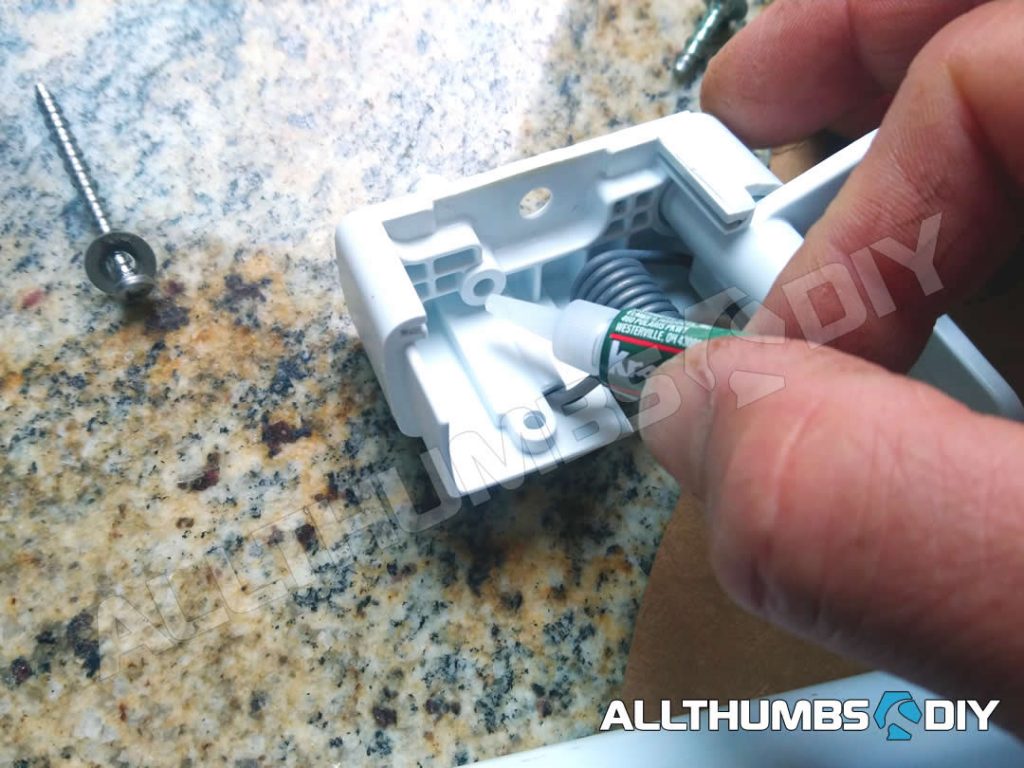
- Step 10 – As good as Krazy glue is on gluing stuff, this little knob takes blunt force every time refrigerator door is closed so we need to strengthen it. We do this by installing a 1.5″ stainless screw into the hollow cavity of the knob from the under side. Why use a coarse thread? Because coarse thread screws tend to have a better “bite” or grip strength on soft materials like plastic. We will also be applying some Krazy glue on the screw to be used as a “thread locker”
- Step 11 – apply some Krazy glue into the hole then gently screw in the stainless screw; make small adjustments as you screw it in to ensure that it goes in straight (please ignore the washer – I ended up removing it due to clearance issues)
- Step 12 – as the screw enters to knob side, you will need to use your pliers to clamp down the knob so the screw does not twist it off from the top assembly; the entire 1.5″ length of the screw should be installed

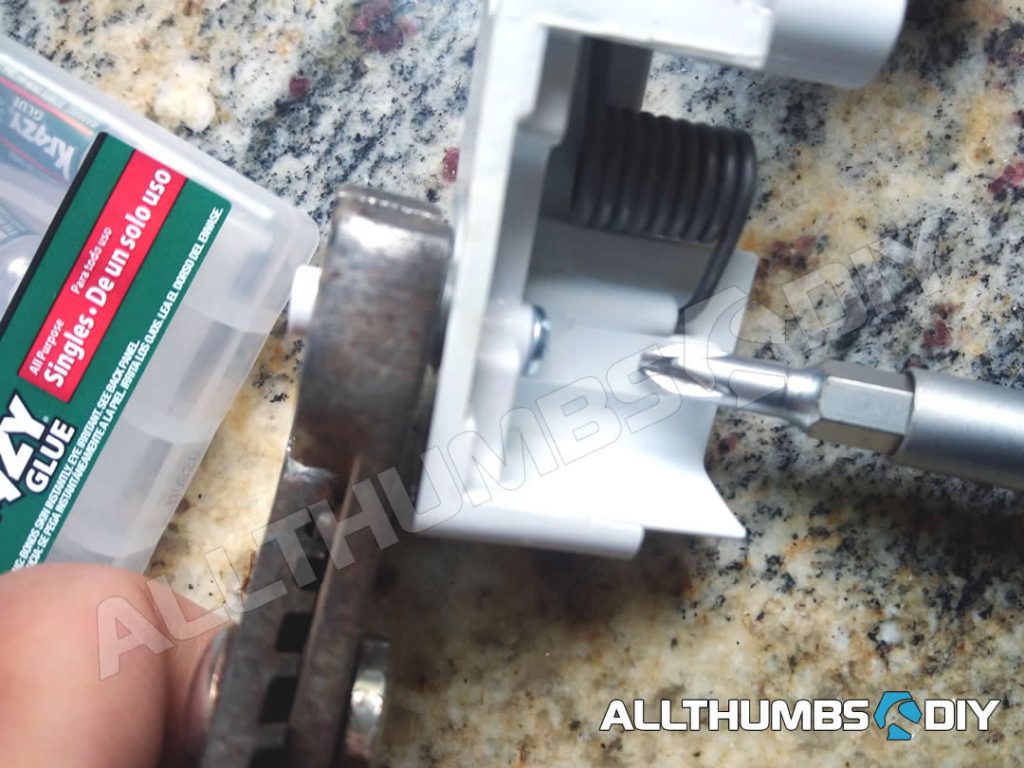
- Step 13 – That’s it! Let it cure for 10 minutes and reverse steps to re-install the articulating mullion assembly. Although i felt confident that this fix will hold, I told my family members to gently close doors going forward.
CONCLUSION
It’s been 4 months since this repair was made and I am happy to report to you that “the knob” is in perfect working condition. With little bit of elbow grease and patience, I was able to save some money and not generate waste.
If you have any questions about the repair, please post your comment below and I will respond back as soon as I can.
Thanks and good luck!
Kevin
eleanor blue
Monday 24th of July 2023
Kevin,
This is fantastic and seems to fit my issue. When the door is closed the flap folds in. Shouldn't it open to form a bridge between the doors? I do notice moisture in the frig.