Windows Types
There are three basic choices when replacing a window: new construction, sash replacement-kit, or wood and/or vinyl replacement windows.
If I have the opportunity to do a total remodel, I would choose a new construction window every single time. I have never really tried sash replacement kits because I think it does not offer superior value over the construction or replacement windows. On the contrary, if I need to replace an old window with minimum fuss, I choose a replacement window.
New Construction Window
If you choose to install a new construction window, you will need to strip the window surrounding down to the studs, and probably will also need to disturb the exterior trim and siding.
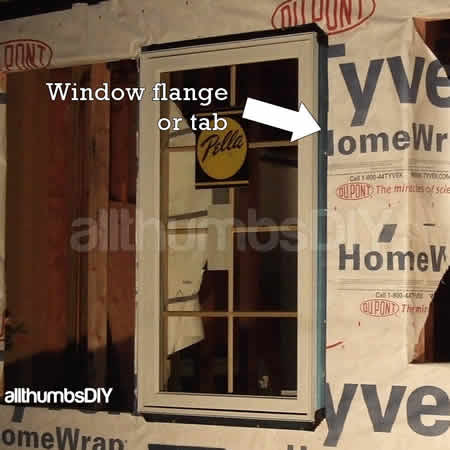
That is because new construction windows come with tabs or flanges that are attached to the window.
These tabs or flanges in turn are nailed or screwed down to the structural framing from the outside.
The positive side to installing a new construction window is that there will be enough room around the window to properly insulate gaps, gaining energy efficiency.
PROS
- Possibly the best thermal energy performance when compared to sash replacement kits and replacement windows due to window flange window + contiguous insulation
- Some cost LESS than replacement windows;
- Retain or improve the amount of light coming in through the window;
CONS
- Typically comes in limited sizes and usually cannot be customized (custom work = expensive);
- May need to enlarge or shrink the rough window opening;
- May need to remove / re-install exterior siding and/or trim;
- May need to remove or add interior trim work, including drywall / sheetrock;
- May have higher labor cost
Replacement Sash Kit
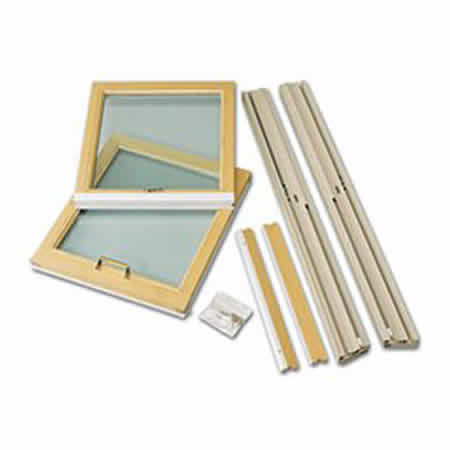
If the existing window frame is in good condition and you want to retain the current look (let’s say for historical reasons), a replacement sash kit may be the only option.
However, I have never used this option as I have always found something wrong with the window frame, be it rotted side jamb or rotted window sills.
Bill Mattison, Ross DePaola, and Dariush Arasteh from HomeEnergy.org wrote:
“… a replacement sash kit—consisting of a new sash with low-e glass, jamb liners, and hardware should be considered. Although sash kits are only slightly less costly than complete replacement windows, they offer several advantages:
- The visible opening is only slightly reduced.
- The kit can be installed by do-it-yourselfers with basic carpentry skills. (This is also true of replacement insert windows.)
- Low-e glass units are readily available in standard and custom sizes.
- Tilt options allow access to external storms for cleaning.
- Double-hung sash kits are available in wood or vinyl from many manufacturers.
If you would like to read more about the sash-kit, please click here for a PDF article from HomeEnergy.org
Replacement Windows
I have replaced many old windows with new construction windows from Andersen (double-hung) and Pella (casement) in the past only when these rooms were going through some major renovations. However, in most cases I chose to go with vinyl replacement windows.
PROS
- Replacement windows have improved dramatically in the last 6 or years or so and they offer just as many advanced technologies as new construction windows;
- Installation is a breeze;
- Relatively inexpensive compared to customized new construction windows;
- Lifetime warranty from a reputable company;
- No finishing – pick the color you want and that’s it
- Low maintenance – no peeling and no painting!
CONS
- Potential for reduced glass area when compared to the original window, letting in less light;
- Thick frames and sashes, letting in less light;
- The texture and surface appearance of vinyl windows cannot be disguised as wood
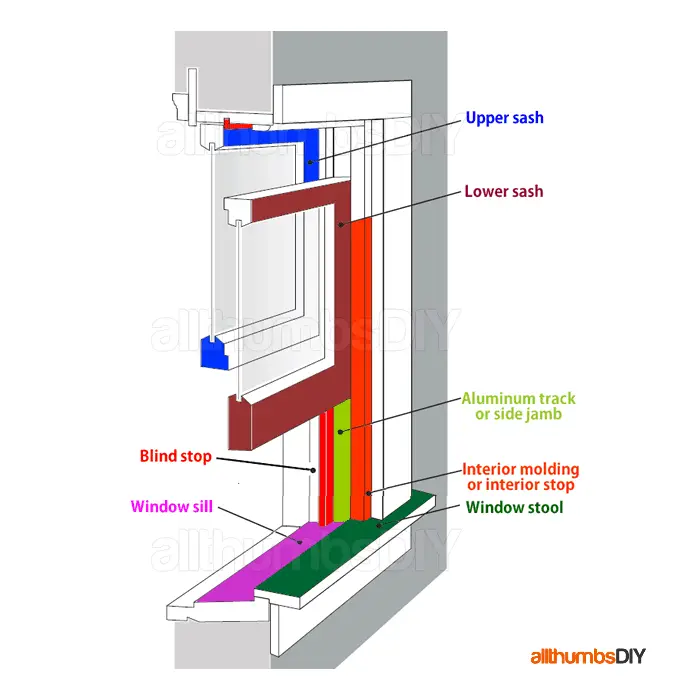
Anatomy of a Double Hung Window
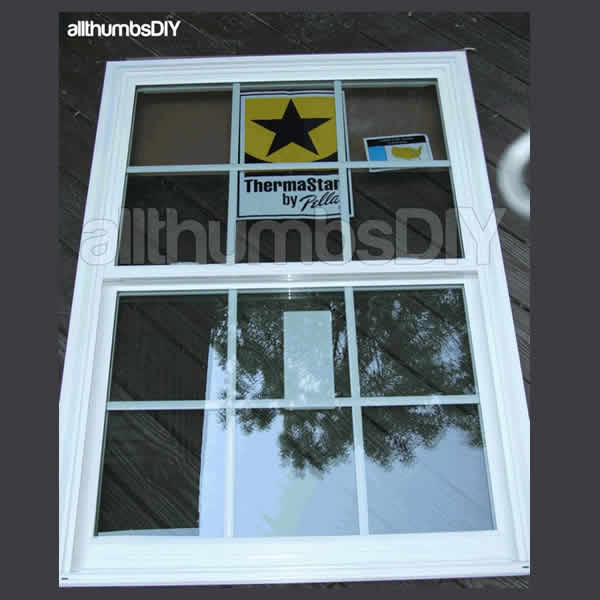
A double hung window simply means that both top and bottom windows (a.k.a. sashes) move up and down. It is a typical window type found in vast majority of homes.
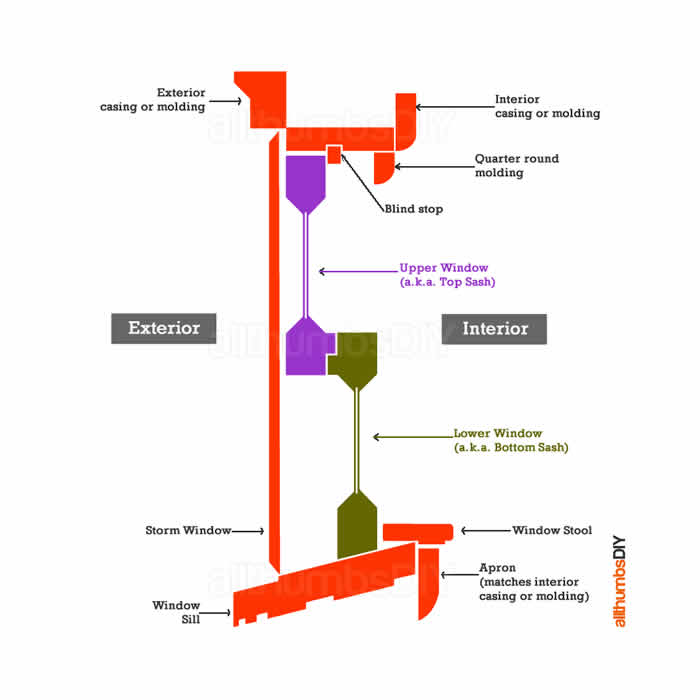
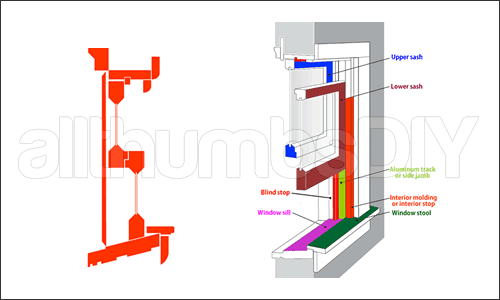
Before blindly taking apart your window, it is helpful to understand some of the components involved so that we can prepare for any installation challenges. Here are two different look of a double hung window
Please note that due to image limitations, some components may not be shown in both images.
Now that we have a good picture of the various window parts, we can start taking out the old window. To continue with my reduce, reuse, recycle mantra, I will attempt to re-use these components:
- Two side jambs and a top jamb (a jamb is usually a 0.25″ thick piece of pine wood attached to the framing lumber);
- Window sill (if in good condition);
- Exterior blind stops (one on each side; they stop the new replacement window from falling out of the window opening!); top blind stop is usually removed and tossed;
- Window stool and interior moldings;

