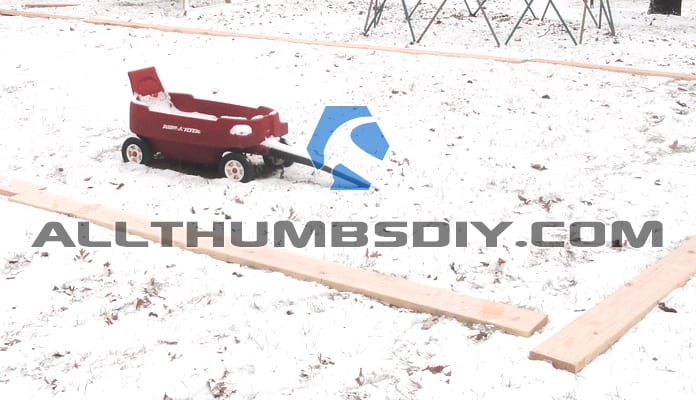
Snow on the ground? Check. Snowing? Check. Temperature in the low teens? Check. Ground frozen solid like a tundra? Check. Getting dark? Check. Time to build a backyard ice rink? Yeah!
| DIY Backyard Ice Rink posts |
|---|
| * Day 1 – Initial Planning * Day 2 (you are here) * Day 3 – Filling with Water * Day 4 – Second Layer of Ice * Day 5 – Skating Time * Day 6 – Finally Ready. |
Materials (2015 prices)
| Qty | Item | Unit Price | To | Note |
|---|---|---|---|---|
| 12 | 2″ x 8″ x 10′ | $9 | $108 | Perimeter framing |
| 2 | 4′ x 8′ x 1/2″, 3 layer plywood | $21 | $42 | Used as Gusset plates; cut in 2′ strips |
| 3 | 4′ x 8′ x 1/2″, 3 layer plywood | $21 | $63 | Used as height adjuster for retaining walls |
| 1 | 2″ Deckmate screws, 5 lbs | $29 | $29 | |
| 1 | Scrap 2″ x 2″ x 3′ wood | $0 | $0 | You can find these free in the rear section of the lumber section (used as skids) |
| 1 | Simpson Strong-Tie SDS25212MB 2-1/2″ x .250 structural screws, one box | $24 |
- (12) 2″ x 8″ x 10′ @ $ 9 = $ 108 plus tax
- (2) 1/2″ x 4′ x 8′, 3 Ply Plywood (cut in 2′ strips) @ $ 21 = $ 42 plus tax (to be used as Gusset plates and/or bottom retaining walls)
- (3) 1/2″ x 4′ x 8′, 3 Ply Plywood (cut in 4′ strips) @ $ 21 = $ 63 plus tax (to be used as retaining walls)
- 5 lb box, 2″ Deckmate screws (drill bit included) = $ 29 plus tax
- Scrap pieces of 2″ x 2″ wood (you can get them free at local box retailers near sheetrock dept. or their junk piles (to be used as temporary corner braces)
- If scrap pieces are not available, purchase two 2″ x 3″ x 8′ studs (of any wood variety)
- Box of Simpson StrongTie Strong Drive Structural Screws #SDS1/4X1.5G-RC50 RC50@ $ 15 = $ 15 plus tax
- (4) Simpson Strong Tie ML24Z ZMAX Galvanized 12-Gauge 2-inch by 4-inch Medium L-Angle @ $ 2.50 = $ 10 plus tax
- Roll of 6 MIL thick, 20′ x 100′ poly sheeting = $ 100 plus tax
REQUIRED TOOLS
- Cordless drill with spare battery (in the house where it is warm)
- Framing Square (any variety will do, but I prefer Stanley 45-300 Aluminum Carpenters Square
- Arrow T50 Heavy Duty Staple Gun + Arrow 509 Genuine T50 9/16-Inch Staples
- Utility knife (with new blade)
- Socket wrench + 3/8″ socket + 8 Pc. Power Extension Socket Bits for Drills
– Used to drive Strong-Simpson Strong-Drive structural screws
BUILDING STEPS
- I need 16 Gusset plates to join 2 x 8 studs together (2 Gusset plates per joinery) so I grabbed 2 sheets of 2′ x 1/2″ plywood and marked 6″ wide lines then cut them using my circular saw

- NOTE: I use 60 Teeth Freud D0760X Diablo Ultra Finish Saw Blade ATB 7-1/4-Inch
to minimize splintering. Lower teeth blade is good for quick ripping but it generates lots of splinters and rough edges (no good for the plastic liner). I wouldn’t use higher-teeth blades either as it would be slow to rip and the blades will most likely bind to wood - With studs lying on their sides, I joined two pieces together as close as I can then attached one of the Gusset plates using 2″ deck screws. Do not overdrive (sink) the screws which will result in screw tips protruding on the opposite side.
- After joining 4 studs together, I flipped them to the other side and repeat the step #3 above
- Repeat steps #3 and #4 to join studs for other sides of the rink
- Stand up joined studs on their edges
- Using a framing square, join two corner studs with a Simpson Strong Tie Simpson Strong Tie ML24Z ZMAX Galvanized 12-Gauge 2-inch by 4-inch Medium L-Angle (15 brackets per box) using Simpson Strong Drive Structural screws
- Clear any debris + snow from the inside of the empty rink to get rid of any sharp objects that may puncture the liner. I also had to shovel out the snow (if it melts, it can create voids, increasing the chance of cracks)
- Carefully roll out the liner, making sure to leave the extra 12 inches on both sides, then cut with a sharp knife

- Working one side at a time, carefully unfold the plastic liner. If the temperature is really cold, you may want to pick another time because any creases in the liner may crack (like mine did)
- Carefully staple the very ends of the liner to studs/plywood sheets using a stapler + T50 staplers
- I had to stop at this point because my garden hoses were frozen solid and it was getting too dark / tool cold
NEXT POST: First Time Building a Backyard Ice Rink – Day 3 Filling the rink with water
