
Key Points
- Designing your generator shed
- Detailed step-by-step instructions on building a 6 ft x 4 ft portable generator shed
Introduction
This post is a continuation from my previous article, “Complete Guide to Building a Portable Generator Shed“.
I am going to assume that you have thoroughly read that post and got started on the paperwork process before picking up your hammer.
Table of Contents
Project Plan – Phase 2
In phase of the project plan, I will show you some of my design considerations and actual build process.
- Design the shed, taking into consideration such factors such as the size of your generator, ventilation, and electrical requirements
- Purchase materials and gather tools. You will need gravel, concrete blocks, lumber, roofing materials, doors hinges, etc. A detailed list of the list is provided in the Materials section
- Build the shed according to your design. Shed building does take a bit of patience, especially if you have never worked with tools but it is doable
- Install the generator, making sure to follow all manufacturer safety guidelines and have the installation inspected by a code enforcement official
- Test the generator to ensure it is working properly
Designing a Portable Generator Shed
I knew from building two storage sheds (back in 2008 and 2015) that having extra space around generators will make my life a lot easier.
Since I owned Briggs Storm and Caterpillar RP7500 generators, I wanted to build a generator shed large enough to handle both units and storage for patch cords, oil, etc.Step #1 – Choosing the Right Size
Choosing the Right Size
The size of the generator shed or enclosure will depend on the size of your generator and your specific needs. Here are a few things to consider:
[INSERT SHED FOOTPRINT IMAGE]
- The average size of a generator is about the size of a full-sized rolling cooler (30 inches wide, 32 inches long, and 28 inches tall), not including the handles which in most cases can be removed.
- Since I owned two generators, I decided on a 6 ft x 4 ft footprint shed figuring that 24 sq. ft. of storage space will ensure that there are plenty of rooms to re-position a generator, store extra cables, perform light maintenance and allow proper ventilation for heat control, etc.
- Generator size: Make sure the shed is large enough to comfortably house your generator. Leave enough space around the generator for maintenance and ventilation.
Choosing a Roof Style
Most sheds are rectangular or square with saltbox, gambrel, gable or classic shed roof style (slanted).
My two storage sheds were built with gambrel and gable roofs.
[IMAGE – GAMBREL]
[IMAGE – GABLE]
[IMAGE-SLANTED]
For my generator shed, I wanted to build a roof that was quick to build with minimal amount of effort so I decided on a slanted roof most commonly found in smaller garden and lean-to sheds.
Foundation/framing
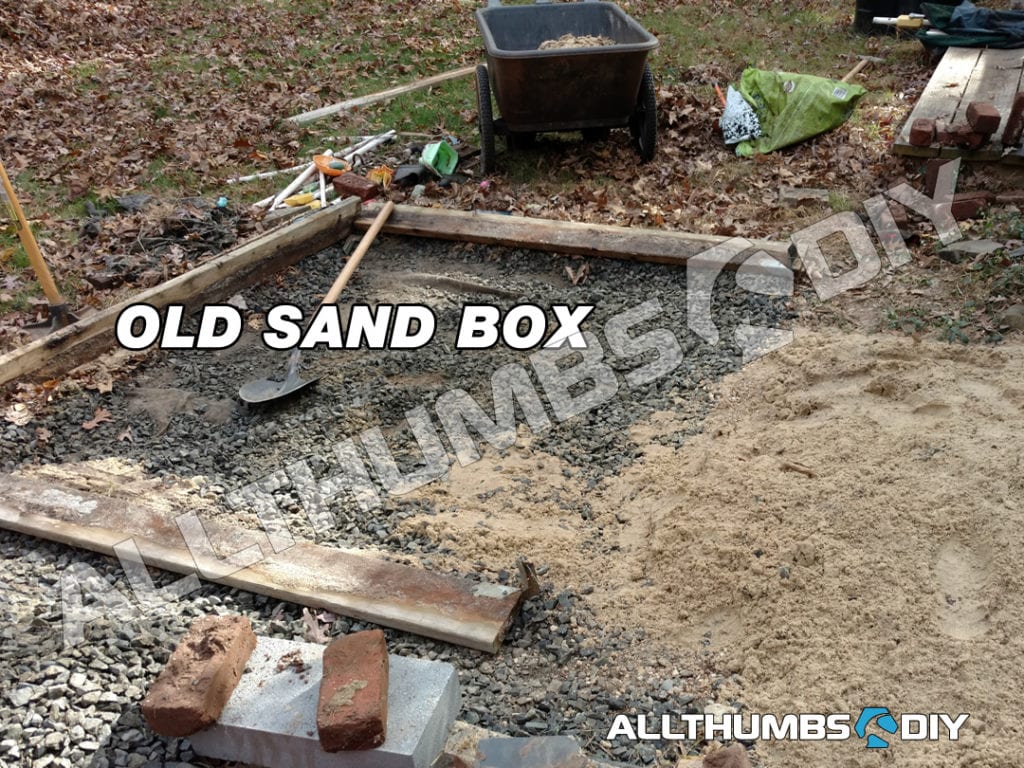
I am re-purposing my kids’ sandbox play area (they are too old for that now). To match the aesthetics of my gravel driveway, I will be installing an 8 ft by 6 ft gravel patch.
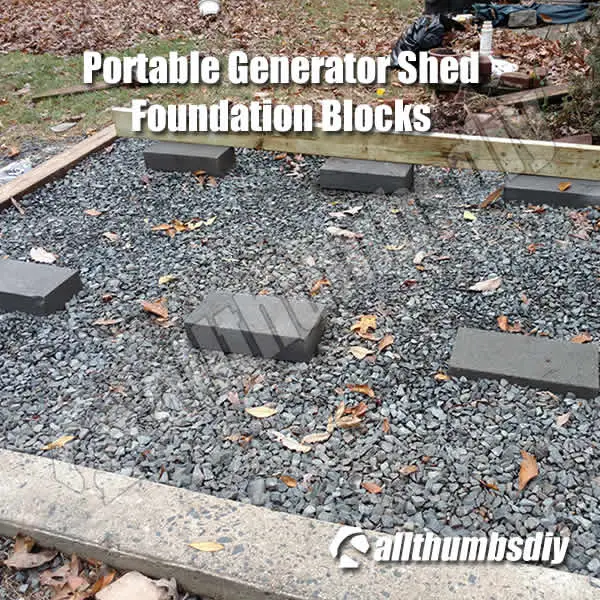
In addition, the generator shed will sit on top of the concrete blocks to ensure proper air movement between the shed and the ground.
- My generator shed will sit on top of concrete blocks
- Although a generator is small when compared to a storage shed, 2×6 lumber should be used as floor joists to prevent sagging
- I will use 2x4s for the walls and ceiling joists and
For those of you living in hurricane-prone areas, you will most likely need to pour a concrete foundation and secure your shed to it.
Siding
- I have had great success using T-11 sidings for my previous storage sheds, so I will repeat the same for my portable generator shed.
Heat Control
Running a portable generator in a small enclosed area can ramp up heat quickly. And uncontrolled heat is the #1 enemy to engines and electronic components.
The following three factors will be considered to control the temperature inside the shed:
- Shed should have two fresh air supply routes – a direct inlet port with a fan will act as the primary mechanism to supply the fresh air and push air out of the shed; the eve of a roof will act as passive secondary air supply route
- Insulate the walls and floor cavities
- Active exhaust ventilation – an exhaust fan that can operate in high temperature will be used to expel exhaust via a dedicated vent
Distance
Distance is an important factor when it comes to operating a portable generator. Unlike cars and motorcycles, portable generators do not use any filtration to reduce toxic gas (Carbon monoxide, Sulfer dioxide, etc.) that are present in exhaust fumes.
To keep you and your family safe, there are two different distance factors you need to be aware of:
- Distance from the generator to your home (windows, doors, etc.)
- Distance from the generator to your home’s main load center
Generator to your home
Most manufacturers like Briggs and Stratton recommend that you keep at least 5 feet of distance between your running generator and your home whereas safety conscious minded organizations like Consumer Reports recommend at least 20 feet.
Generator to the main load center
I plan supply the generator power directly to my home via the main load center. This will allow me to selectively supply power to critical devices like refrigerators, dishwashers, etc.
Because there is a certain amount of resistance by the wire connecting the generator to the main load center, it is best to keep the distance between these two devices as short as possible.
| How to Calculate the resistance of a wire |
|---|
| o Resistance (?) = (resistivity (?*m) * length (m)) / cross-sectional area (m^2) o For example, if you have a wire that is 100 meters long, made of copper, and has a cross-sectional area of 1 square millimeter, you can calculate the electrical resistance as follows: o Resistance (?) = (1.7 * 10^-8 ?*m * 100 m) / (1 * 10^-6 m^2)= 0.17 |
In order to maintain maximum generator efficiency, I will be using a 30amp NEMA circuit from the generator and connected to a 60 amp service cable terminating to a 60 amp interlock circuit breaker.
Final Generator Shed Location
Because my generator “shed” did not fall under any regulations, I was free to place at any location.
However, as previously discussed in the “Complete Guide to Building a Portable Generator Shed” post, the only spot my kids’ old sandbox box.
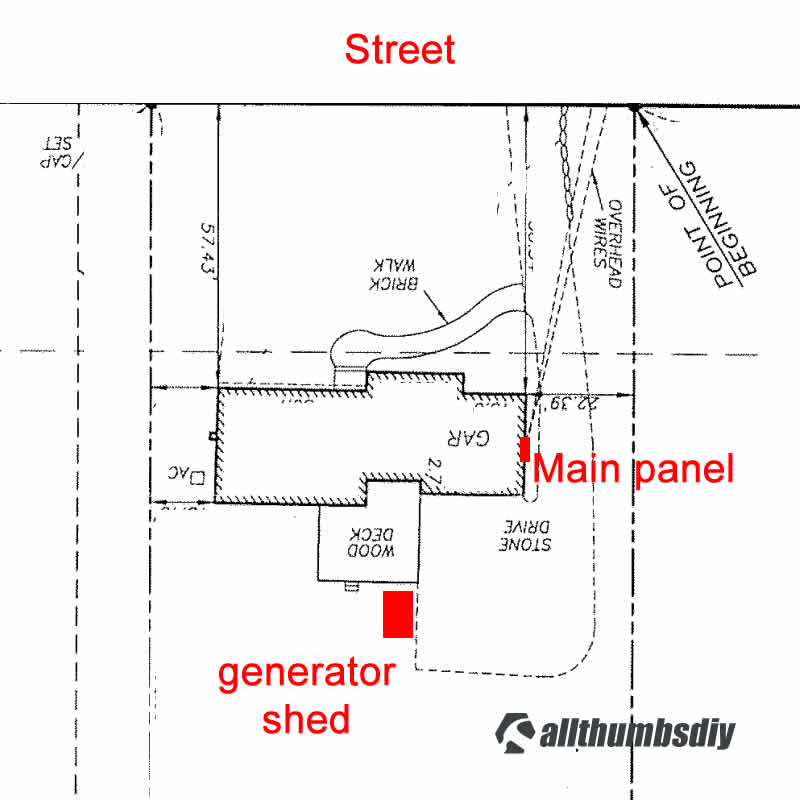
That meant my generator was over 30 feet away from my next door, enough to deaden any loud sound.
Conveniently, the sandbox was right next to my gravel driveway and it was higher than the rest o of the backyard, which meant I did not have to worry about water.
The total cable length worked out to be approximately 62 feet.
Step # 1: Materials & Tools
Any building materials used in constructing homes can be used for a portable generator shed. Depending how visible it is from the street, you may wish to match the style of your shed to your house.
Materials
- 14x, 2 x 4 x 8, SPF
- 6, 2 x 6 x 8, Pressure-treated
- 2x, 4 x 8 x 3/4″, plywood
- 2x, 4 x 8 x 5/8″, T-11 siding
- 12x, 2x4x2 concrete blocks
- 1x, concrete glue
- 4x, heavy-duty door hinges
- 4x, carriage bolts (for security)
- 16x, 2″ screws, hex
- 2 lb box, 2 1/2″ Deck-mate screws
Tools
- Chop-saw
- Cordless drill
- Drill bits
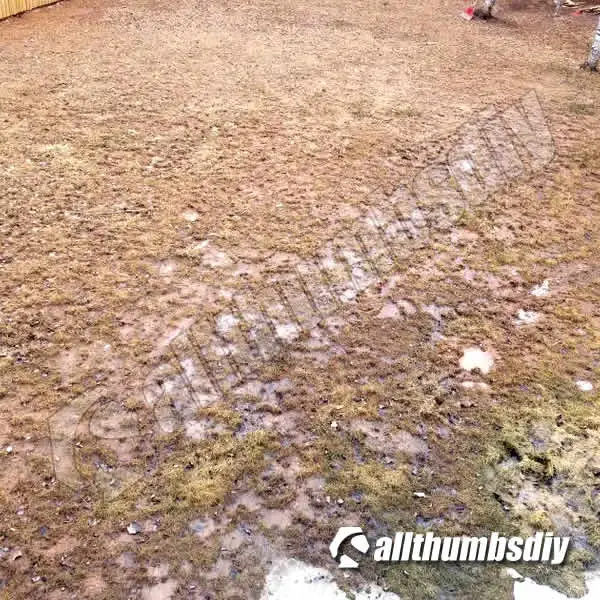
Step # 2: Site Preparation
I picked a spot next to my driveway for my generator shed because it had two sides that sloped away for fast drainage.
Although the spot consisted of packed clay and did not drain well, I intended to re-purpose the play sand and gravel to change the elevation to increase drainage and level out the area to prevent water from pooling.
Surface Options
Depending on your property, you will face one or more more types of surfaces:
Dirt – Plopping a shed on dirt ground may be fast, but it drains poorly and cause water pooling. Excess surface water turns dirt into mud, which is not pleasant to walk through. Mud invariably pools more water and, of course, working with electricity while standing in a pool of water is never good!
Grass – Although grass has a better drainage profile than dirt, it also retains moisture and welcomes little critters.
Gravel patch – If you must place your generator enclosure on dirt or grass, install gravel patches and some concrete blocks to promote air movement between the ground and shed. To start, dig a shallow rectangular hole about 4 inches deep, pack some gravel, level it, and install concrete blocks on top of gravel to elevate the shed.

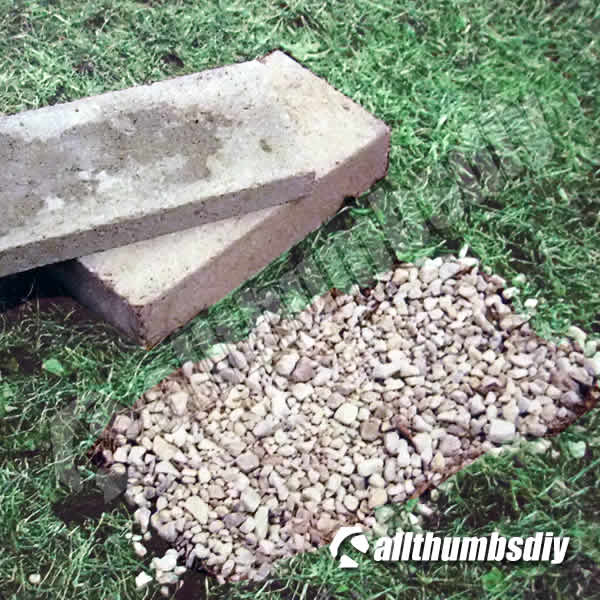
Gravel Pad-Placing a portable generator shed in an area covered with packed gravel has many benefits, including efficient drainage to keep the ground dry, preventing vegetation growth, and discouraging pests from making a nest.
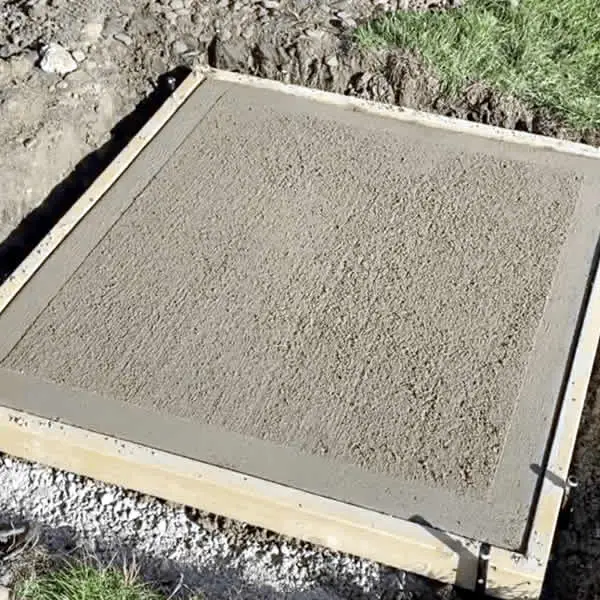
Concrete Pad-Concrete foundation provides rock-solid stability and allows walls to be anchored directly to it. Additional benefits include no need for separate flooring, easy maintenance, high durability, and installing a concrete foundation in areas that are difficult to dig. If you live in a hurricane region like Florida, a concrete foundation is most likely your only option.
Shed Foundation
Because a portable generator is usually small in size, there are many options when placing a shed’s foundation framing members:
- Utilize concrete piers (way too expensive and unnecessary for such a small shed)
- On top of rails/skids (usually 4×4) resting on compacted gravel or dirt (additional cost for little to no extra benefit)
My portable generator is only 6ft x 4 ft so I chose to rest the foundation framing on top of the elevated concrete blocks on four corners.
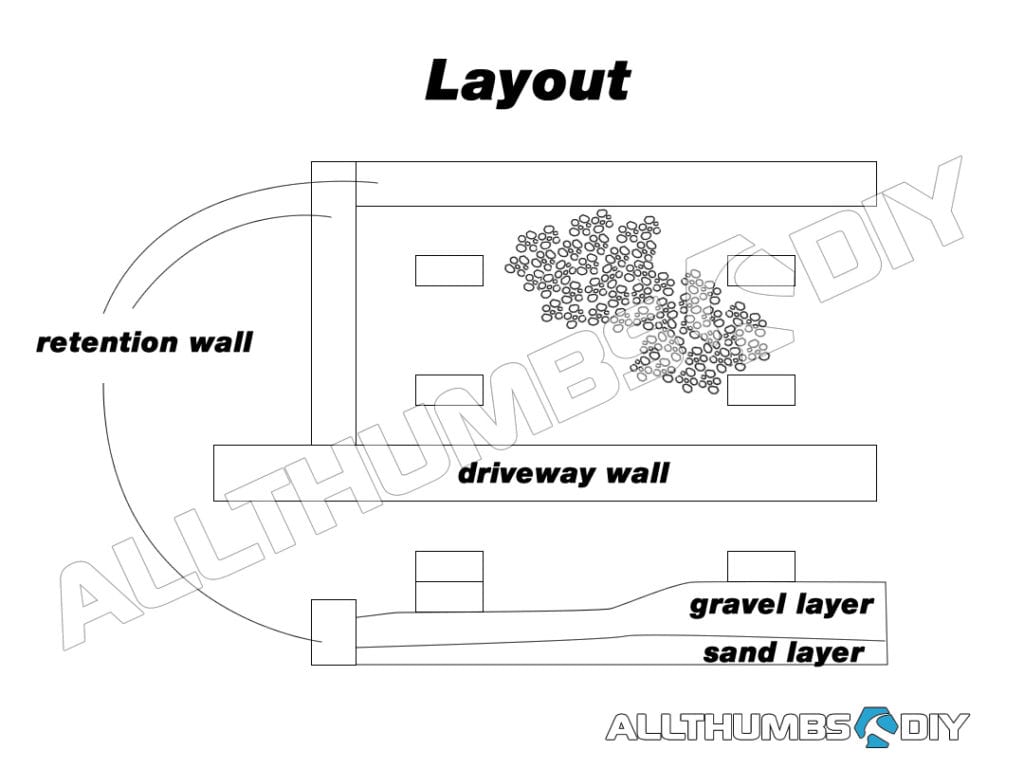
Surface (ground) Prepping
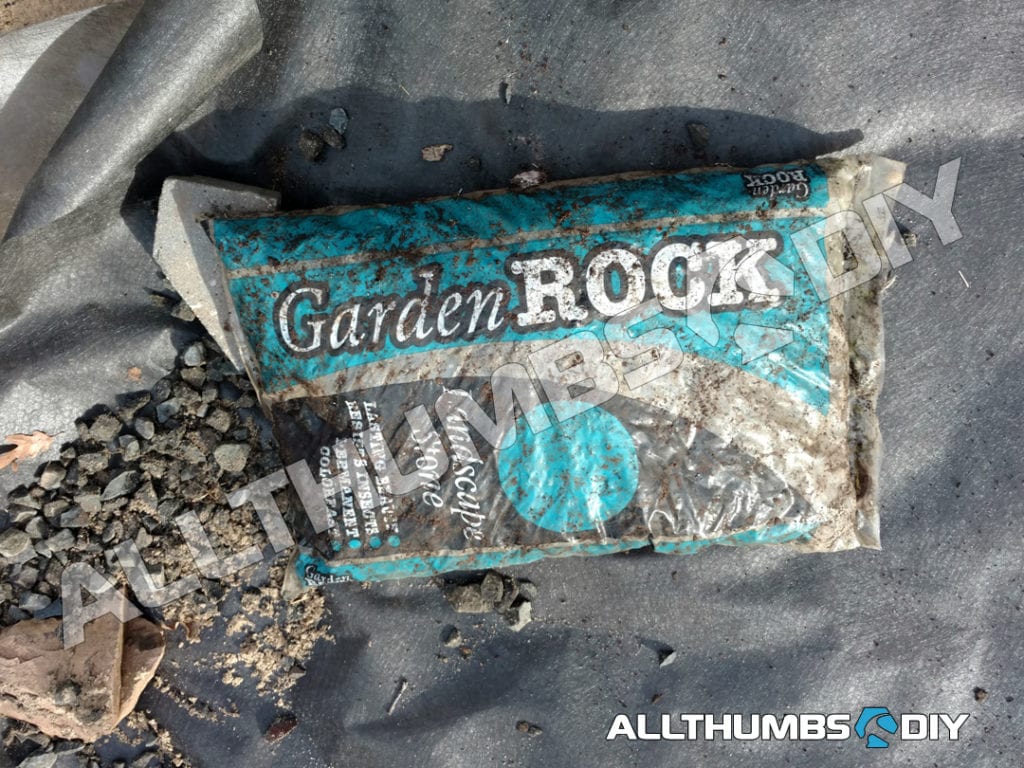
What I decided was to create a landing pad consisting of packed sand and 3/4″ driveway gravel.
Although one side sits slightly lower than the adjoining gravel driveway, the remaining three sides are about 6 inches higher for good drainage.
I created a similar setup with my first shed (link here to read my article) with good success.
- STEP A – The original location was on the corner of the deck so I decided to re-purpose the old sandbox play area which was directly adjacent to it;
- STEP B – Remove sand (top layer) from the sandbox;
- STEP C – Remove gravel (bottom layer) from the sandbox;
- STEP D – Remove redwood sandbox frame;
- STEP E – Clear debris;
- STEP F – Mark 8 ft x 7 ft area with wood stakes / re-bar stakes;
- STEP G – Remove rocks and do a rough clearing to level the ground;
- STEP H – Lay down landscaping fabric (to prevent weeds from growing underneath);
- STEP I – Lay down sand; tamper down; check level using 6 ft level;

- STEP J – Lay down a second layer of landscaping fabric;
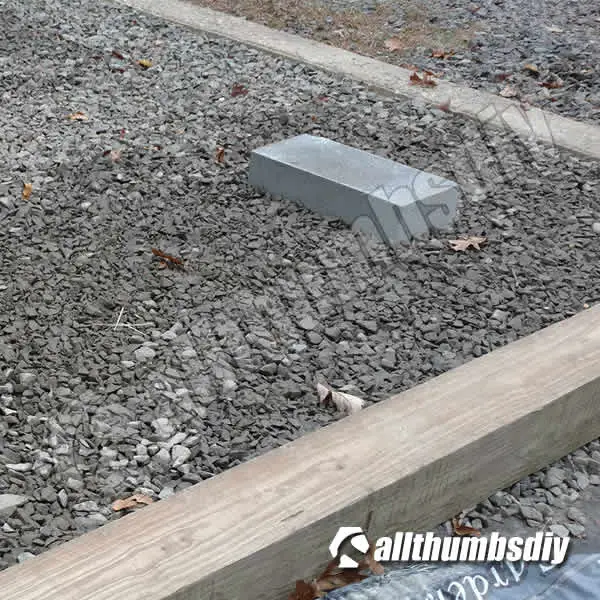
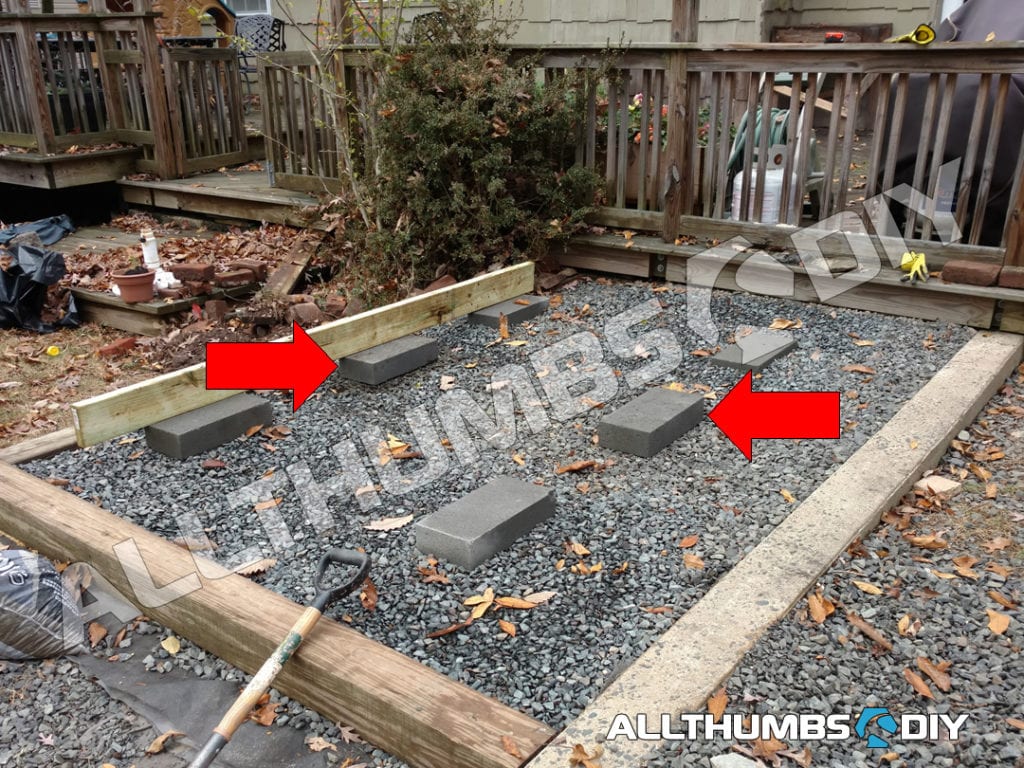
- STEP K – Place 2 concrete footing blocks on each corner;
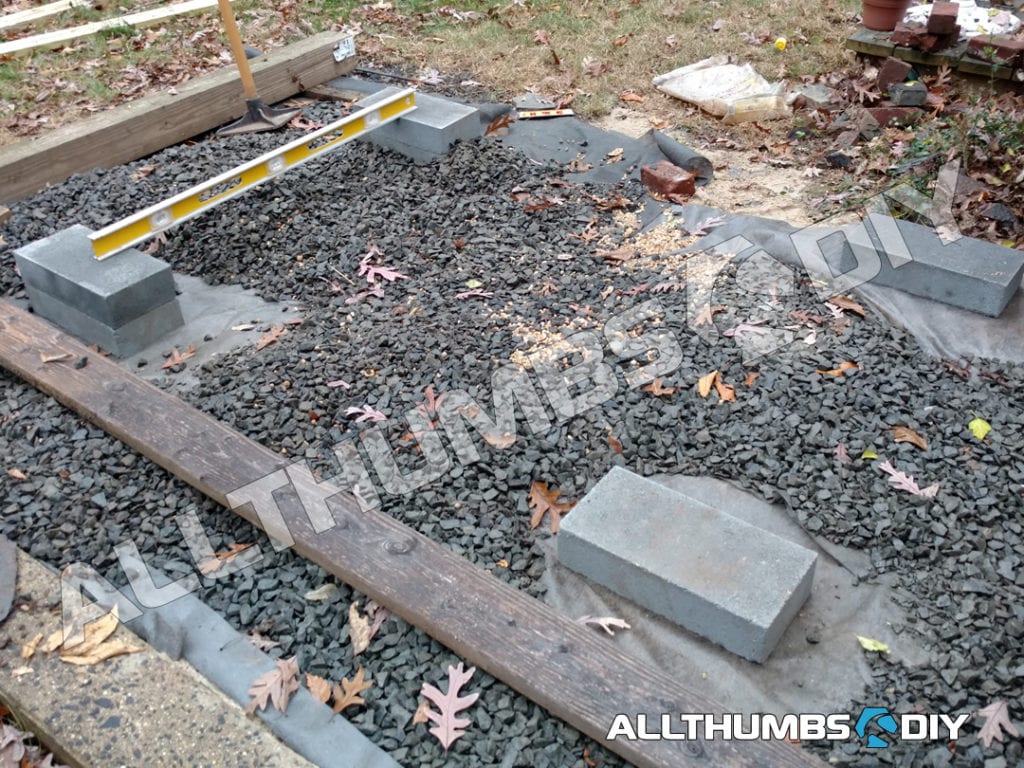
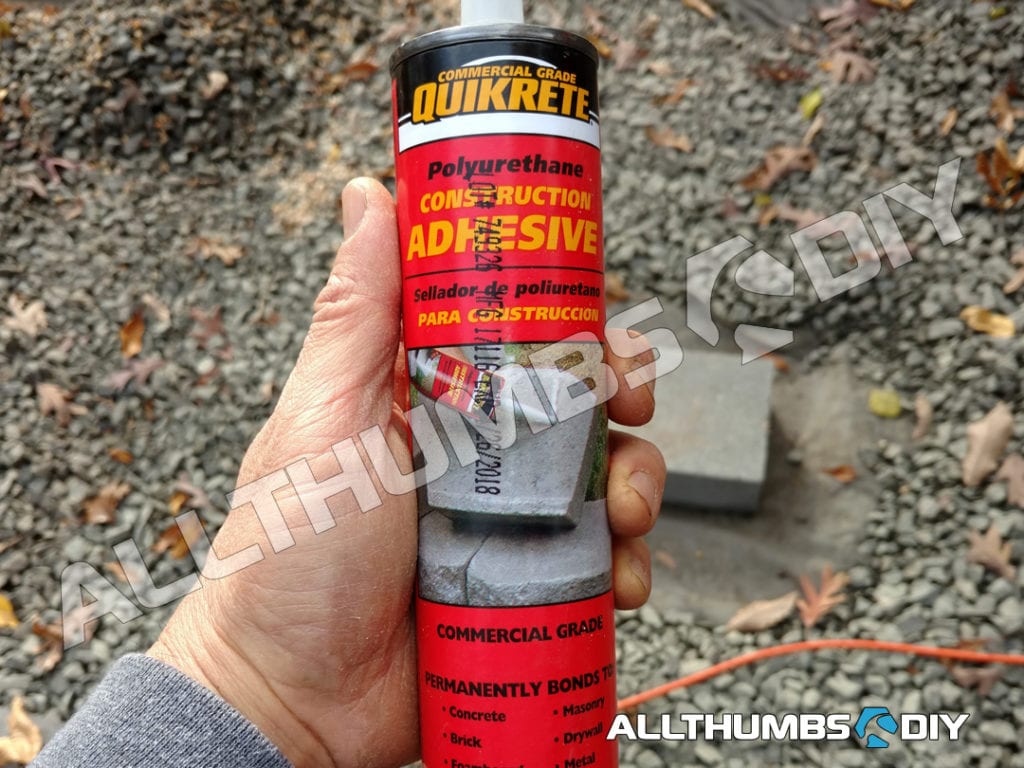
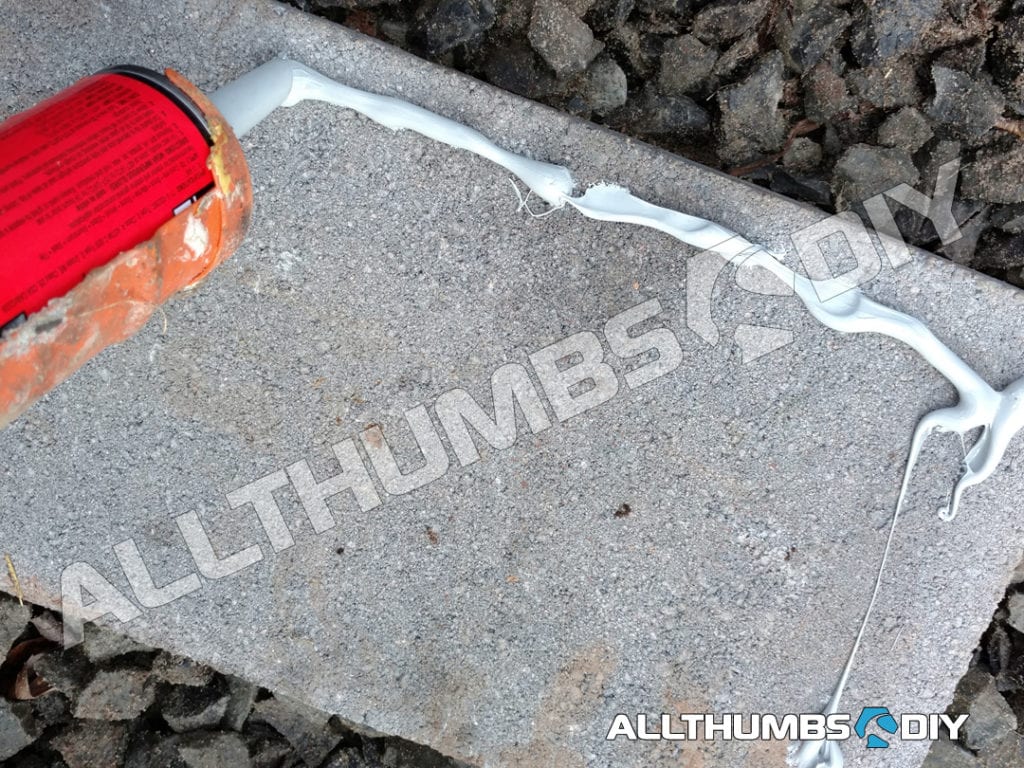
- STEP L – Place 4 concrete footing blocks (2 stacked per corner) on each corner; 2 stacked concrete blocks are required due to elevation; use construction adhesive to bond two concrete blocks together
- STEP M – Lay down approximately 6 inches of gravel and tamper down;

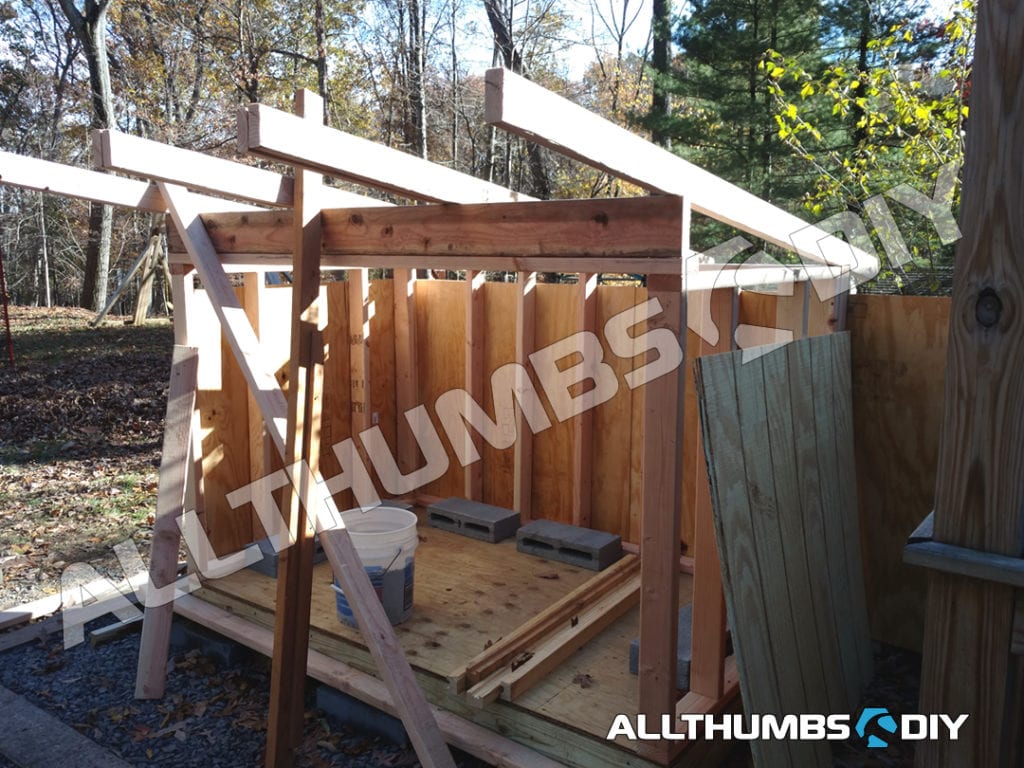
Framing
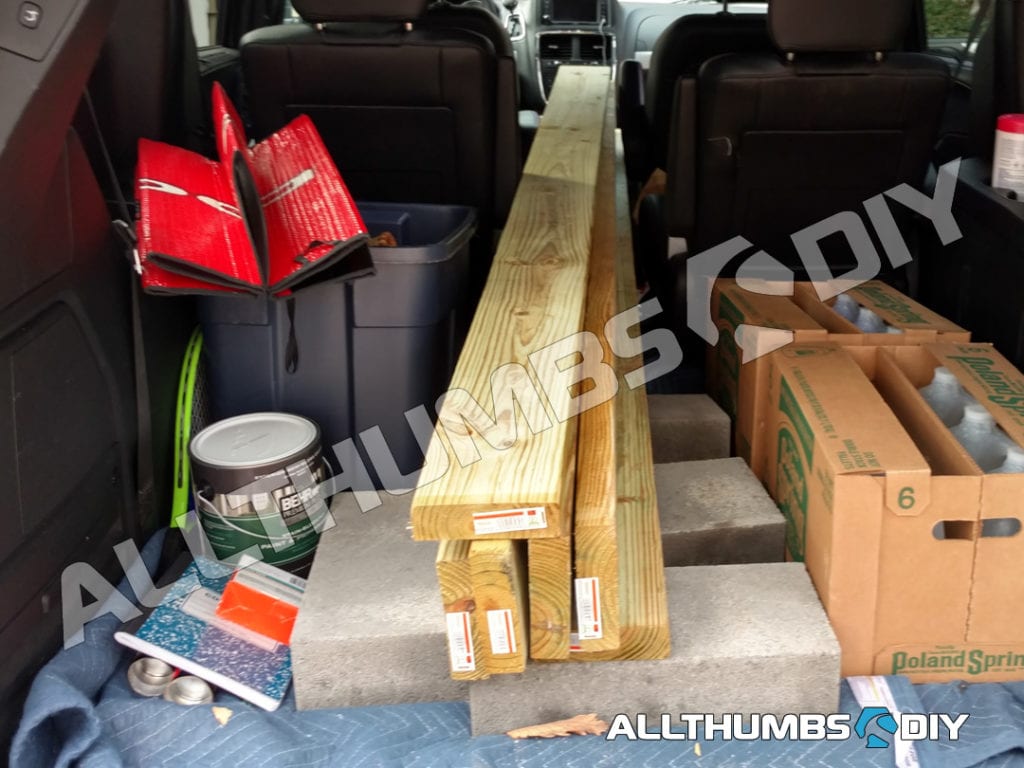
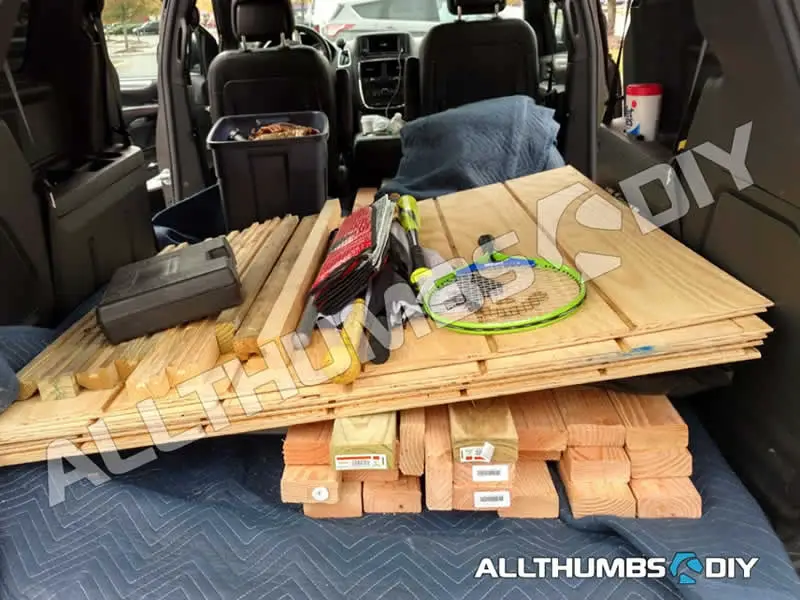
One slight change from yesterday’s work is that I added two more concrete blocks in the middle of the frame to give it bit more stability. And using my awesome Dodge Grand Caravan, I lugged some 2x6x8 PR lumber.
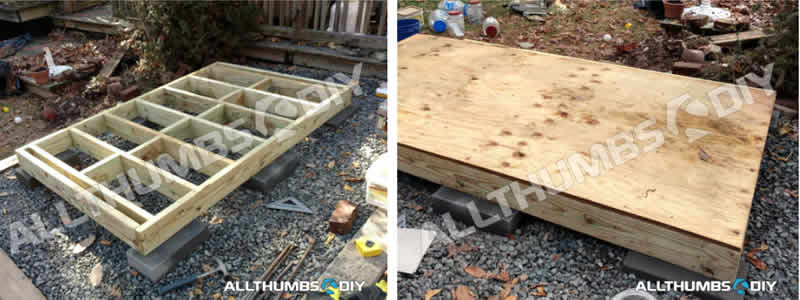
Framing the Foundation
With the gravel landing pad completed, I moved on to constructing the foundation.
- STEP A – Position two, 2x6x8s and two, 2x6x4s on a rectangular shape and screw them in;
- STEP B – Attach one center beam in the middle of the rectangle than measure to verify that the rectangle is square
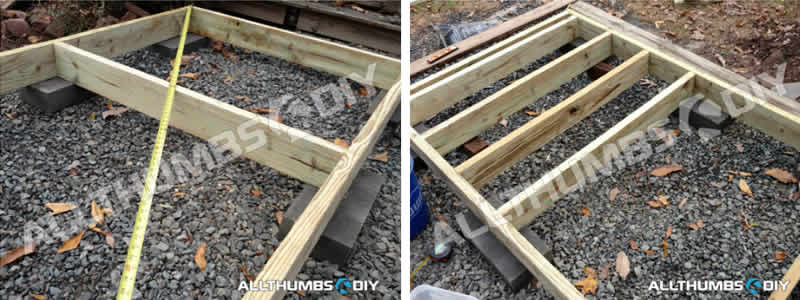
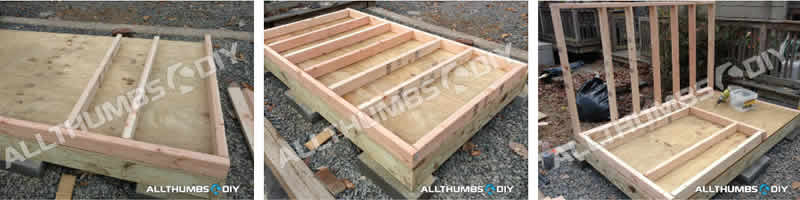
- STEP C – Attach additional floor joists, 16″ O.C.;
- STEP D – Install joist blocking between floor joists;
- STEP E – Screw down 3/4″ 4×8 PT plywood
^ Return to top
Framing the Walls
With base padding complete, time to head over to Home Depot for lumber to install walls and roof rafters (and picked up some T11 sidings as well).
- STEP A – Much like base framing, I follow the same pattern except this time, I use 2 x 4s to create the back wall;
- STEP B – Side walls will not be supporting any weight so the space between two studs were made them wider to anticipate installing an intake fan at the end
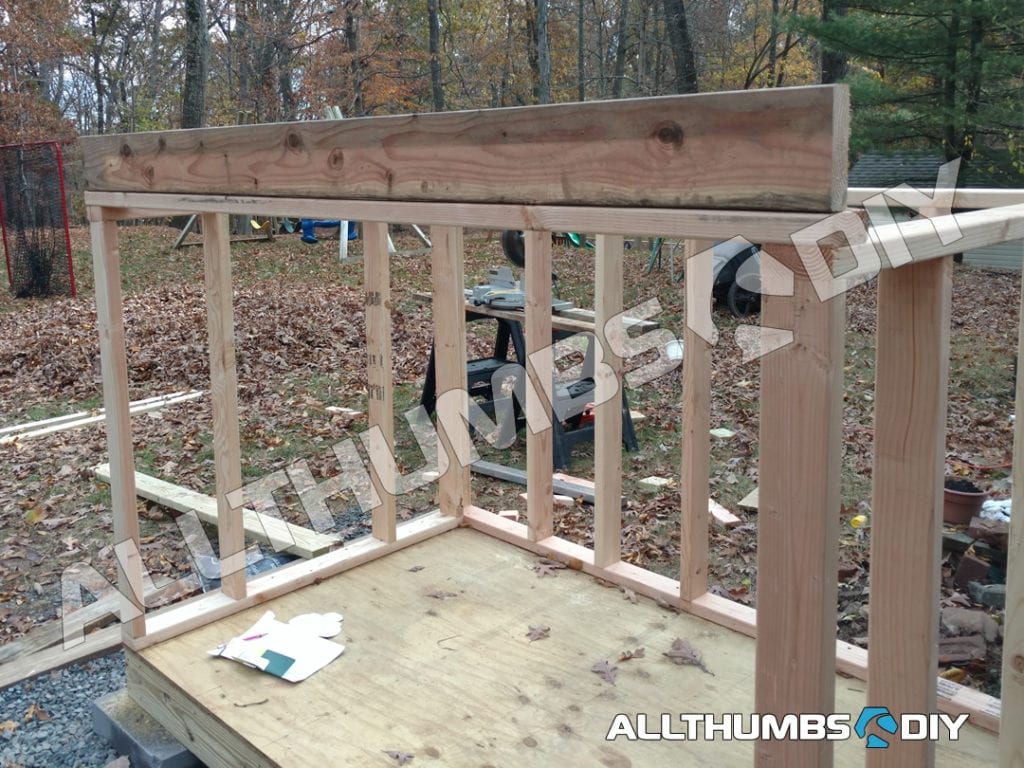
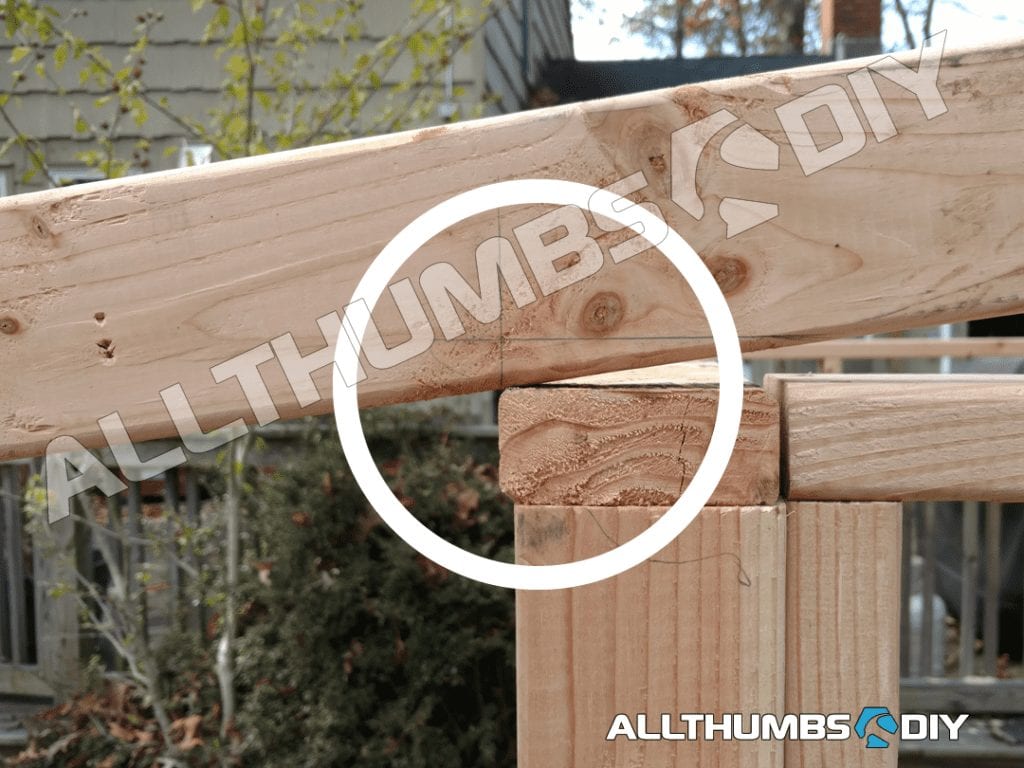
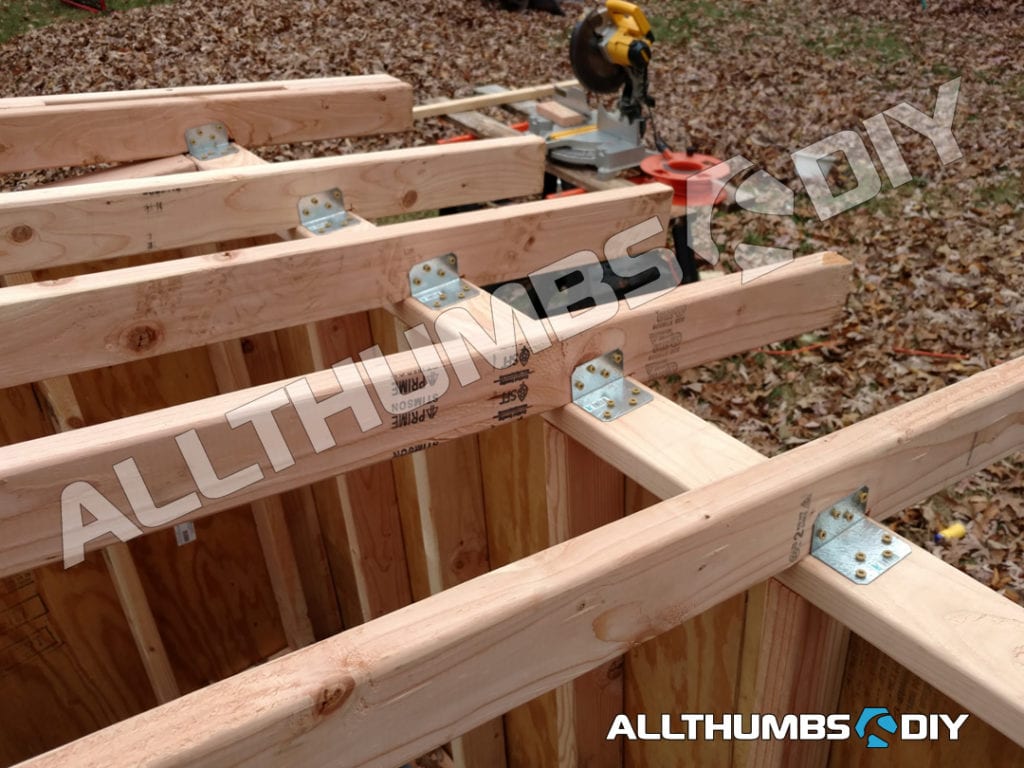
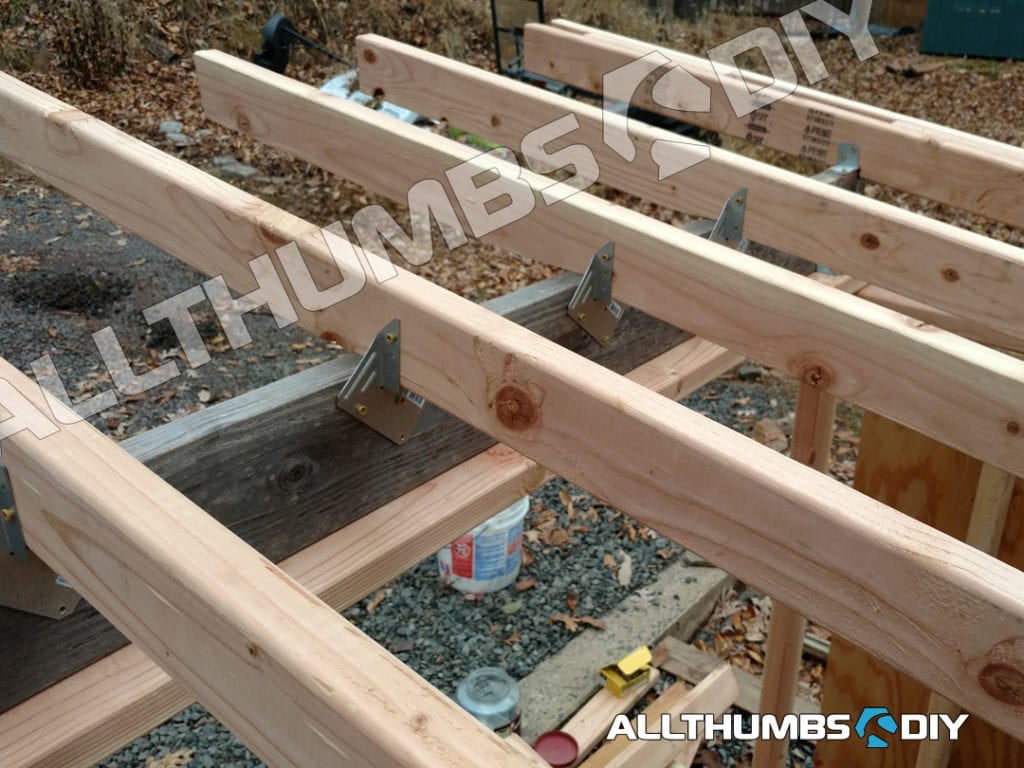
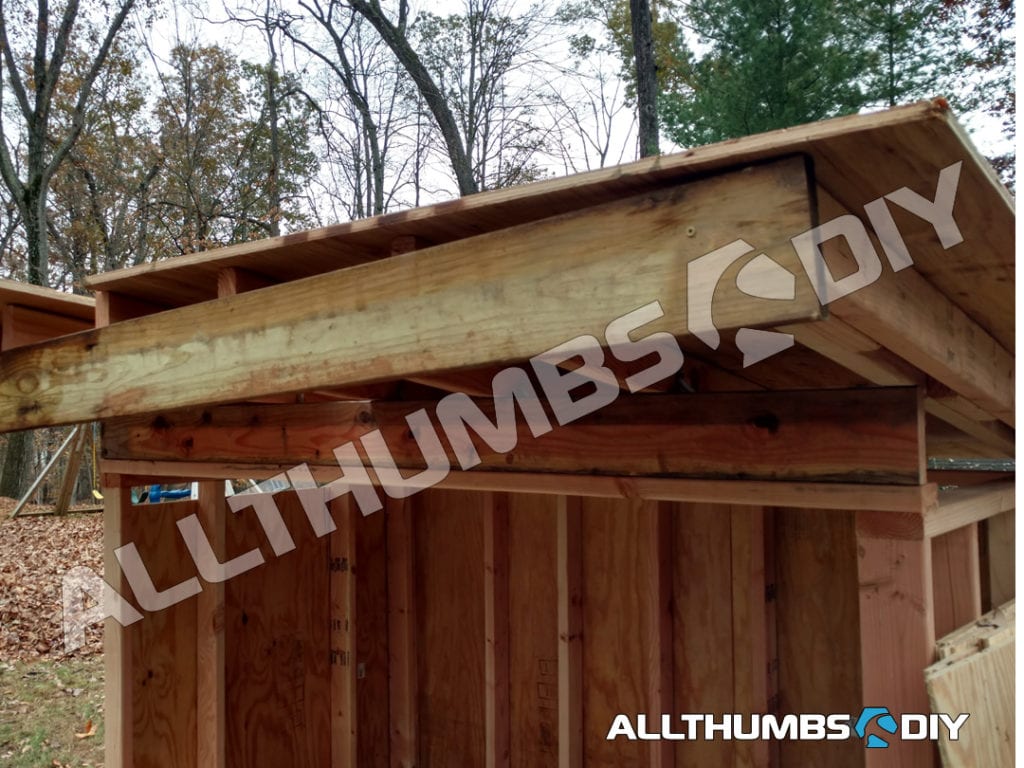
Framing the Roof (rafters)
- STEP A – I installed 2 x 4 on its side, then a 2 x6 header to support the rafters;
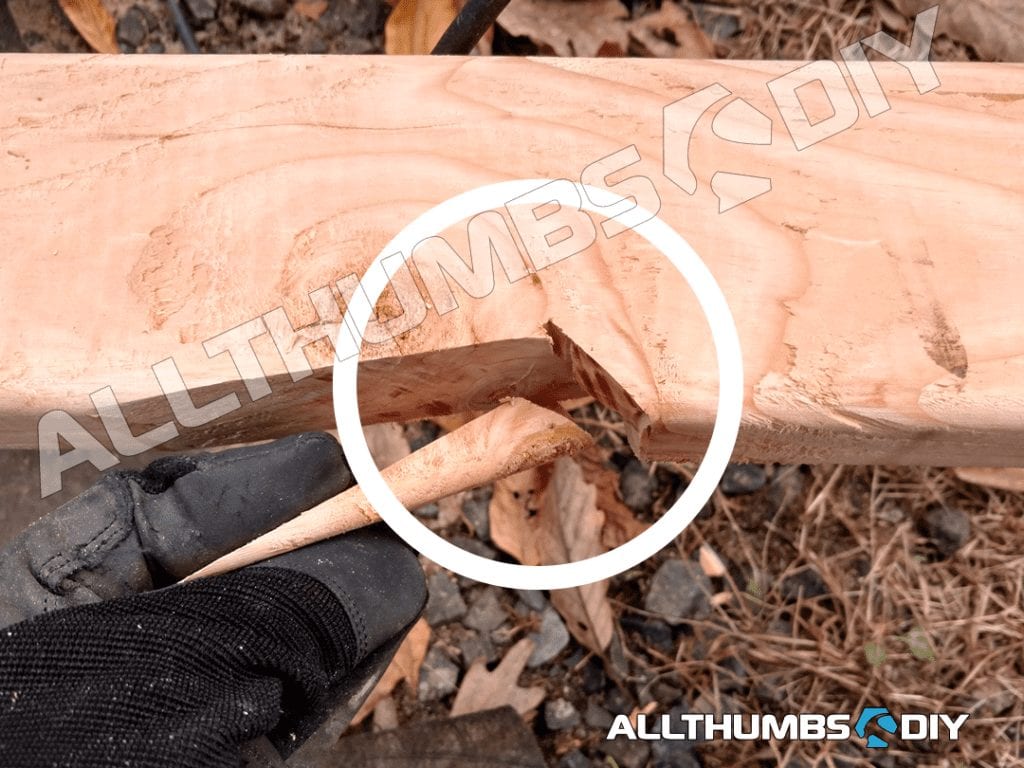
- STEP B – Because the footprint was fairly small, I decided to go with 2 x 4 rafters with bird-mouth cuts
^ Return to top
Siding (coming soon)
Roofing (coming soon)
Heat Control (coming soon)
Sound Control (coming soon)
Refueling Safety (coming soon)
Actual Cost to Build a Generator Shed
Key Takeaways
I will be posting updates as I progress through the generator shed project.
If you found this article to be useful, can you do me a favor and sign up for my newsletter so that I can send you updates on my DIY projects?
Lastly, if you have any questions, please leave a comment below.
Thanks and good luck with your DIY project!

References
- Should You Buy or Build a Shed
- What pollutants are in the exhaust fume from a portable generator?
- Portable generators do not have catalytic converters like cars due to cost. Generator fumes include harmful emissions such as carbon monoxide (CO), nitrogen oxide (NoX), hydrocarbons (HC), surfer dioxide (SO2)
- I see that standby generators are usually located very close to the house? Can I build my shed close to the house as well?
- Most standby generators use natural gas or propane as it fuel source. When compared to diesel or gasoline, natural gas generators produce lower levels of NOx and CO2, reduced particulate emissions, and virtually no SO2 or mercury emissions. Portable generators, for which this shed post is intended to cover, can emit as much pollutants as driving an average vehichle for about 150 miles
- Can I build a lean-to generator shed?
- I recommend against building an attached portable generator shed because no matter how careful you are, running a portable generator is a fire-risk. And you still have to contend with toxic exhaust fumes so I suggest building a freestanding generator shed that is at least 20 feet away from the house
- Can you install a catalytic converter on my portable generator?
- https://comtekk.com/co-filter.htm
- generator shelter
- generator shelter plan
- generator shelter diy
- generator shelter kit
- generator shed lowes
- generator shed suncast
- generator shed design
- generator shed soundproof
- generator shed exhaust fan
- generator shed fan
- small generator shed
- outdoor generator shed