
Purpose
Troubleshoot and resolve the squeaking / squealing soound
Applicability
Most Whirlpool Duet Gas Dryers
Solution
Although I am not 100% certain, I am fairly confident that either idler pulley and/or one of the drum support rollers have failed. Taking apart the machine is a time-consuming task so I plan on replacing all 4 drum support rollers, 1 idler pulley and the drum belt. The repair kit includes all these parts for less than $30 bucks. It certainly is better and cheaper than buying a new gas dryer or hiring a technician for $300-400.
Required Materials and Tools
As stated in the previous post, you should have the Dryer Repair Kit from Whirlpool.
- Repair kit;
- Nitrile Gloves (not required);
- Paper towel
- 1/4″ socket + socket extender + ratchet;
- Small flat head screwdriver
- 1/2″ foam gasket tape, 10 ft roll
- 2″ spatula (to scrape off the old foam gasket);
- Gas (yellow) teflon tape;
- Pipe dope;
- Two adjustable pliers
ALL-THUMBS-DIY-STEPS
I had a lot of work so I kept on delaying the repair and after putting up with REALLY loud squeaking, blackboard-fingernail-scratching sound for 5 days, my dryer just simply stopped working one day so I knew I had to get it fixed or my wife would kill me:
-
- Disconnect the power cord and shut off the gas supply;
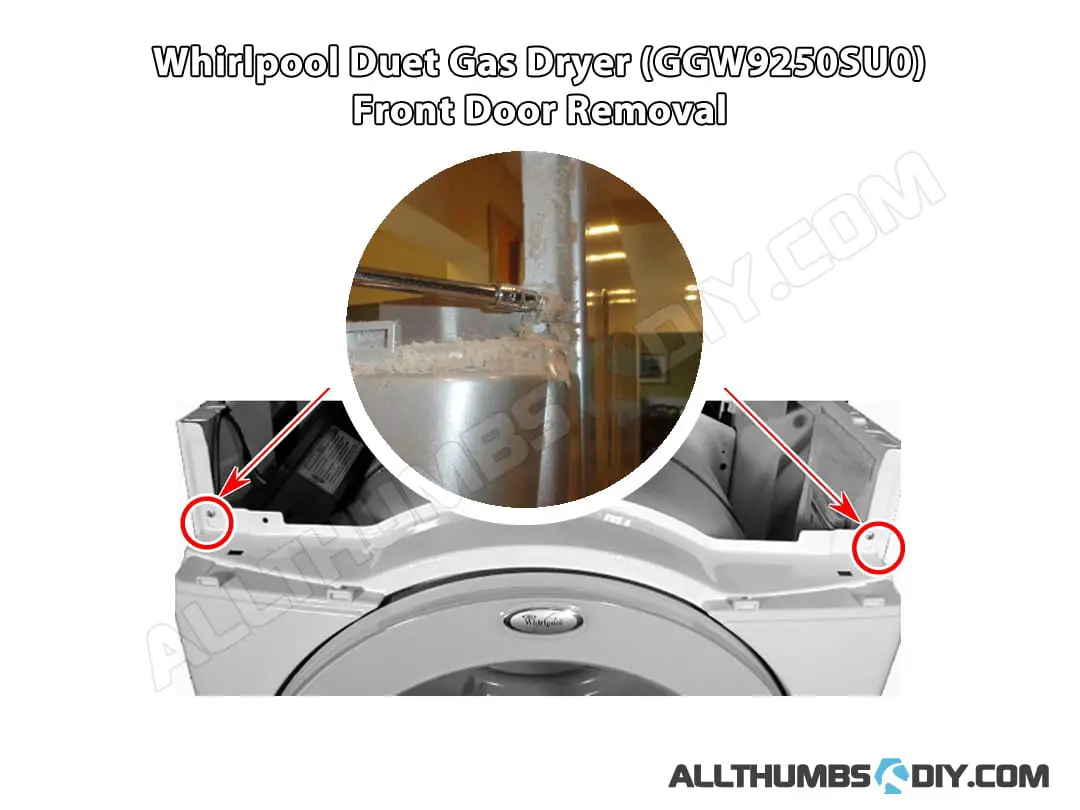
- Disconnect the gas line from the dryer;
- Disconnect the vent pipe using 1/4″ socket or long flathead screwdriver;
- Slide out the gas dryer (because my dryer is stacked on top of the washer, I will be re-using my custom-made table). Instead of lowering the dryer to the ground, I will make the repairs directly on this table;
- Remove 3 hex screws from the rear to remove the top panel using 1/4″ socket + ratchet;

-
- Note the belt position relative to the black mark on the drum;
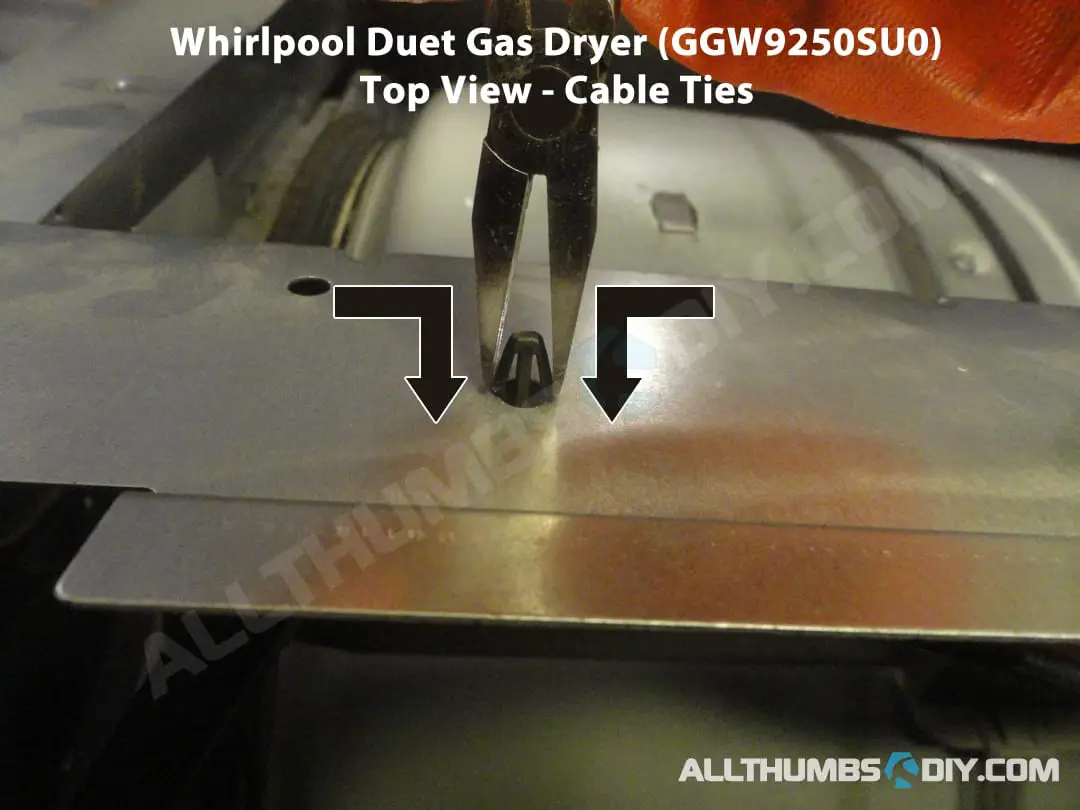
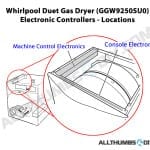
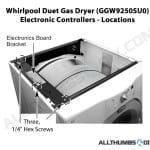
- Before detaching the control board bracket, loosen 2 push in pins holding the wiring;

-
- Remove 3 hex screws holding the control bracket;
-
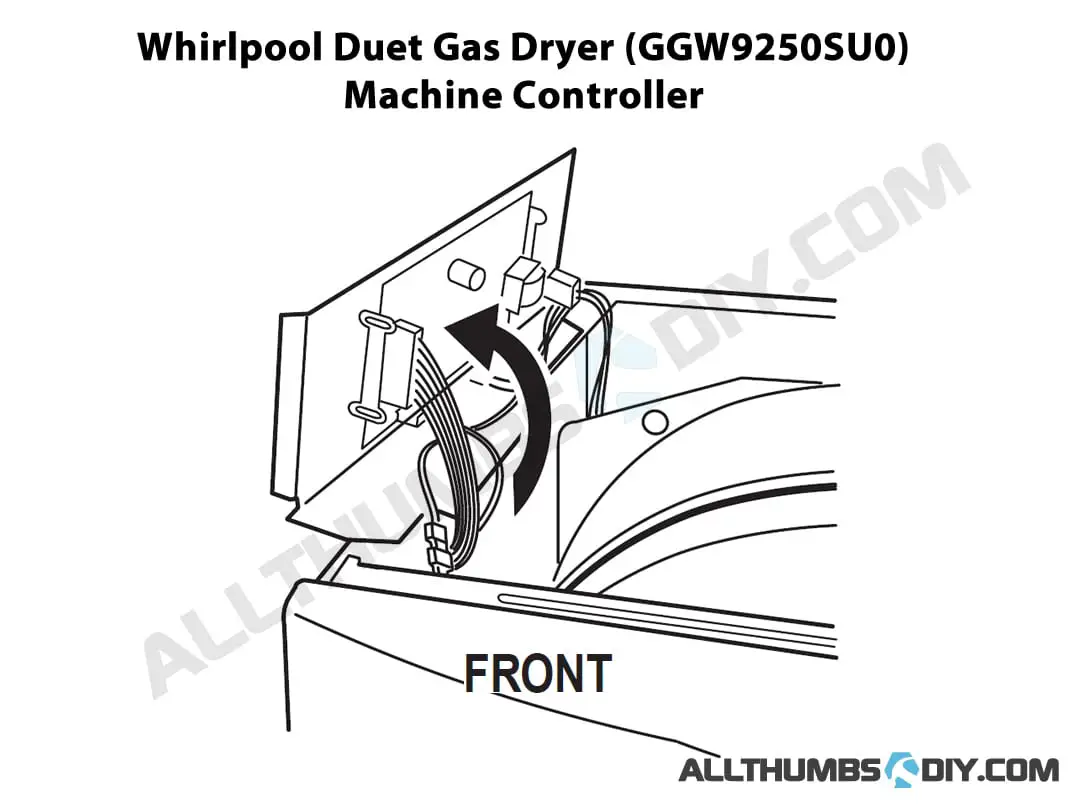
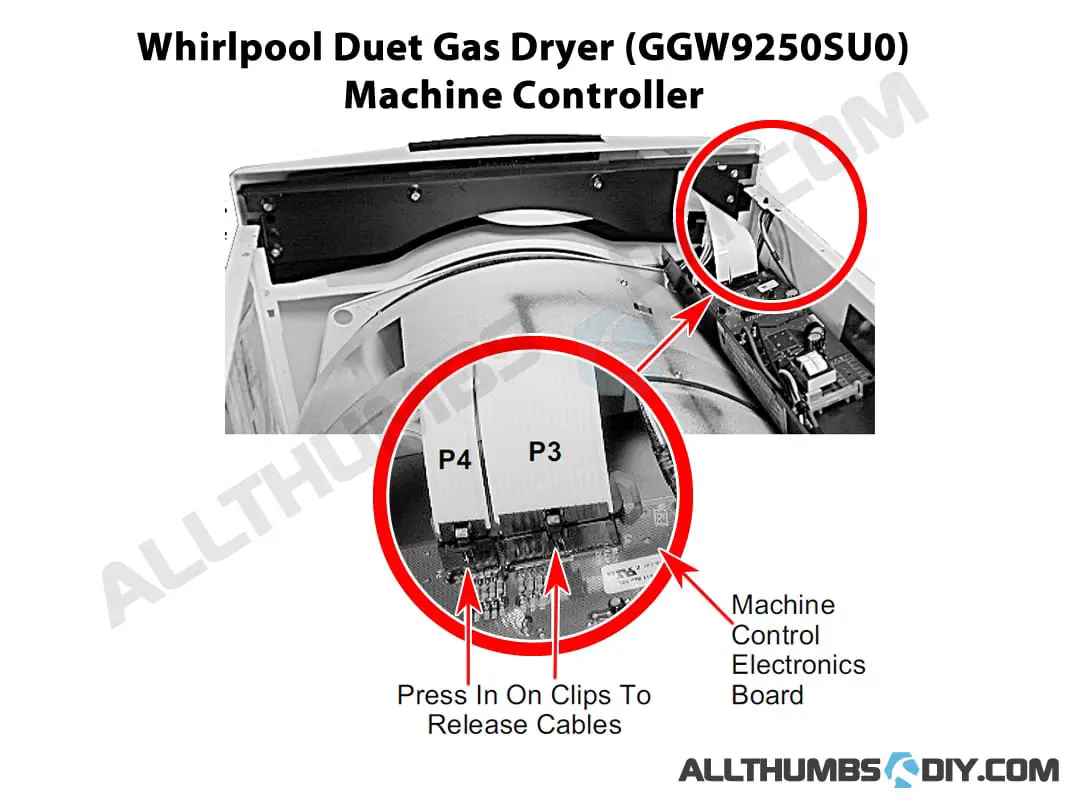
- Before touching any electronic components, it is important to ground yourself to remove any static charges by touching any metal objects (i.e. kitchen faucet)
- lift and flip to detach 2 ribbon cables (P3 and P4) from the console electronics;
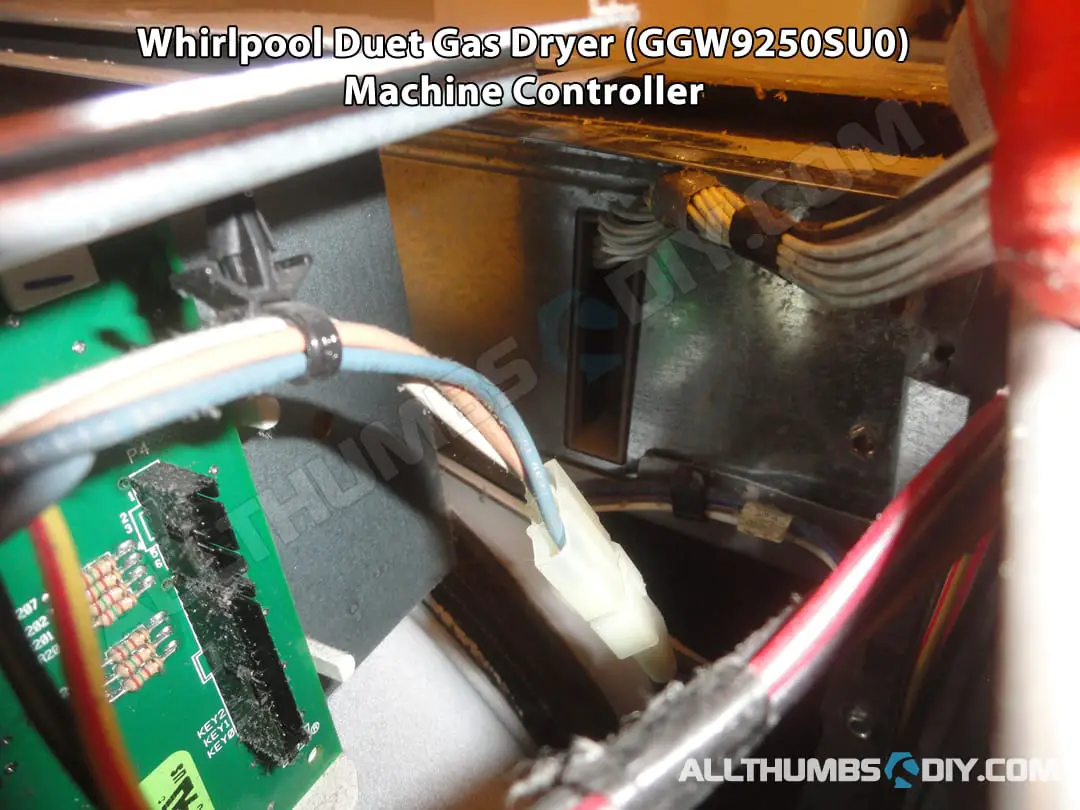
-
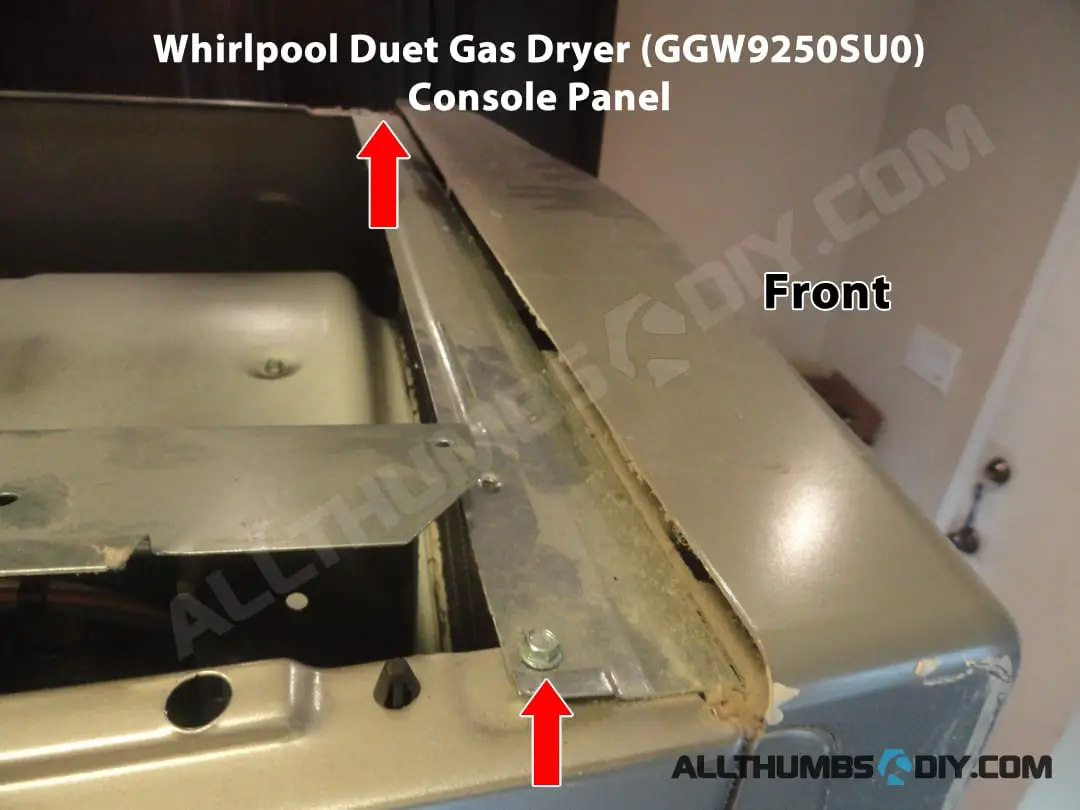
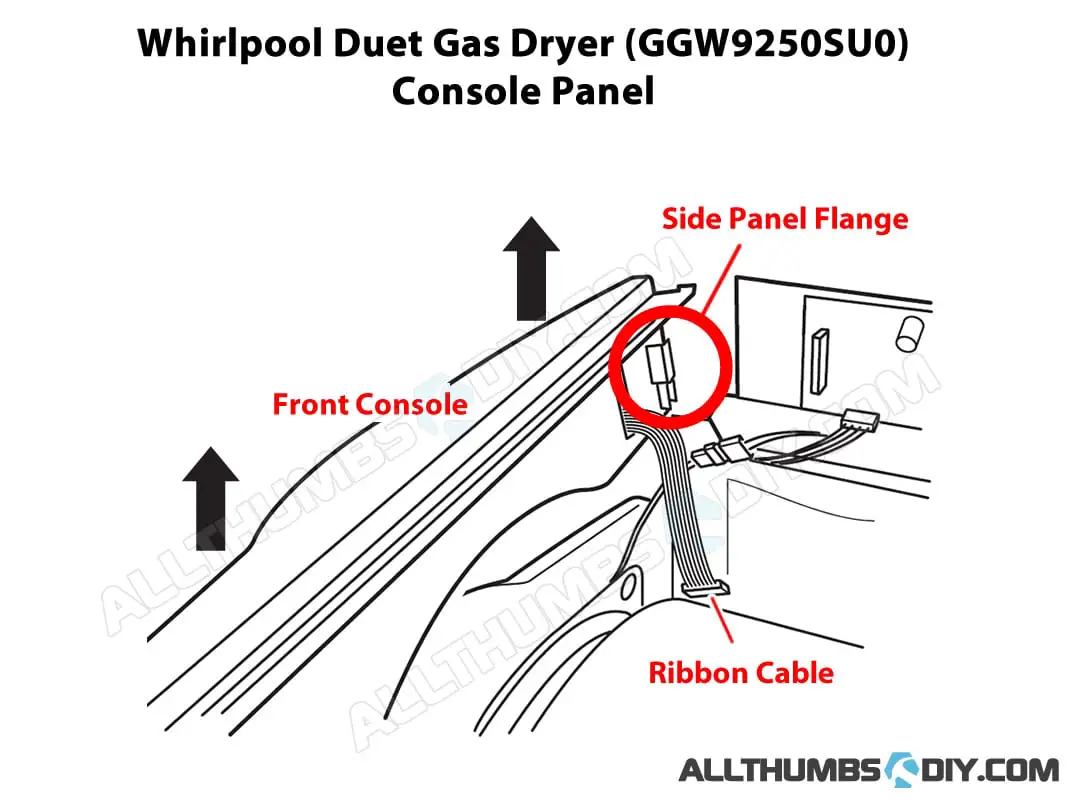
- remove 2 hex screws holding down the front console andremove the front computer panel;
- Squeeze and lift to disengage tabs; remove the panel and set it aside;

-
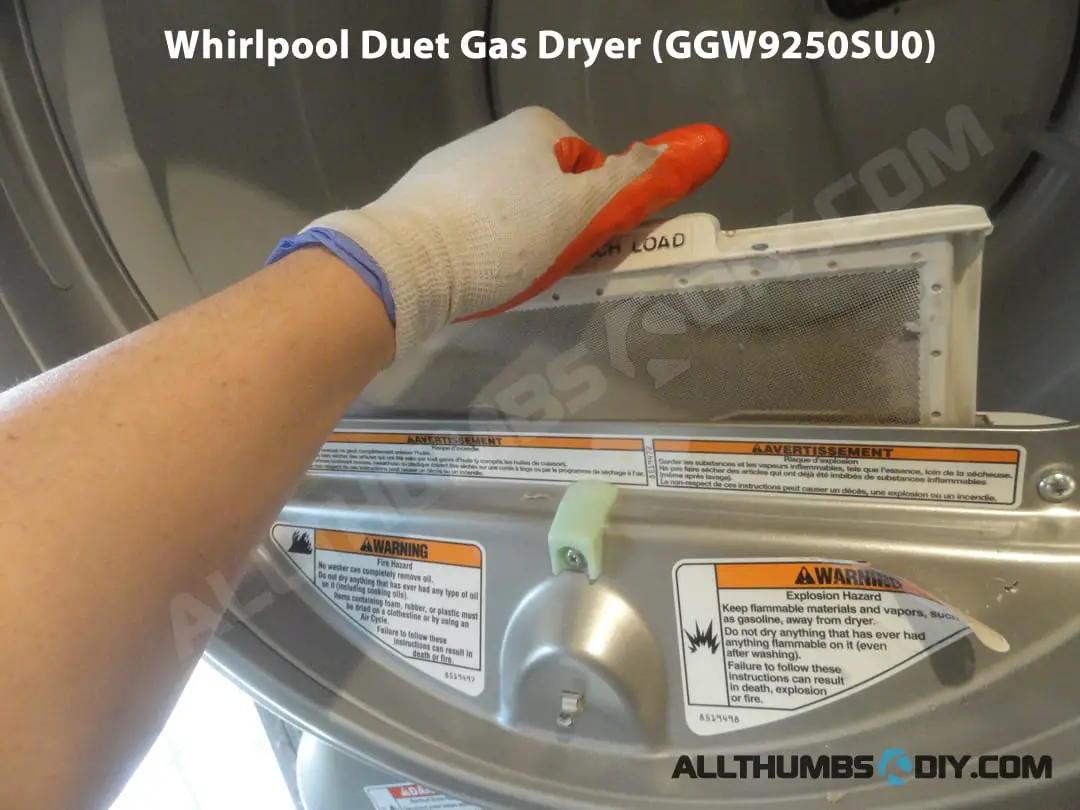
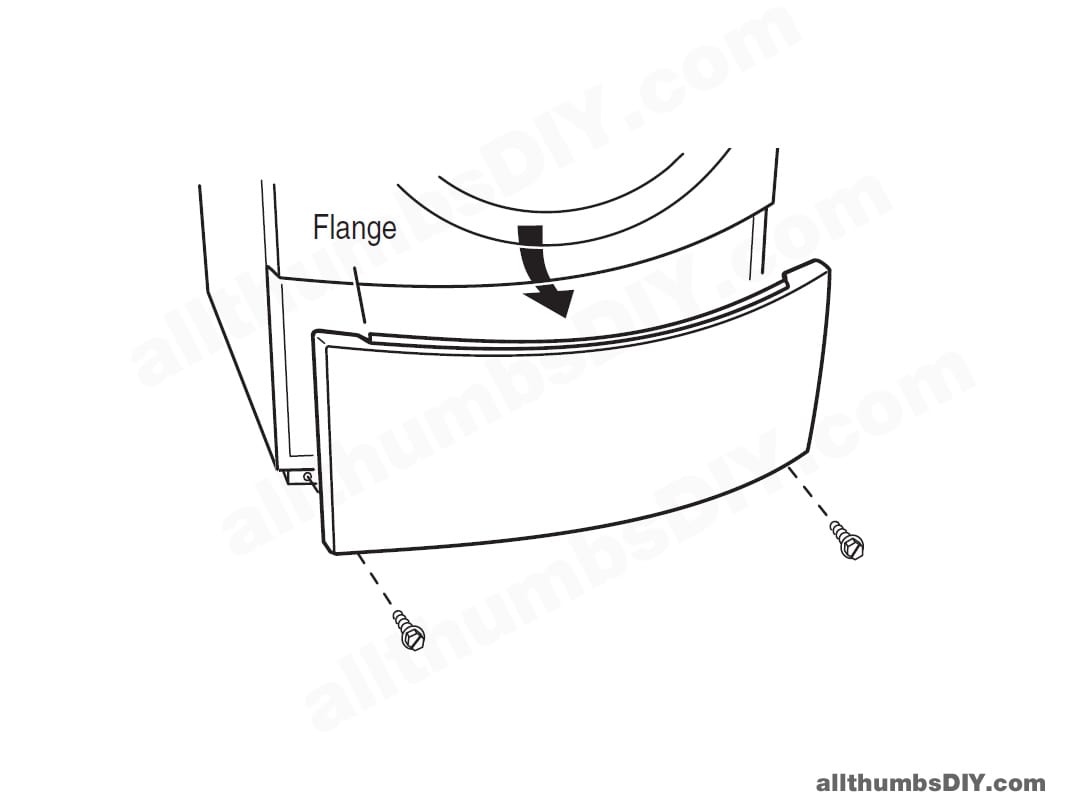
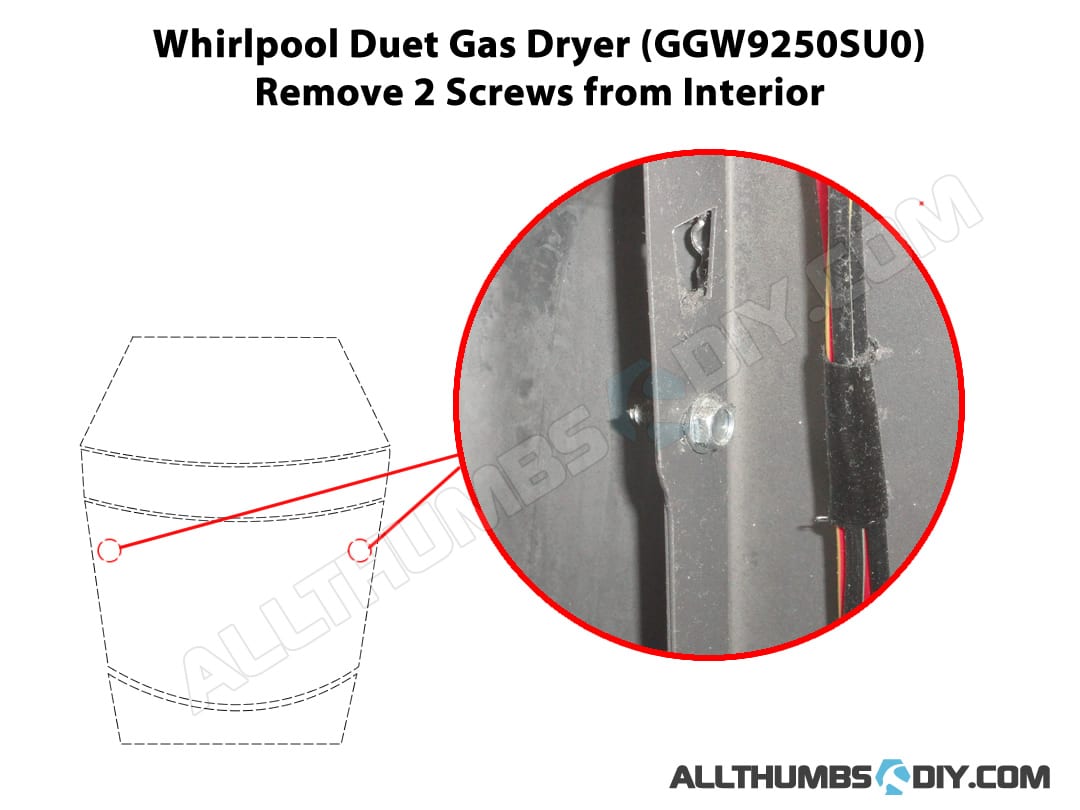
- With the top off, I am going to remove the bottom toe panel
- Using the same 1/4″ hex socket, remove two bottom screws
-
- Fig. 1
-
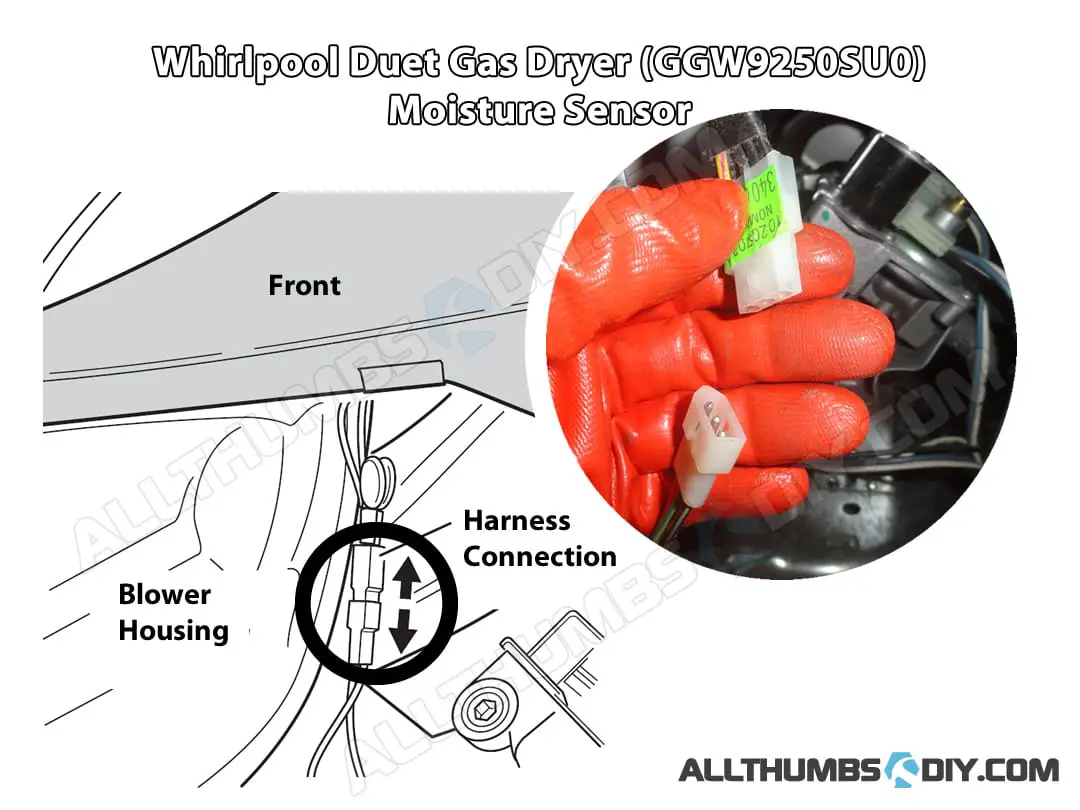
- with the bottom panel off, first disconnect the moisture sensor (need a narrow flat head screwdriver to disengage the clip)
- Uninstall 3 (or 4 screws, depending on the exact model) and remove the blower cover


-
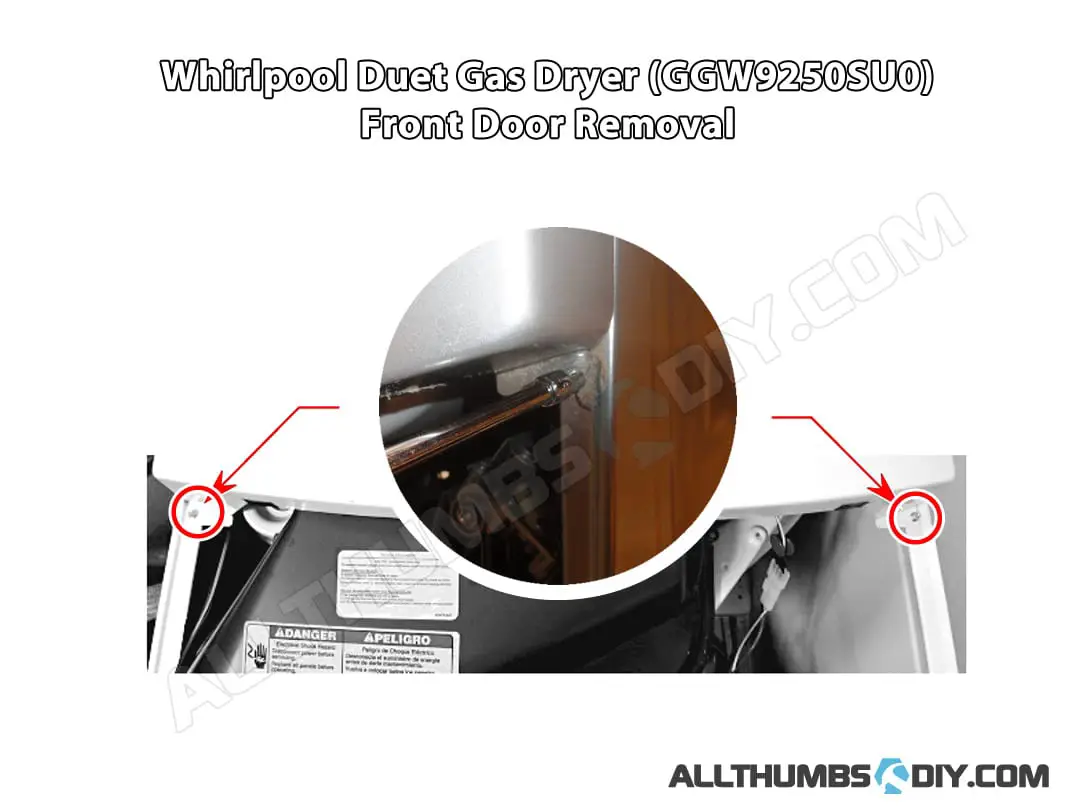
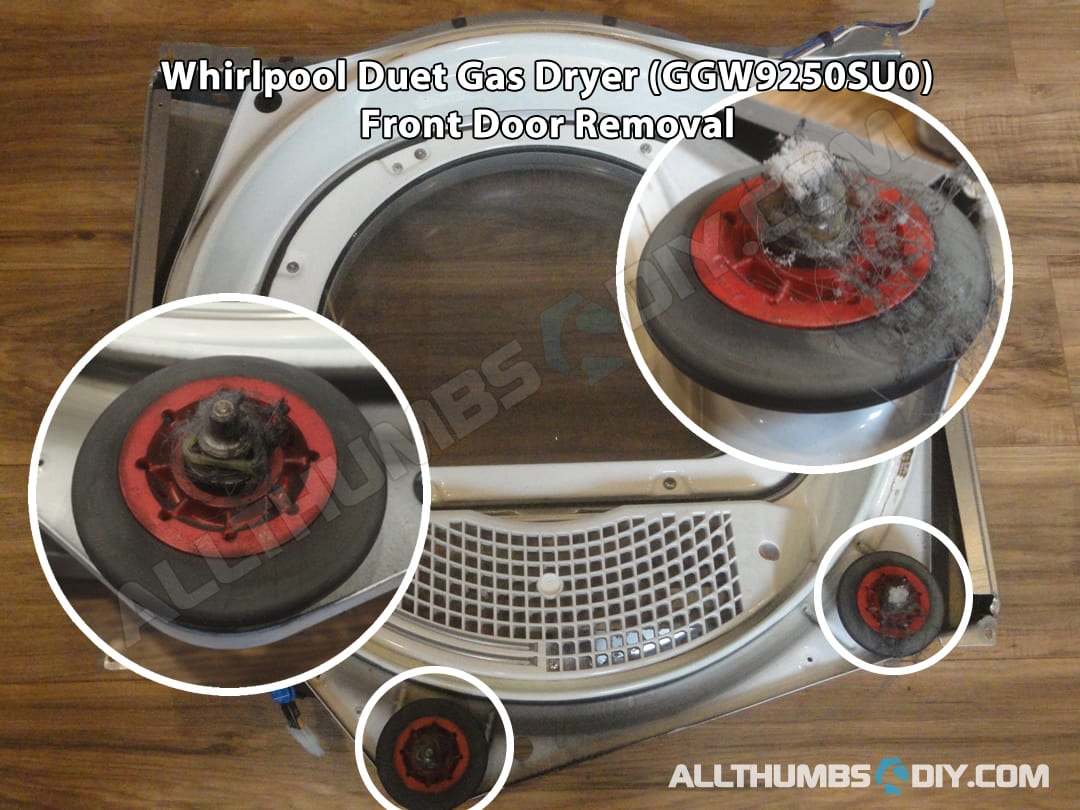
- With the blower cover off, we can remove the door assembly
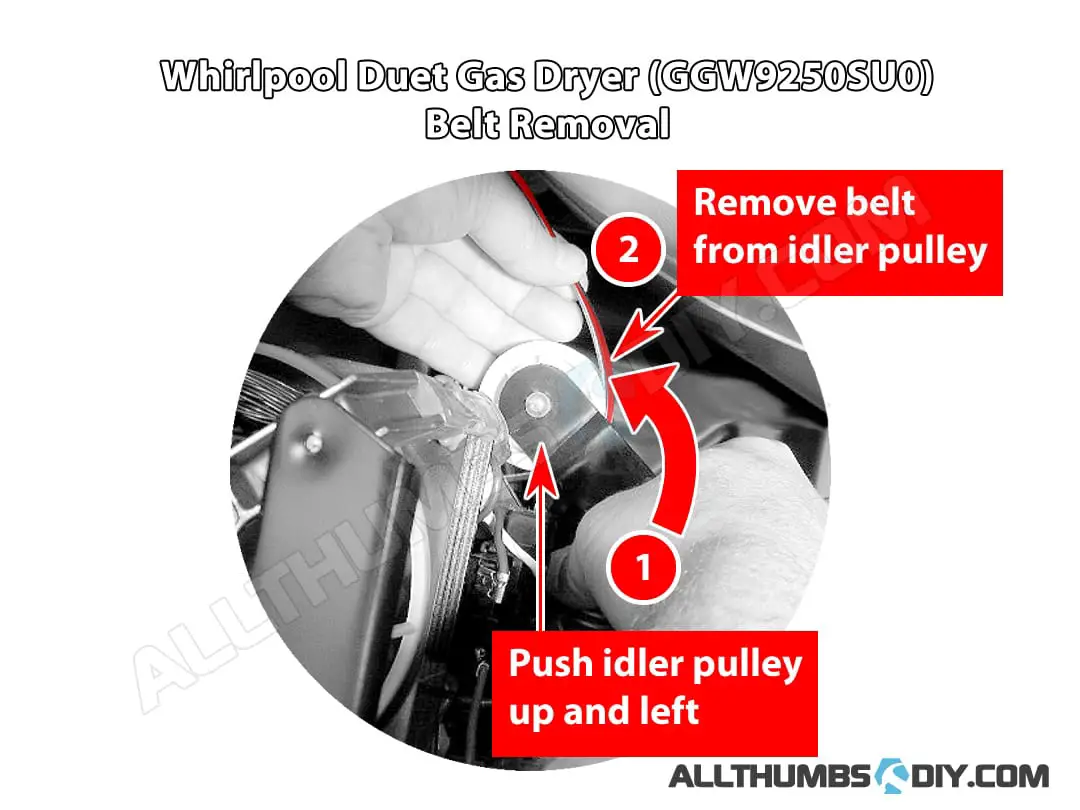
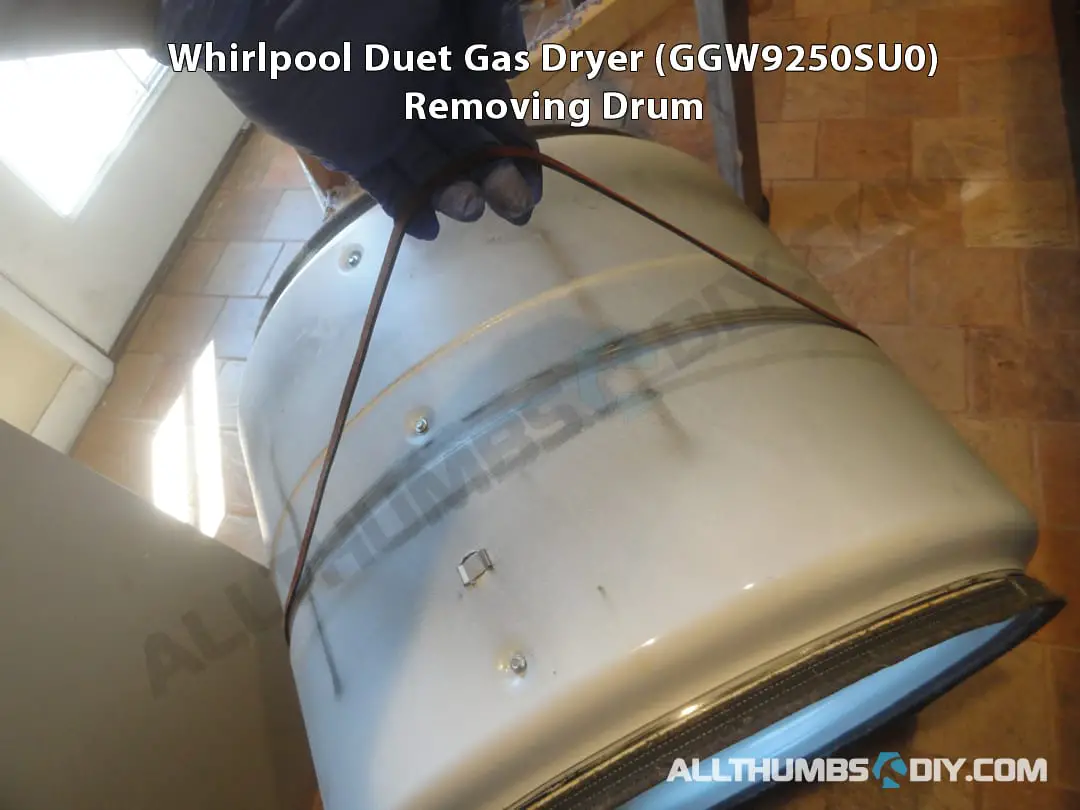
- To remove the drum, we first need to disengage the belt. It is done by pushing the idler pulley up then removing the belt off its track
- Right off the bat, I noticed my belt was already disengaged and the pulley itself seemed to be drooping so I knew something was wrong


-
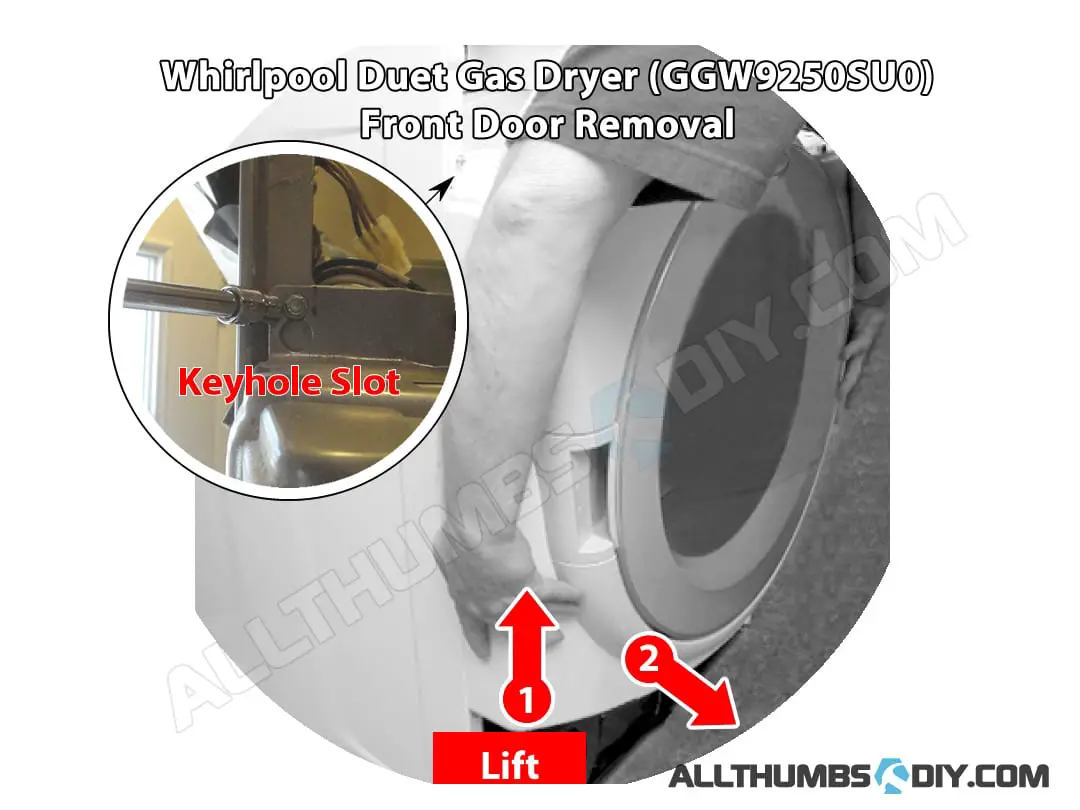
- Remember that the drum is simply resting on 4 rollers so we simply need to lift the door up then pull it out, along with the belt.
-
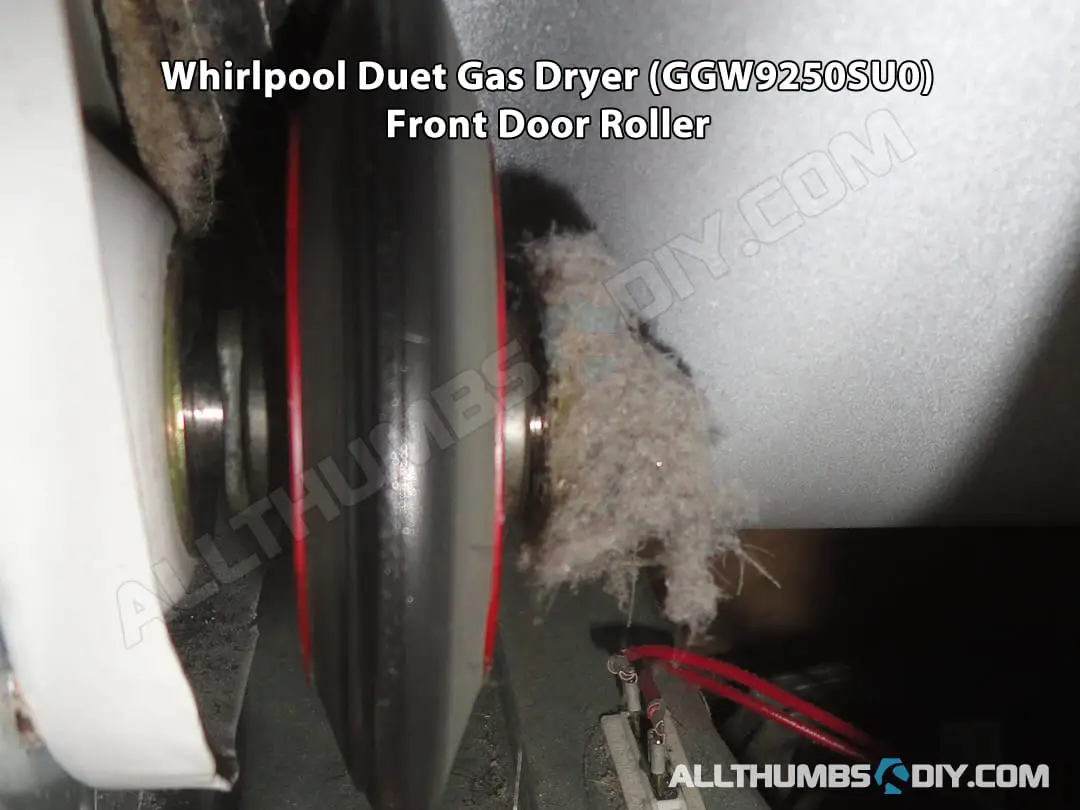
- You can see the roller on the front door are rather dirty, caked with dust and hair
-
- Upon removing the drum, I immediately noticed some type of black soot all over the motor assembly;
- I also notice how the idler pulley is kind of drooping
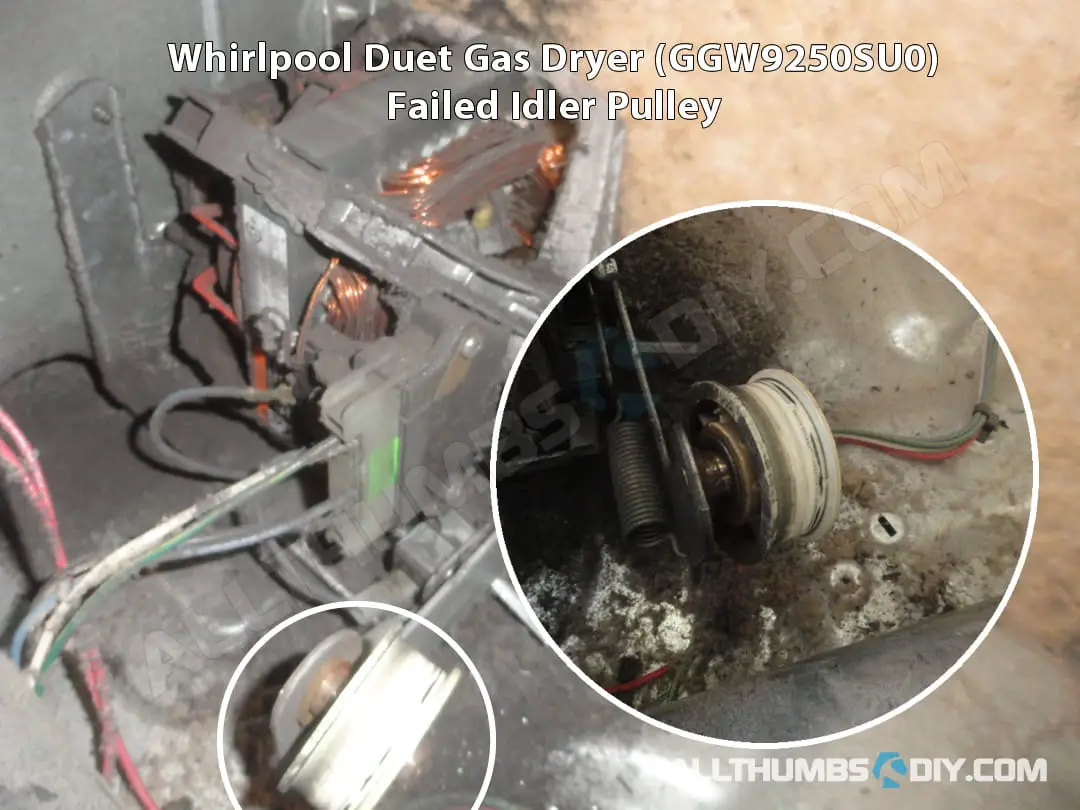
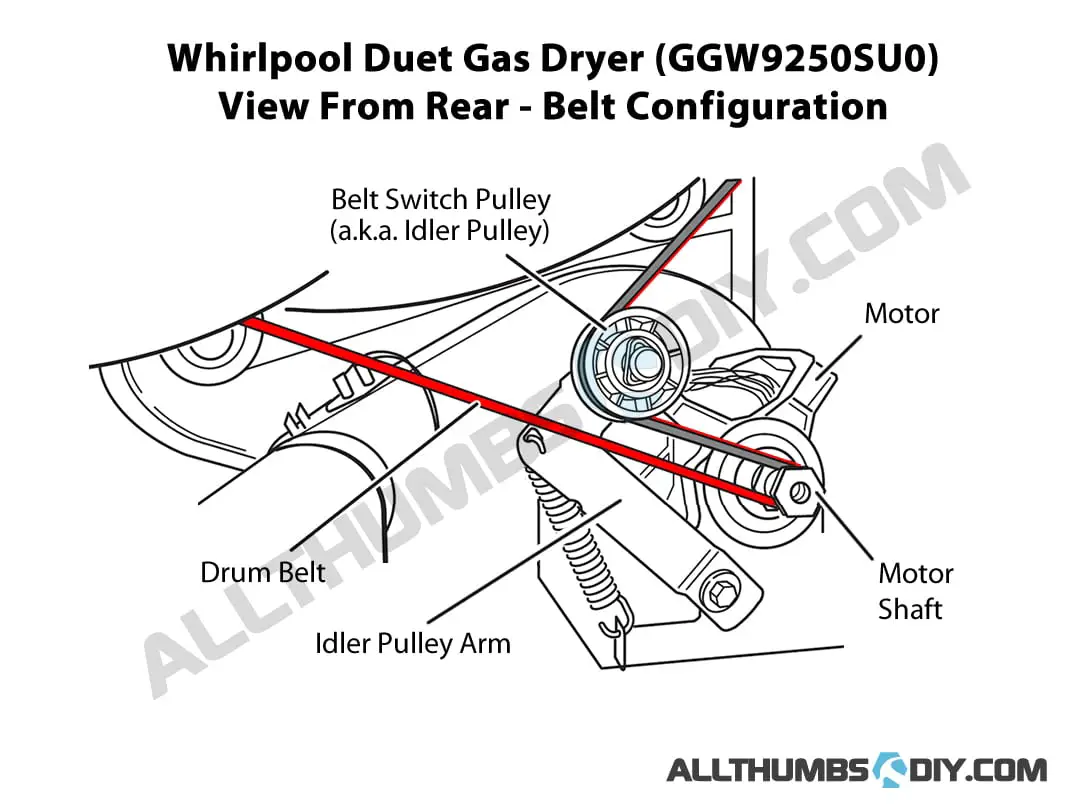
- At this point, I am fairly confident that the screeching noise was entirely due to this idler pulley failing.
Wrap Up
If you found this article to be useful, can you do me a favor and sign up for my newsletter? The signup form is found at the top of the screen on the right side.
Good luck with your repair and let me know how it turns out!

Lori Barlow
Monday 3rd of January 2022
I cannot get the bottom with box thingy apart. it seems like it should be a pretty easy thing to separate. It looks like you should be able to depress the middle locking part and pull apart, but that is not happening, I am at a standstill till I get this step done..... please help!