Alright, I have all the parts and tools I need to get started.
As I said in the previous post, I am going to perform a quick engine tune up (i.e. change oil, spark plug, etc.) first before overhauling the carburetor.
| Read me |
|---|
| If you found this article via search engine, you may want to read: ** Fast and Easy Fix for Your Generac Wheelhouse 5500 / 5550 Portable Generator (Part 1) ** Engine Tuneup for Generac Wheelhouse 5500 / 5550 Portable Generator |
CARB CLEANING TIPS
Here are some things to keep in mind before getting started:
- MAKE SURE THE ENGINE IS COOL TO TOUCH;
- Work in a well ventilated area;
- Place protective covering under the generator (I used heavy duty trash bags) to protect the surface from fuel contamination;
- Wear pair of Nitrile, Latex or Vinyl gloves (I cook a lot so I don’t want my hands to smell gasoline all day);
CARBURETOR CLEANING STEPS
Note 1: I attempted to clean the carburetor while it was still attached to the engine (evidenced by pictures of me removing a carb fuel bowel first). My hindsight suggestion? Completely remove it before disassembling for cleaning.
Note 2: Please note that most pictures were taken when I was initially cleaning the carburetor, not when I replacing various parts like gaskets, etc.
STEP 1 – Remove the spark plug cable, turn off the ON/OFF circuit breaker switch and turn off the fuel supply valve.
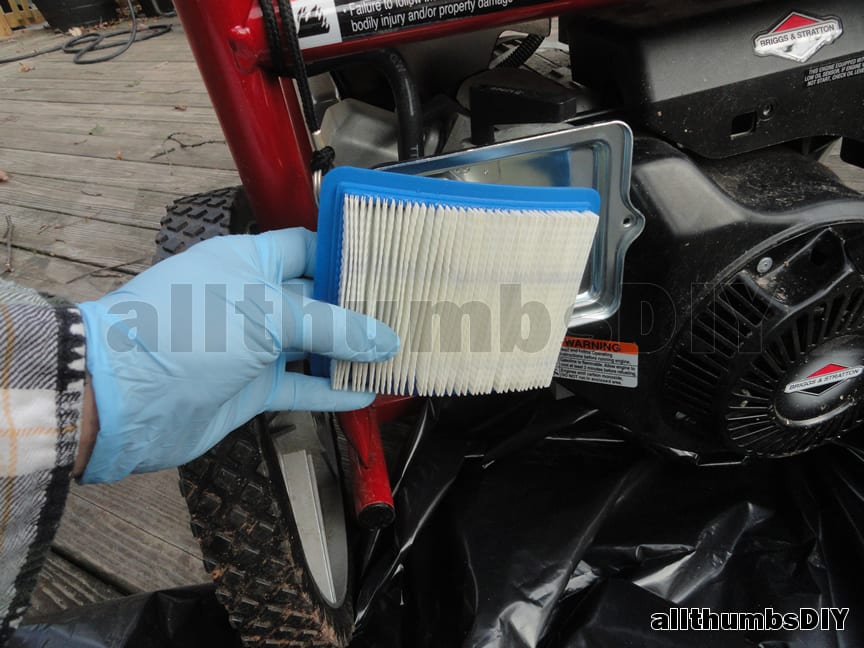
STEP 2 – Using a 5/16″ socket to remove two mounting screws holding down the air intake cover. Remove the air filter.
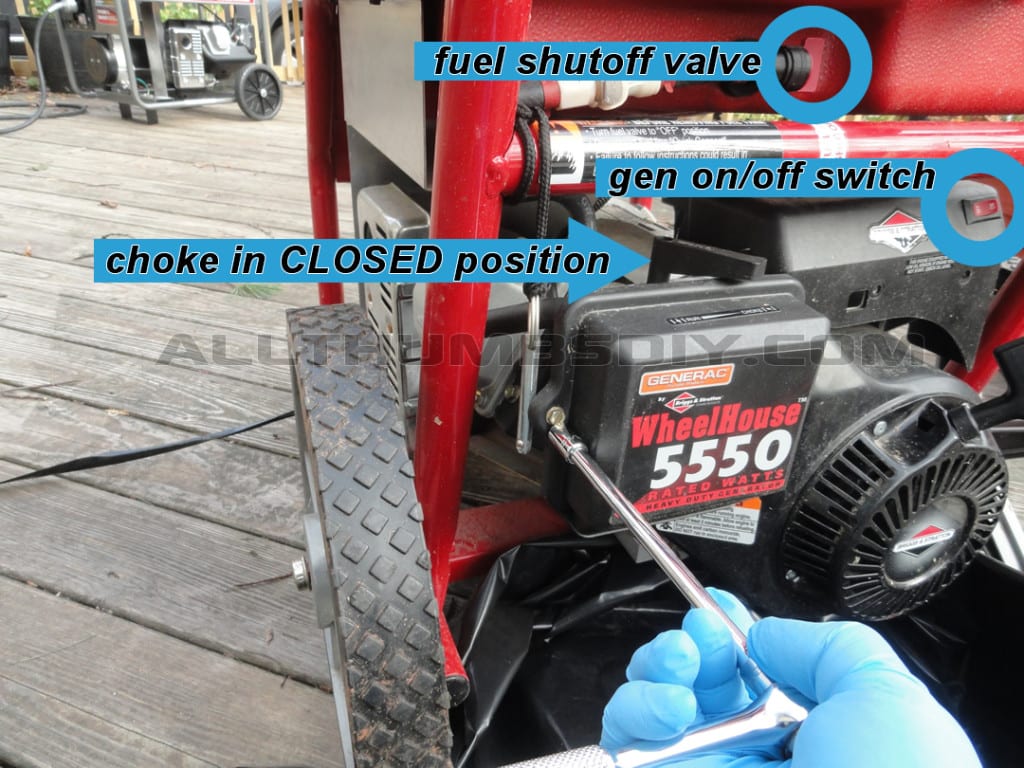
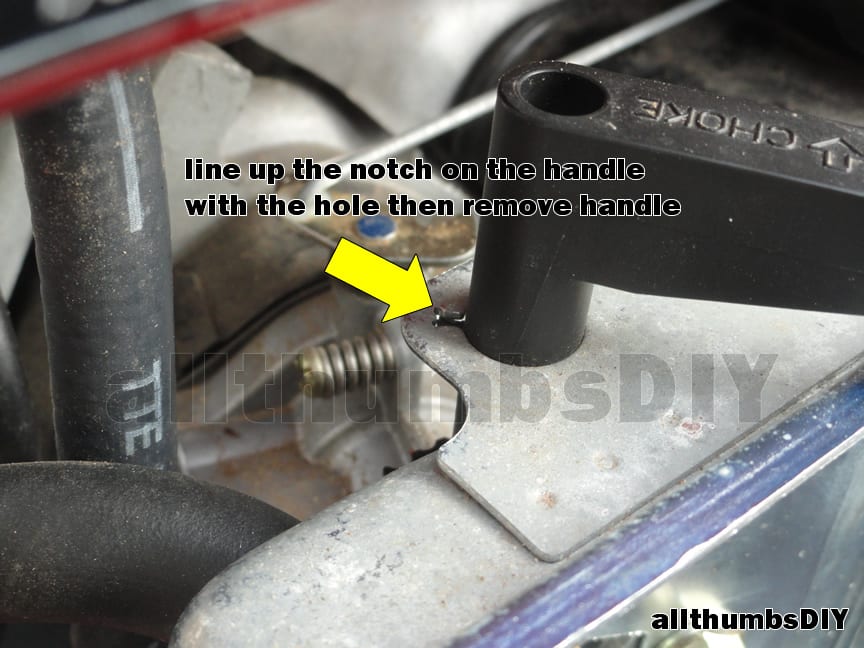
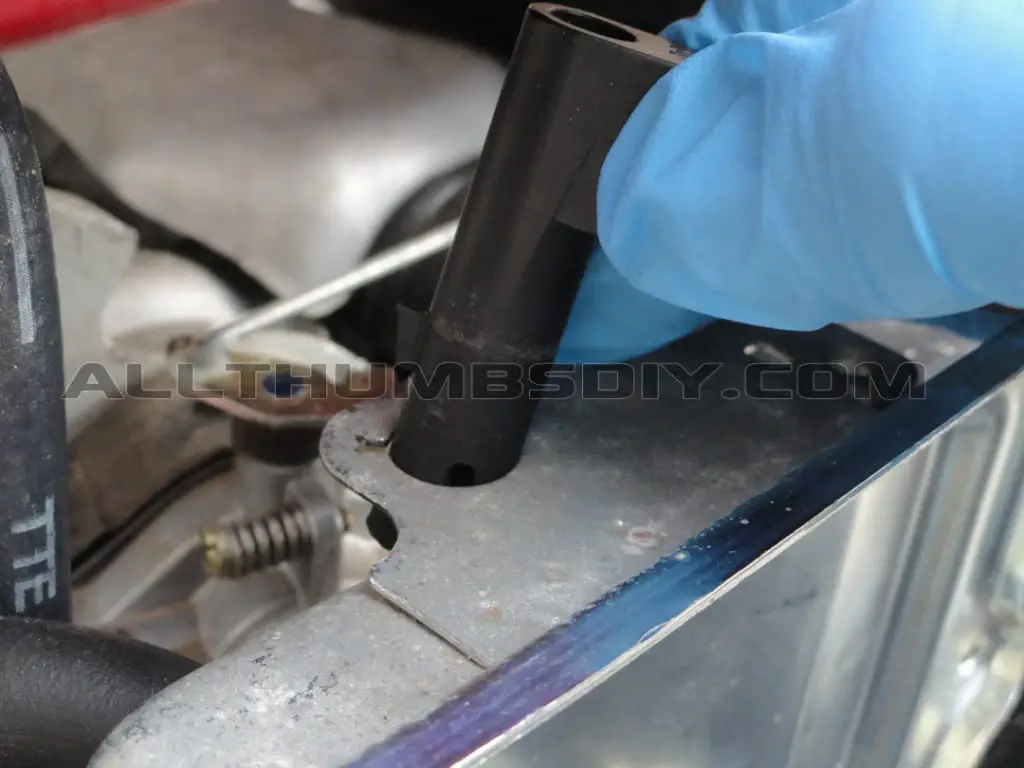
STEP 3 – Move the choke lever to CLOSED position. Make sure the handle notch is lined up with a small notch on the metal plate and gently pull it up (fig.1.3). Do not use excessive force. If it does not come up, double check to make sure notches are lined up and try again.
STEP 4 – Using a 12 mm socket to remove two nut washers holding down the metal air intake shroud/housing. Remove the shroud and set it aside.
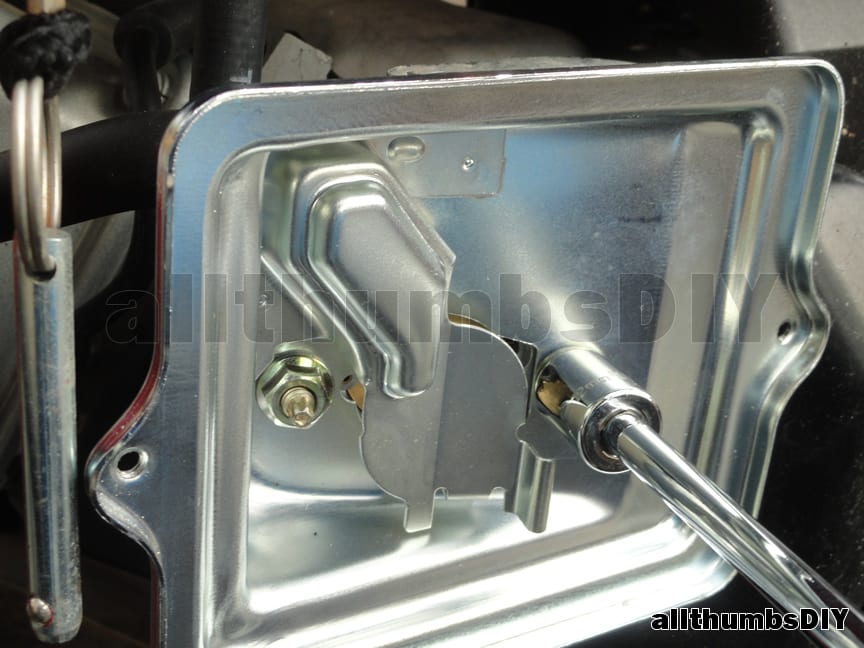
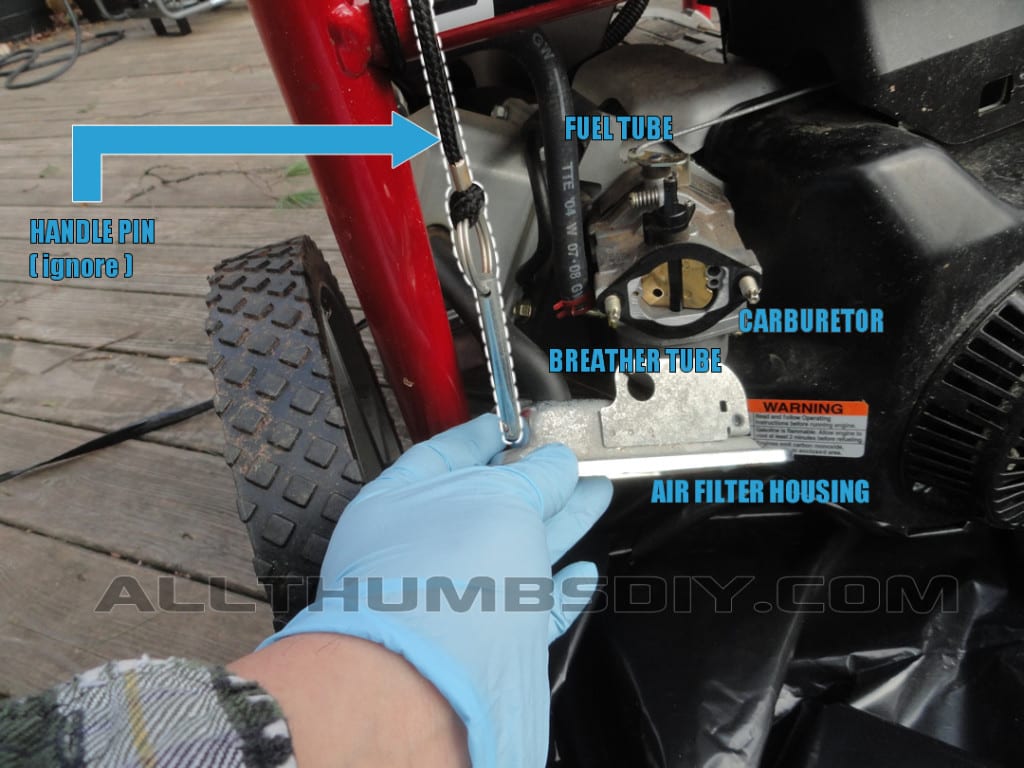
STEP 5 – Pry off the breather tube from the air filter housing by gently rocking it back and forth. Do not use any sharp objects.
STEP 6 – Using a pair of adjustable pliers, squeeze the hose clamp tips to open (fig.2.1) then slide it up. Gently pry off fuel hose from the fuel inlet (fig.2.2).
STEP 7 – Gently pry off the hose from the fuel inlet (fig. 2.2). Please note that some gasoline may drip out.
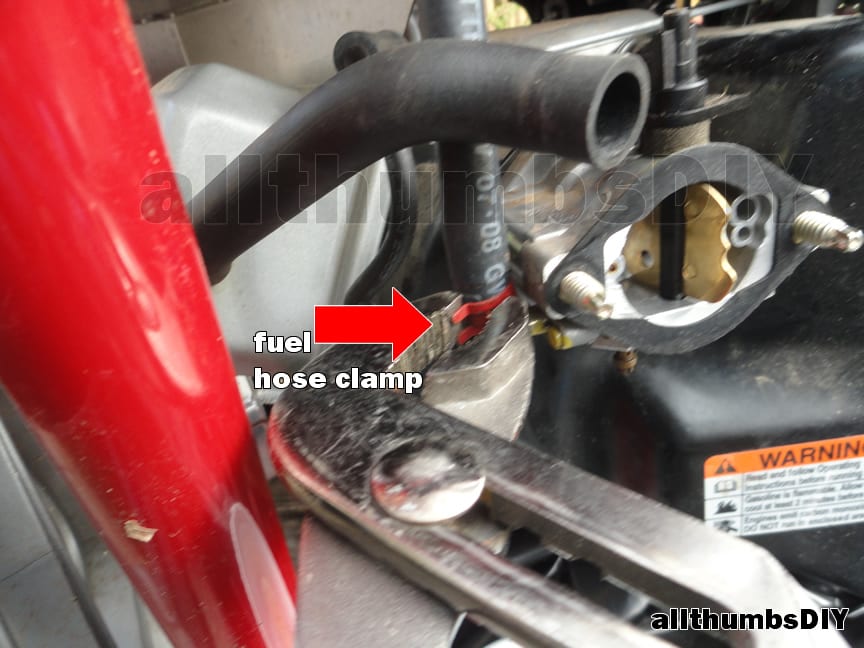
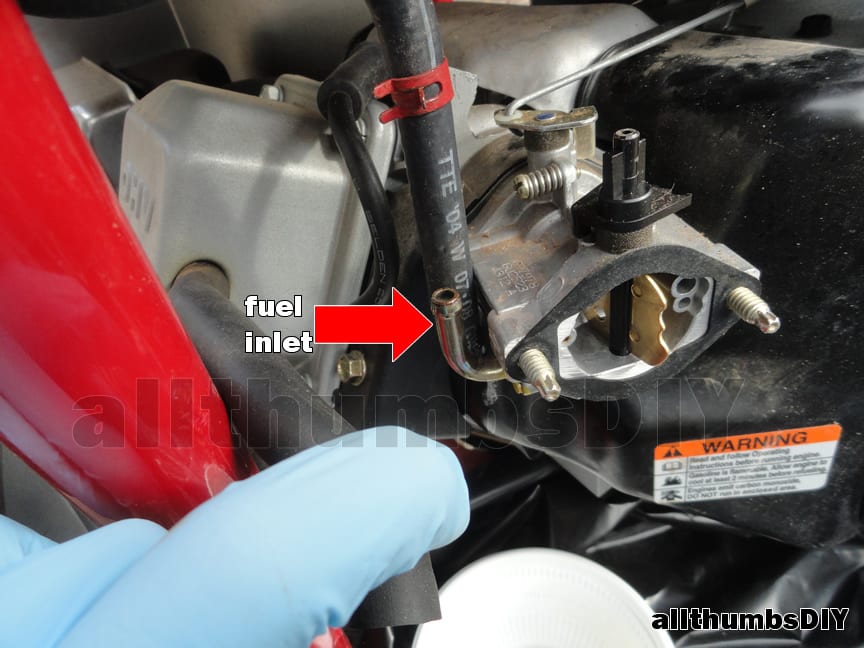
Please note that above pictures have fuel bowel already removed. As stated before, I would suggest following the steps outlined below without removing the bowel first
STEP 8 – Now we need to detach the carburetor from the engine by removing two long carb hold-down bolts. Just a fair warning that the Torx heads on these bolts are made from soft brass. Since soft brass is fairly easy to strip or crush, you want to use an external Torx to remove these bolts. If you do not have it, you can buy the E5 external Torx bit in this this Neiko set. (read my review here). Whatever you do, be careful as these bolts are not available!
UPDATE: you can now purchase replacement (Briggs and Stratton OEM Part # 694869 ) bolts are now available here for purchase.
| If you are in a crunch, you can try using a 4 mm regular socket with a tiny piece of paper towel wrapped around the Torx head (to remove free-play). You SHOULD NOT use pliers because there is no good way to grip the head securely without crushing or stripping it. |
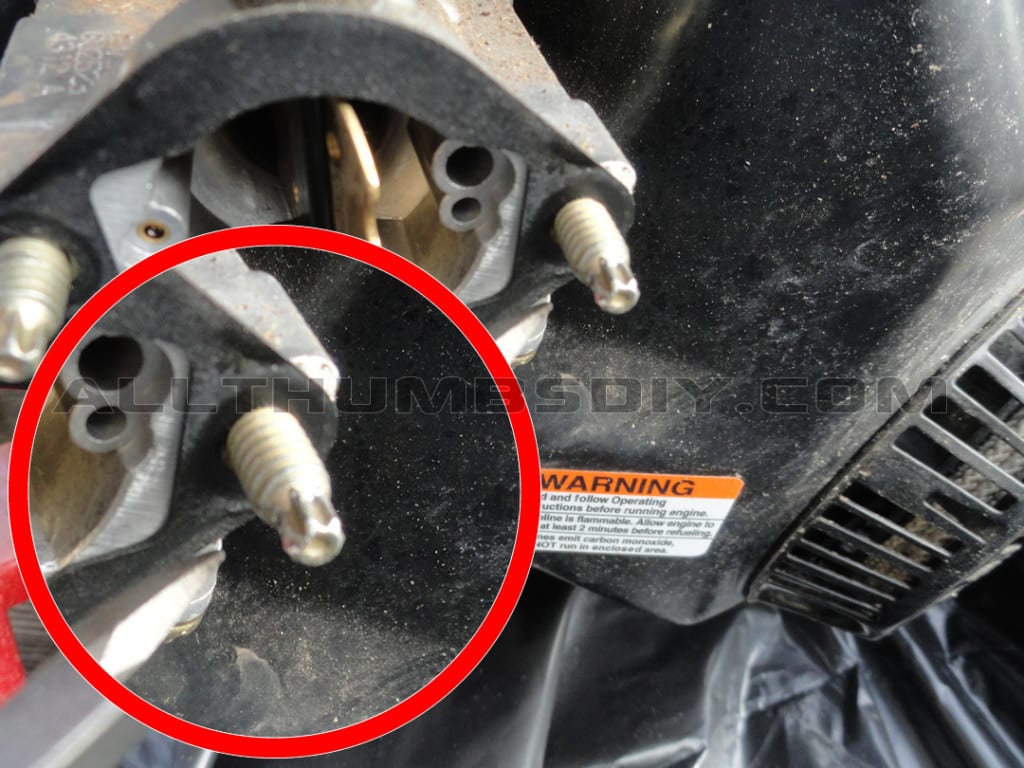
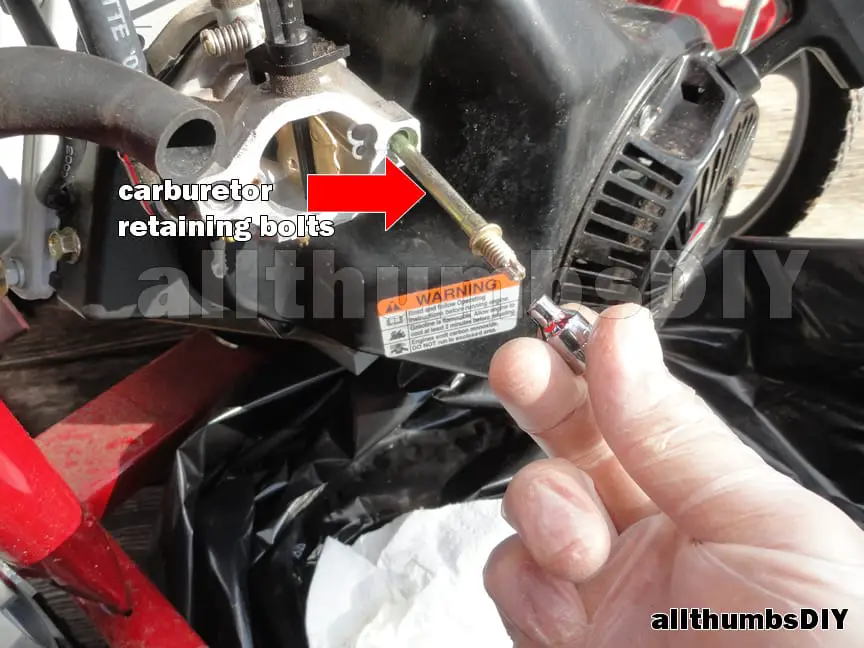
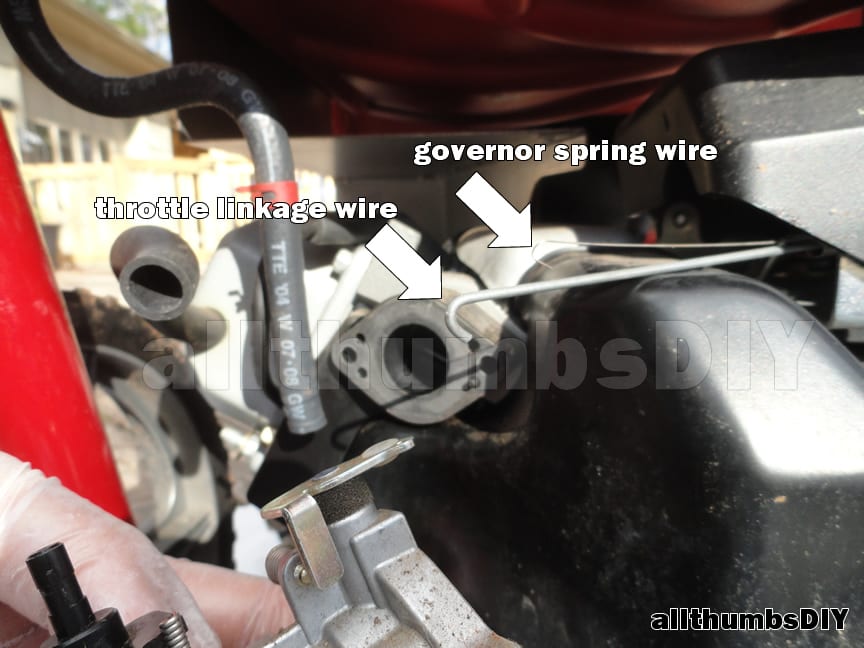
STEP 9 – While holding the detached carburetor in one hand, slightly rotate it to gently unhook the governor spring wire (thin) and a throttle linkage cable (thick) (fig.2.4).
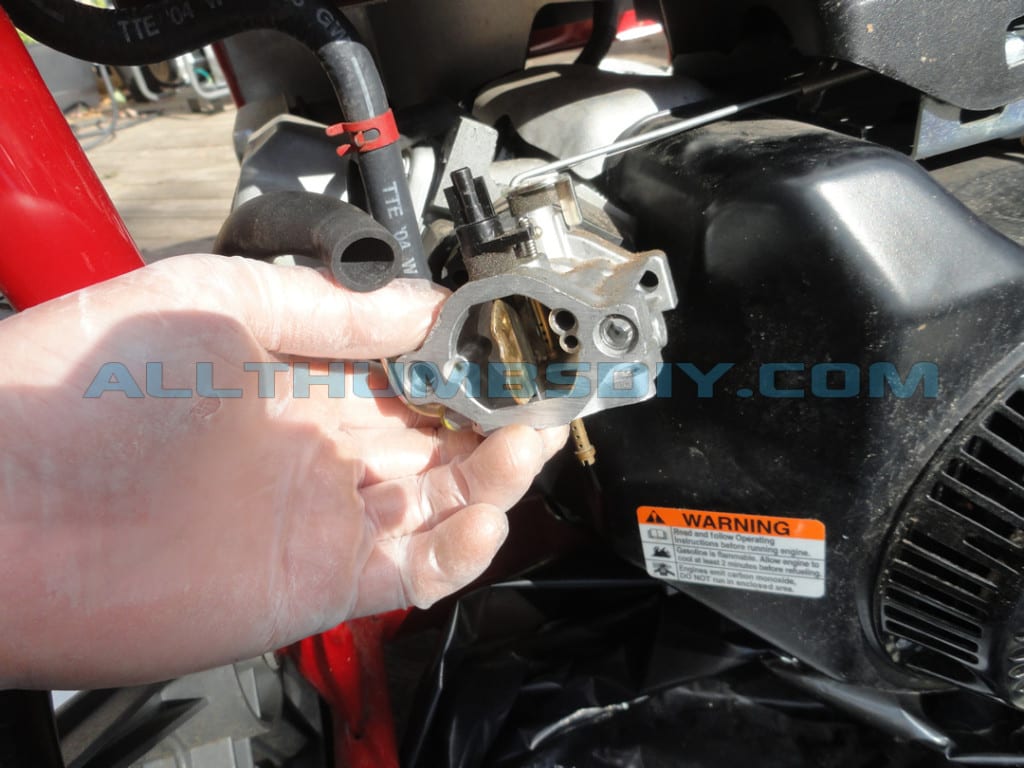
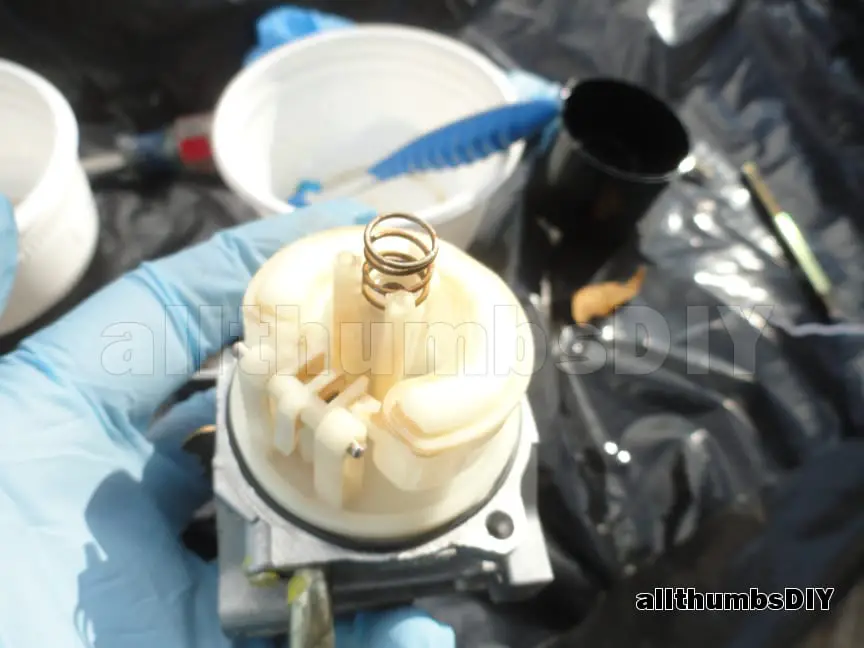
STEP 10 – Using a flat (slot) head screwdriver, remove two screws and washers that are holding down the carb fuel bowel (fig.3.1). Be careful as it will hold about 2 oz of gasoline. Also, there will be a loose spring inside (fig.3.3). This is what keeps the internal plastic components (float, gasket-float bowel) in place. Make sure to keep it in a safe place. Note how in fig.3.2, you see reddish deposit on the bottom with some flakes. These are deposits from a stale gasoline. Use a small amount of carb cleaner to clean them as much as possible.
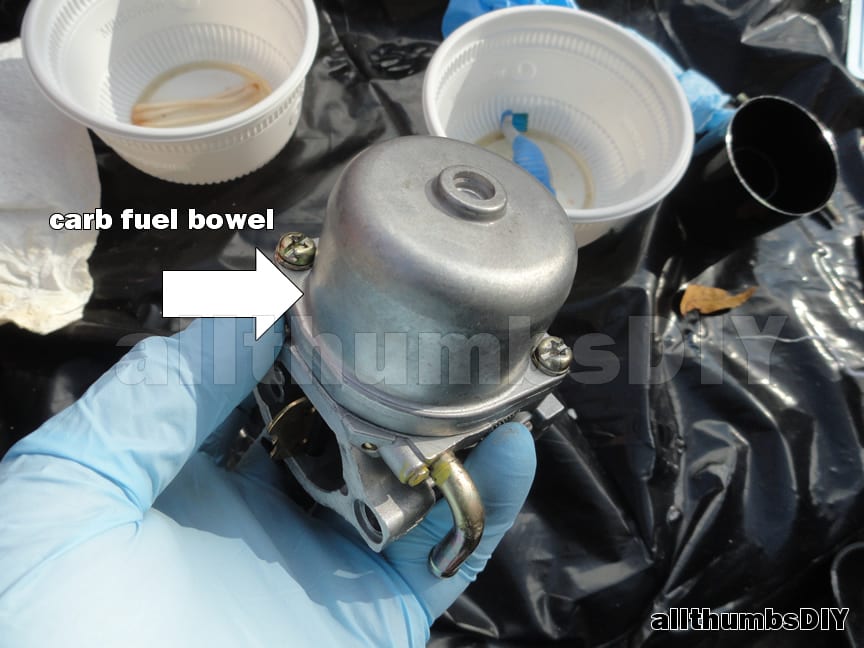
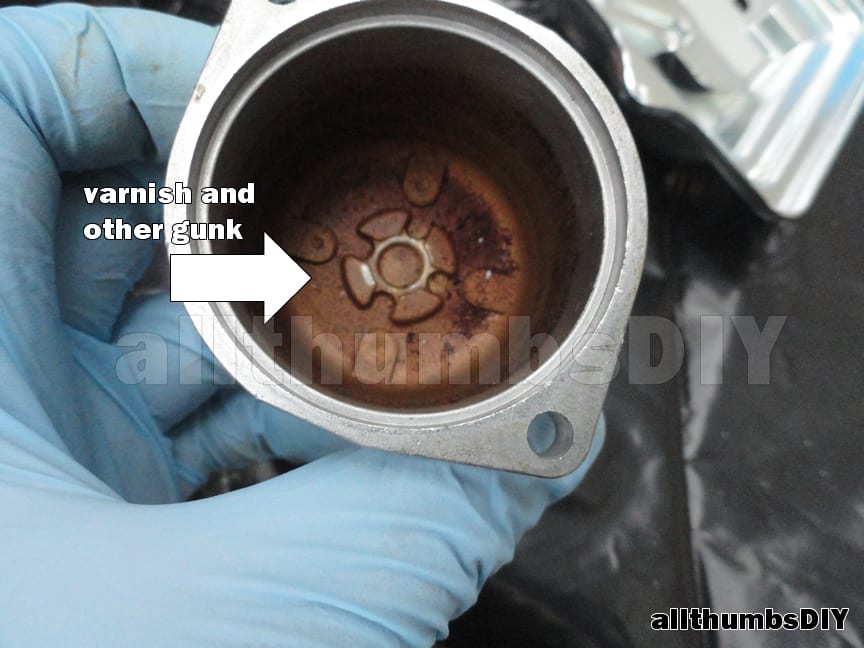
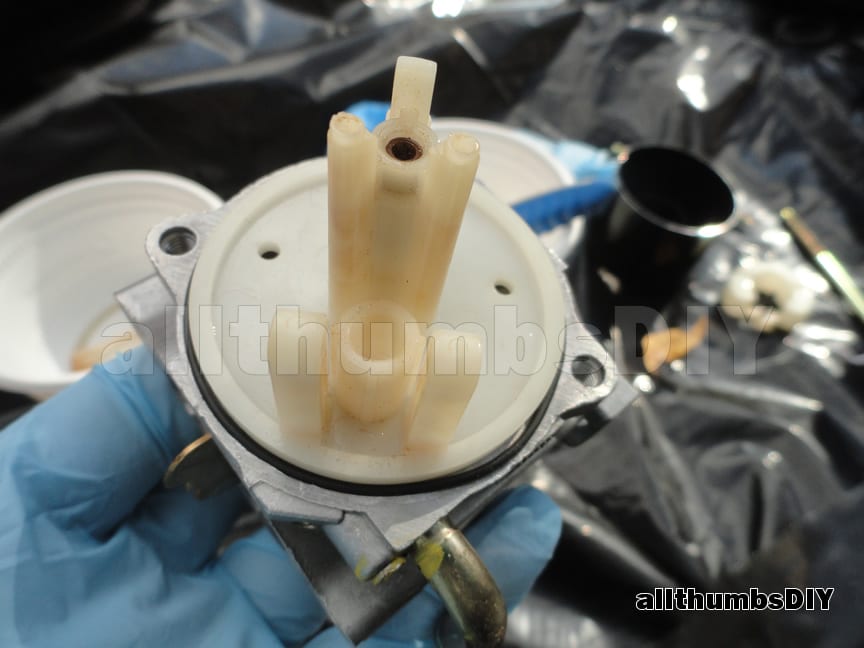
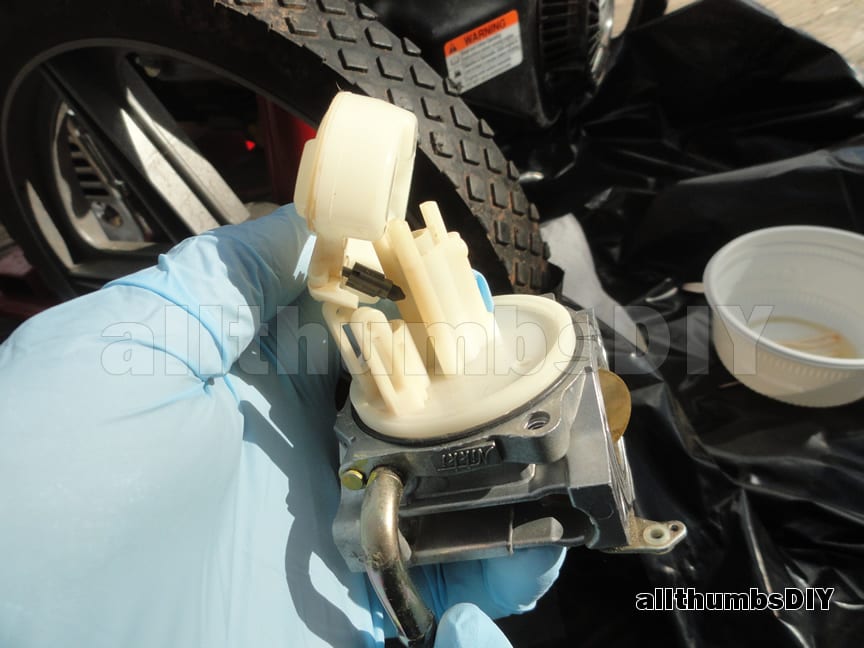
STEP 10 – A large plastic piece that is now visible is called a float (fig.3.4). Carefully slide out the hinge pin using a straight paper clip. One end of the hinge pin is crimped so it can only slide out in one direction so if you cannot easily slide it out, try pushing it in the other direction.
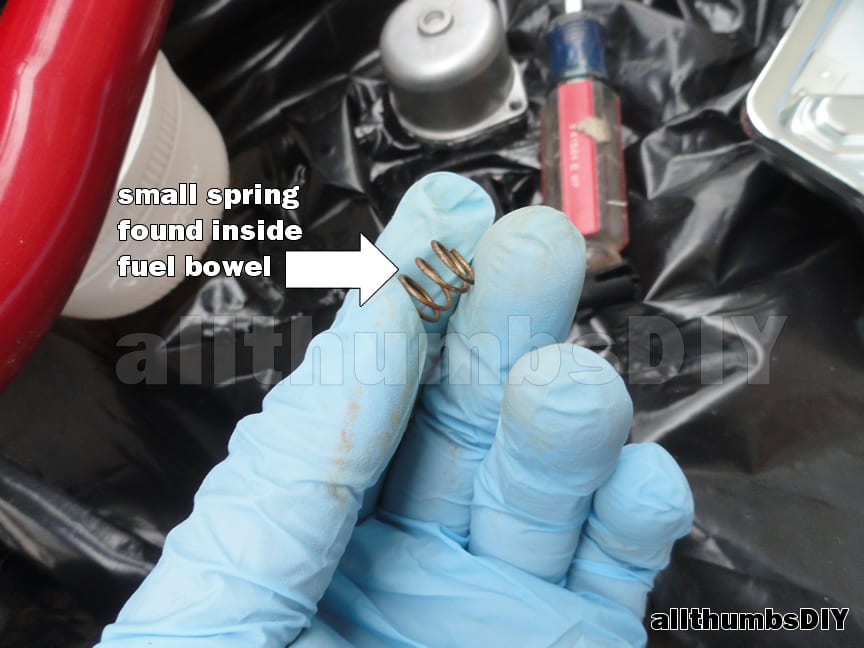
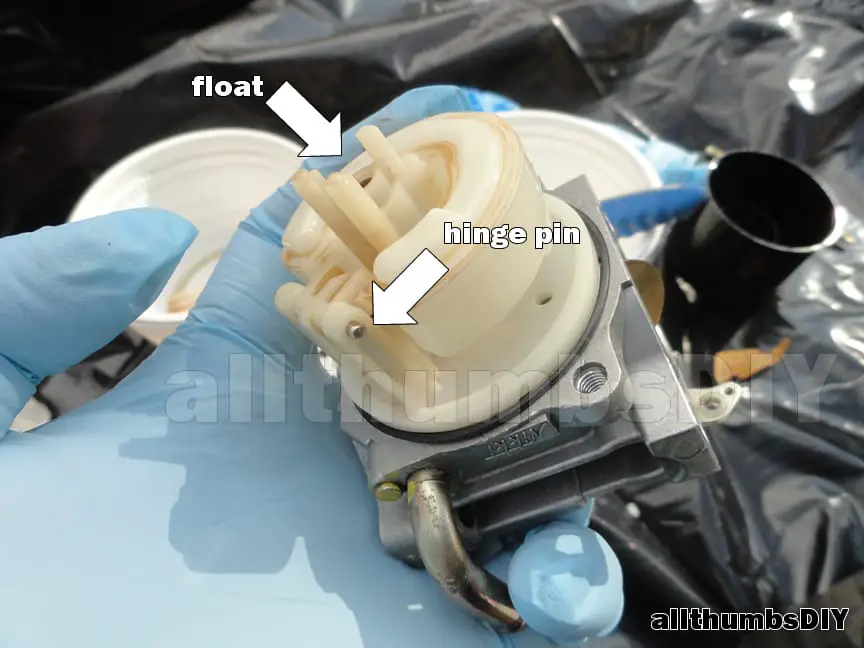
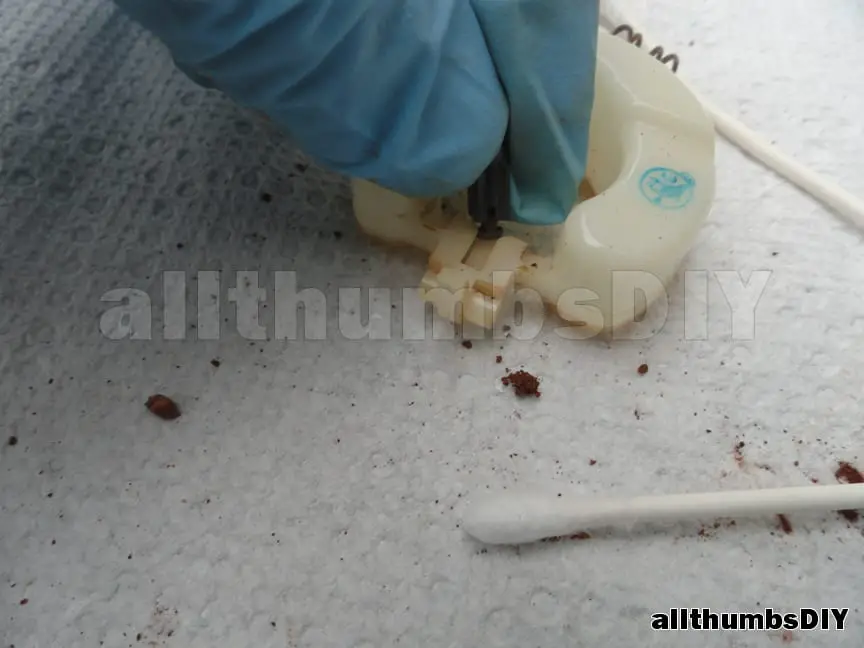
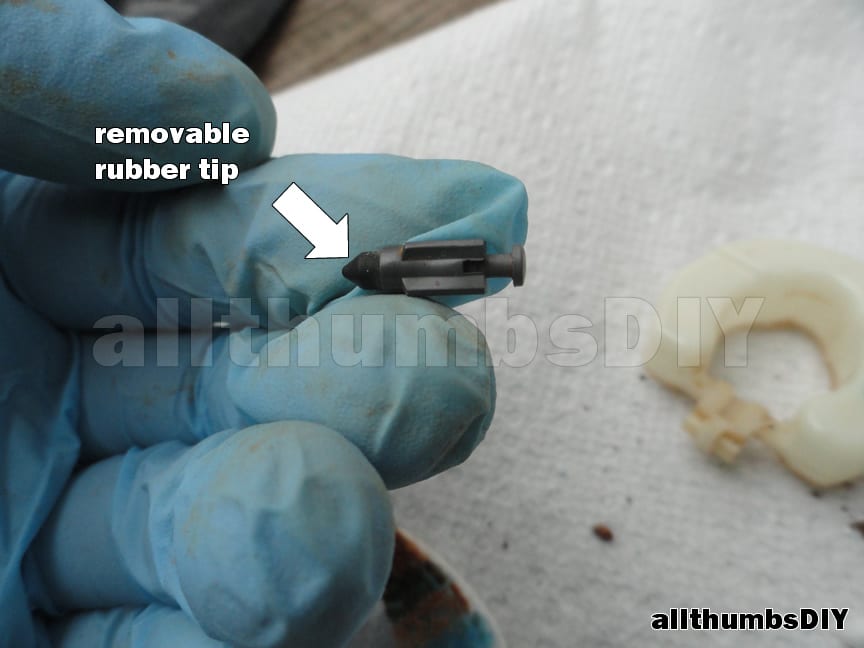
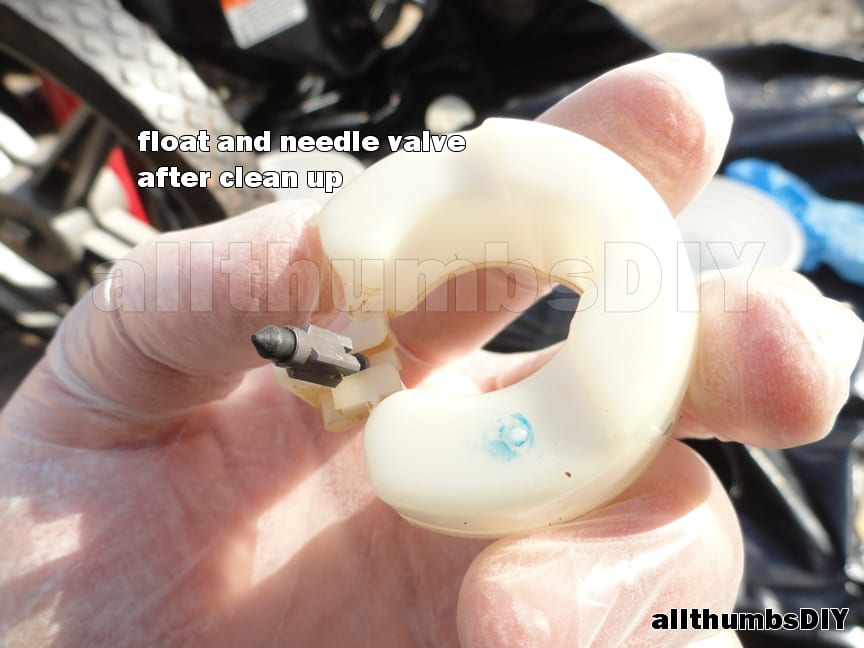
STEP 11 – Once a float is detached, there will be a small gray “needle valve pin” (fig.3.5, fig.3.6 and fig.3.7). This needle pin either opens or shuts the fuel valve so it is critical that tip needs to be free of any debris. Be careful as the tip is made of rubber and it will pop off easily (and very easy to lose!). Using some fresh gasoline mixed with carb cleaner (2:1 ratio), clean off all gunk (as stated previously I do not like using straight solvent on plastic pieces as it may chemically degrade plastic components) so what I did was to dip some cotton swabs in the mixture clean off the gunk. Fig.3.8 is the end result of that cleaning which took about 20 minutes.
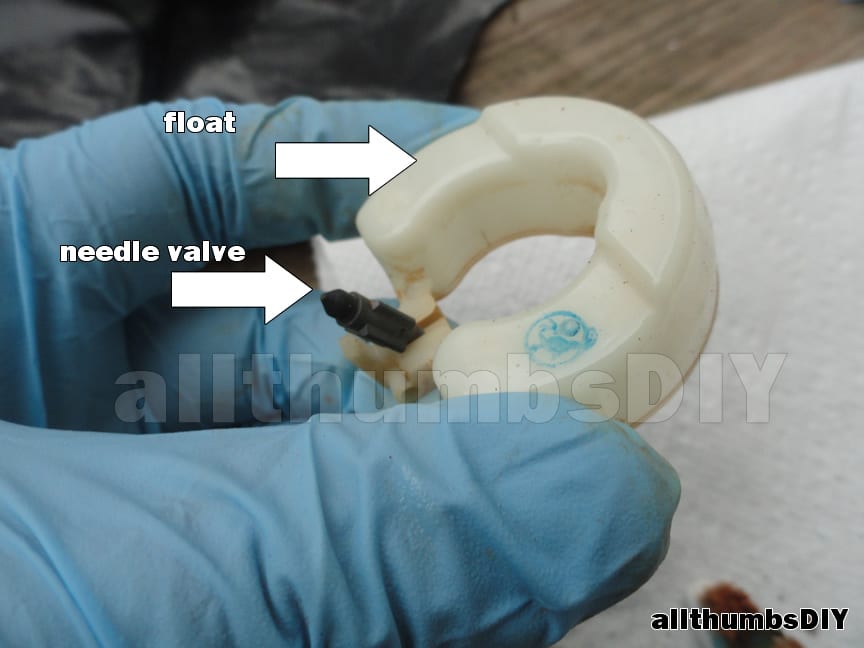
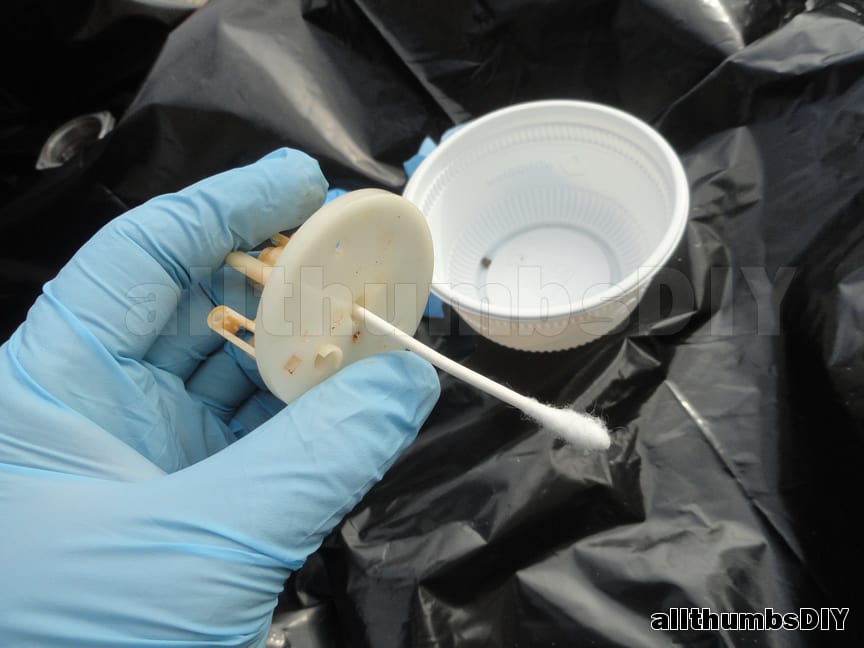
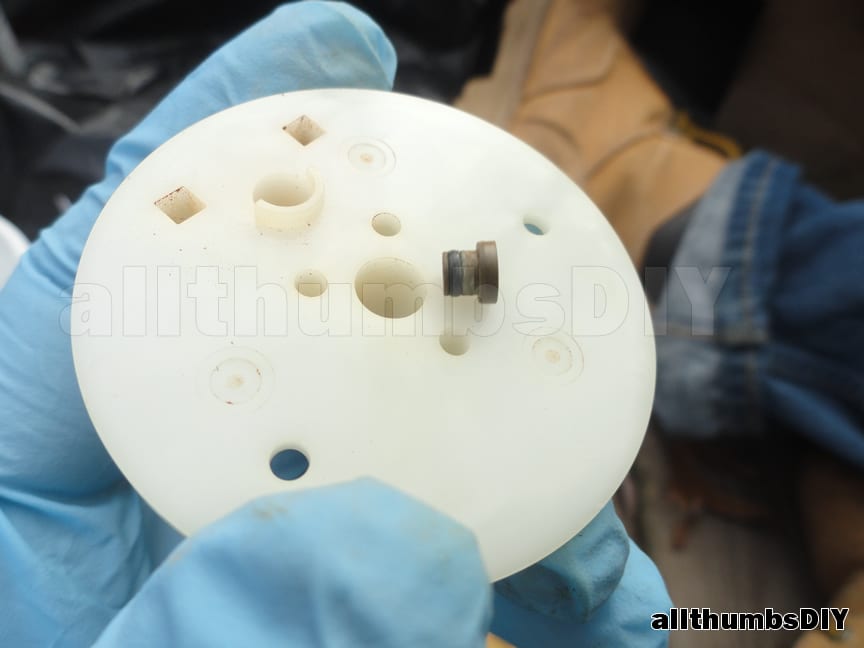
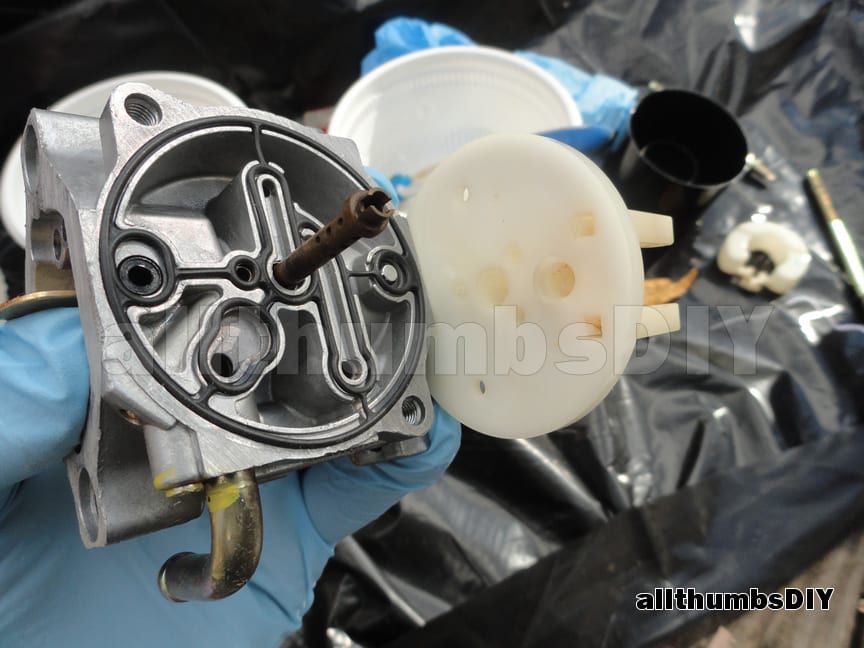
STEP 12 – The remaining round plastic piece (gasket-float bowel) channels the gasoline flow. Note how the inlet and outlet ports are clogged with junk (fig.4.1 and fig 4.2).
STEP 13 – The inlet also has a small (ceramic) piece with an O-ring that gets open/shut by a needle valve (fig.4.2 and fig.4.3). Gently pop it out by using a Q-tip with firm force. DO NOT use an awl or any sharp, pointed objects which can enlarge the hole or worse, crack it.
STEP 14 – Using a thin wire, clean off as much gunk as you can, not just the hole but all surrounding area (fig.4.4) If there is gunk left, needle valve cannot seat properly which will flood the engine (which is what happened after my first clean attempt).
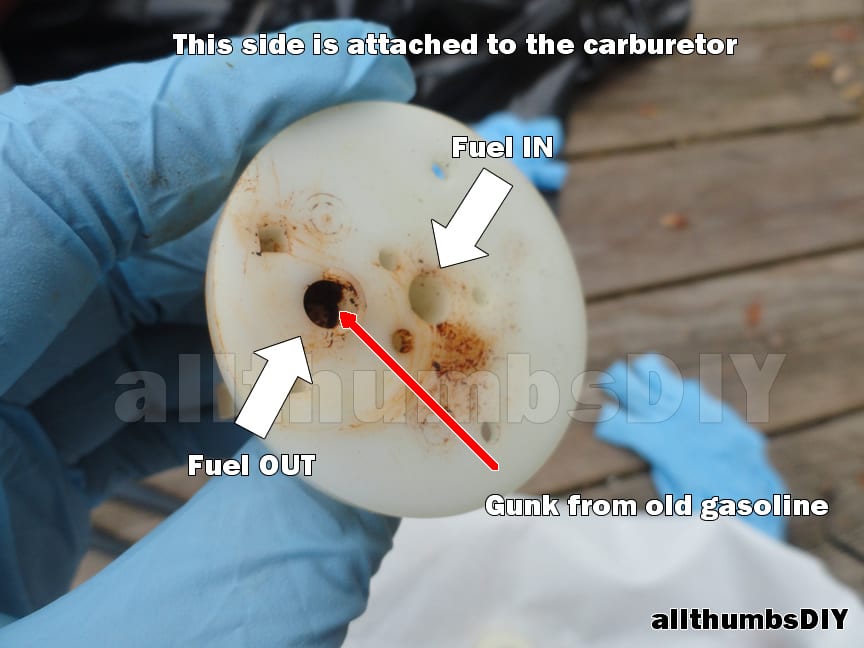
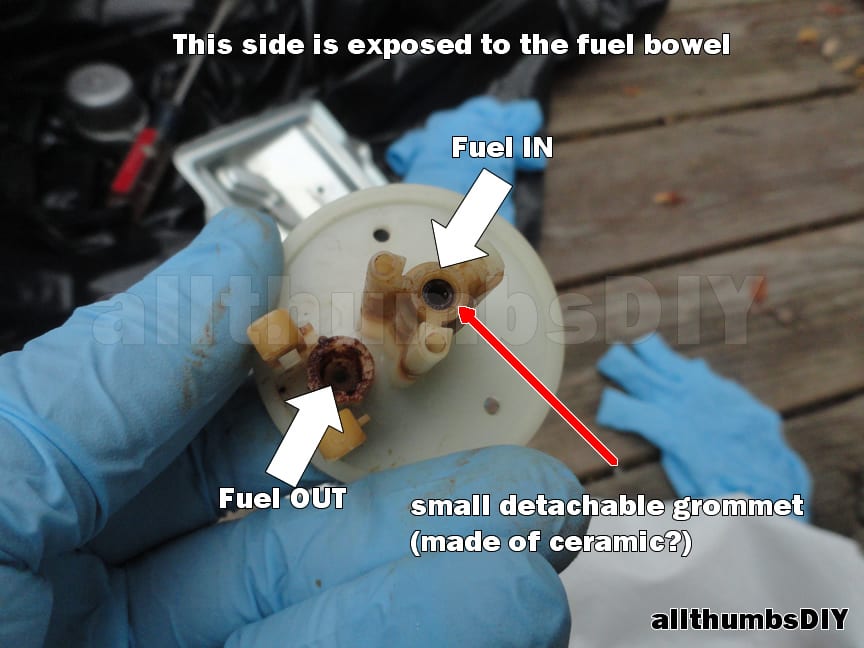
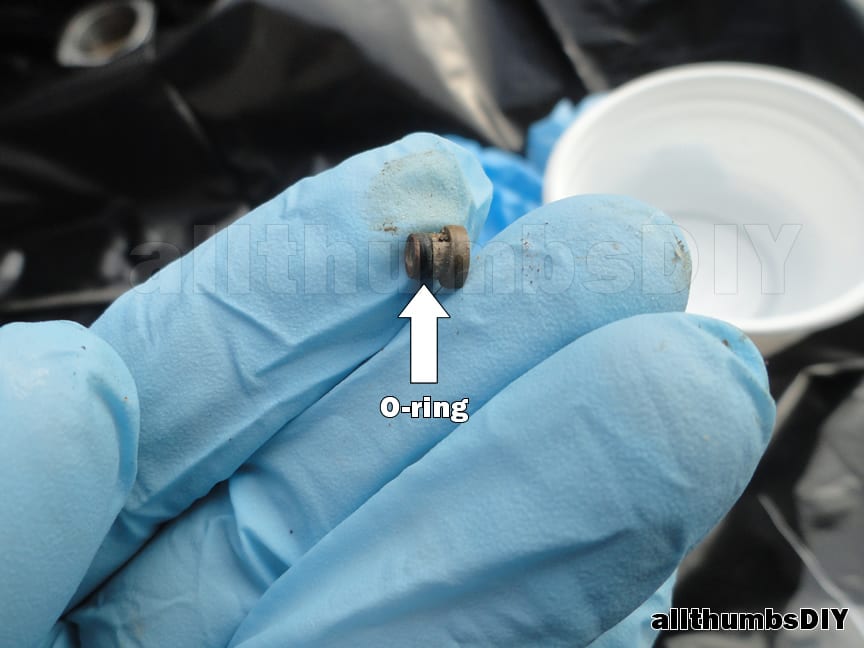
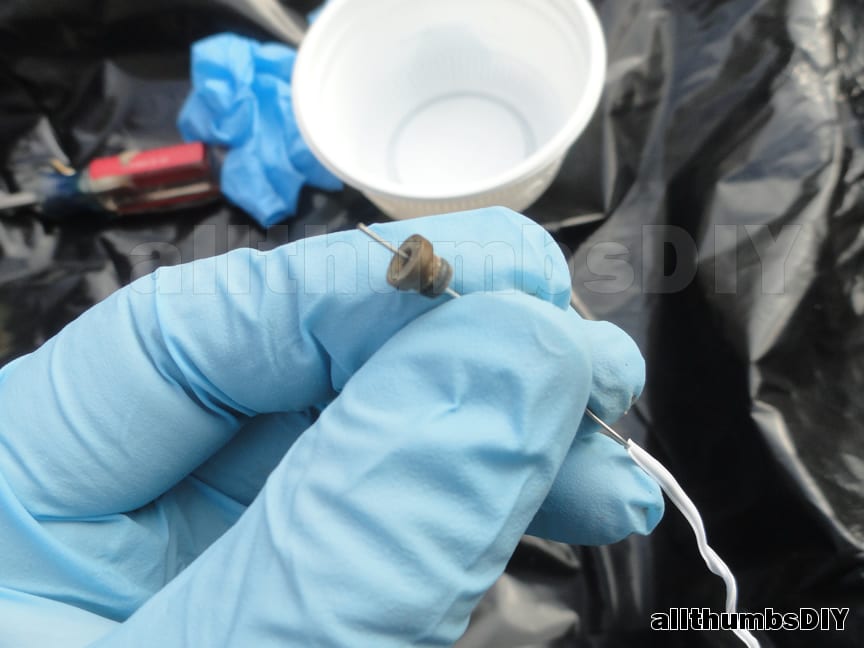
STEP 15 – This is what it looks like after thorough cleaning (fig.5.1 and fig.5.2).
STEP 16 – To pop the ceramic flow control piece back in, I used a small piece of leftover 12 AWG electrical wire. You can also use a Q-tip, but make sure you hear the “click” to ensure that the O-ring has been seated properly.
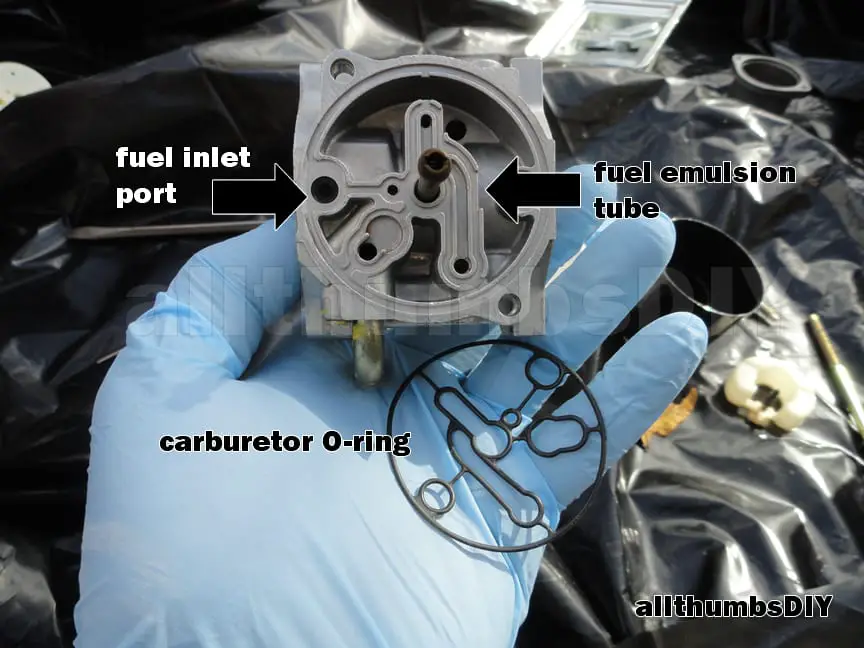
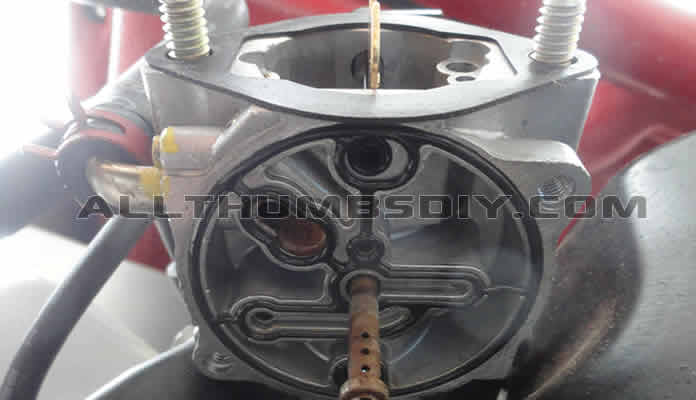
STEP 17 – On to cleaning the carburetor itself. VERY Carefully remove the O-ring seal and put it aside (Fig.5.3; BTW, if you are attempting to clean your carb that is still attached to the engine, it will be fairly impossible for you to re-mount this O-ring so you may *not* want to remove the O-ring).
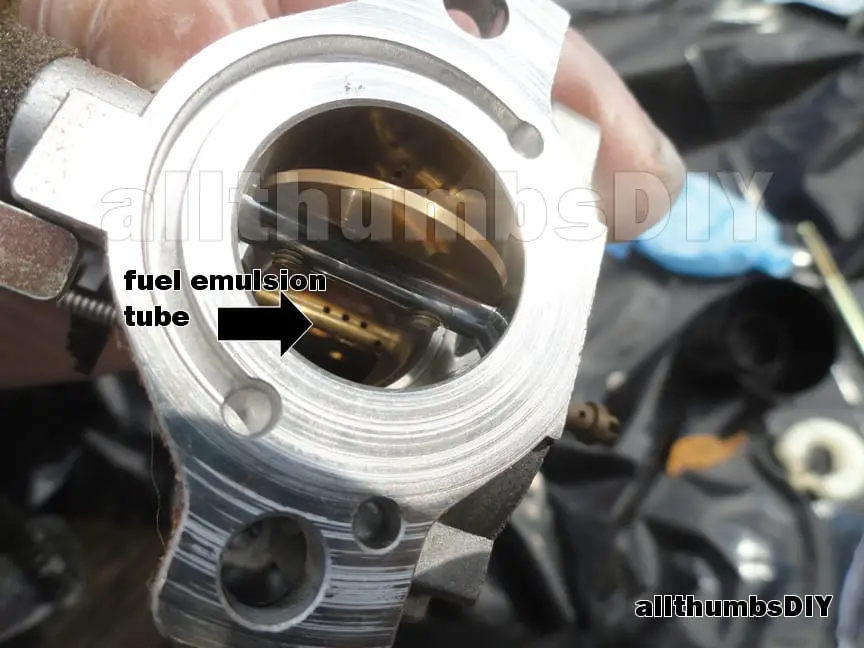
STEP 18 – Using a carb cleaner, carefully and thoroughly clean all holes and grooves (I also used Q-tip to scrub the gunk off). Pay special attention to the inlet port where fuel enters the carburetor chamber. I ended up using Q-tips soaked with straight carb cleaner (no plastic inside the carburetor) to clean the inside, making sure to not leave behind any Q-tip remains.
| Carb cleaner can unexpectedly shoot out in different directions or even deflect back at you. Make sure to WEAR EYE PROTECTION and preferably a long sleeved shirt |
STEP 19 – Now that all parts have been thoroughly cleaned, it is now time to reassemble the carburetor and re-attach it to the engine. Just use reverse steps to reinstall, making sure to install the retainer spring before seating the fuel bowel (fig.6.1 through 6.8).
The overhaul is not complete. Turn on the generator switch (marked as “ON” or “I”), open the fuel supply valve, set to full choke and pull to start. Hopefully that will get it to start up right away! My older generator actually sounded like it ran much better than my new Briggs and Stratton Storm Responder generator!
| Portable generators produce lots of carbon monoxide that is colorless, tasteless and does not smell. Follow the manufacturer’s instructions to keep it away from your house and make sure your carbon monoxide detectors are positioned near it |
Final Thoughts
Overhauling a carburetor seems taunting at first but if you have some basic skills, it really isn’t that bad.
After replacing or cleaning the carburetor, make sure to test your generator every month (every 2 weeks during hurricane season) with electrical load for at least 30 minutes.
Also, constantly rotate your stock of gasoline (use stale gas for your car).
If you are currently using extension cords for your generator, you may want to read my post titled, “How I Connected My Portable Generator to My Home” which outlines what I did to hook up my portable generator to the main load center with a generator interlock kit.
Well, that’s it for me 🙂 If you found this article to be useful, can you do me a favor and sign up for my newsletter? The signup form is found at the top of the screen on the right side.
Thanks and good luck!


Norman arrlack
Tuesday 29th of August 2023
Ran generator for first time yesterday. Started and ran as expected. This morning gas was leaking out the breather. When I start it gas gushes out of the breather. Even looks like it may have oil in it. I removed and cleaned the carb but didn’t fix the problem. Maybe bad needle valve???
kevin
Tuesday 5th of September 2023
I would disassemble the carburetor as outlined in my post. Needle valve could be stuck or it could be something else.
Dennis J Legowsky
Wednesday 7th of July 2021
My Generator starts fine but will only run for 5-10 minutes and then stops. After cooling for 15+minutes it will start and run again fine but again for 5-10 minutes. My research indicates that the low oil shutoff may be the issue, but, there is plenty of oil. It has only run for about 3o hours and is used infrequently. I have seen notes that say I can bypass the low oil module but non show how to do it with my engine. I have one wire that runs from the low oil sensor port (its only a port not the sensor which is internal) to the power switch (three pins, LOP, Center Black, Right White). I cant find a good schematic or diagram to figure this out. Suggestions. Thanks, Dennis
Steve
Wednesday 11th of November 2020
I have a Wheelhouse 5500 with a Briggs and Stratton engine. 2006 or 7 model I believe. Recently during Hurricane Zeta I ran the it for about 20 hours and notices a rattling sound coming for the unit that got progressively worse. I shut it down and started it up again with no problem but it would not provide power. Found some loose bearings on the ground under the alternator. I was told a sealed bearing failed. If so can it be repaired? Can I DIY the repair? Can I get parts? Where?
Alfred
Thursday 8th of October 2020
I have a WheelHouse 5500 and it will run for 4 to 6 hours fine but will shut down after that amount of run time as if the shut off switch was activated. It will not start and run again until I do a oil change. Then it will run fine again for another 4-6 hours. Oil still looks and smells new. Has anyone have this problem?
Ryan
Monday 17th of August 2020
Saved my ass. Thanks for the article.