

If your little ball player is afraid of sliding, I have a perfect solution for you.
Learning to slide on a carboard box is nothing new but I made a couple of tweaks so that it will be more fun for kids to learn how to slide for baseball and softball.
This home-made solution costs less than 30 bucks to make and you can easily replace the outer cardboard for free for indefinite use.
REQUIRED MATERIALS & TOOLS
- Four (or six), 48″ x 48″ single-wall brown cardboard sheets (you can usually find them for free at where plastic water bottles are sold at Costco, BJ’s or Sam’s Club)

- Roll of duct tape
- Package of Open foam flooring tiles (link here)
- NOTE 1: Please do not use any gym mats made from heavy rubber; these are typically heavy-duty rubbers and will not be good at cushioning the fall
- NOTE 2: The photo examples in my instructions shows 24×24 tiles. If you end up buying 12.5″x12.”5, you simply need to connect them together
- NOTE 3: After piecing together multiple pieces, use some duct tape on joints to prevent separation
- Utility knife and/or scissors
Can I use any other materials to slide?
There are many other options to practice sliding. If you need more information on other available options, please go read “Teaching Youth Baseball Players How to Slide Properly“
If you are unable to find cardboard box sheets, you can substitute with paper chip boards which is nothing more than a compressed pulp sheet.
These sheets feel like heavier-duty construction papers and are found where paper towels/toilet papers are sold
If you have the time, you can also visit Home Depot and Lowes to see if they have any refrigerator cardboard boxes that are being recycled. These are double-walled (thicker) so they can take more abuse from sliding.
Top cardboard sheets will start to rip after about two weeks of consistent use so make sure to have some extra hand.
Assembly Instructions
My DIY baseball sliding pad comes in two sections which are easy to transport in cars.
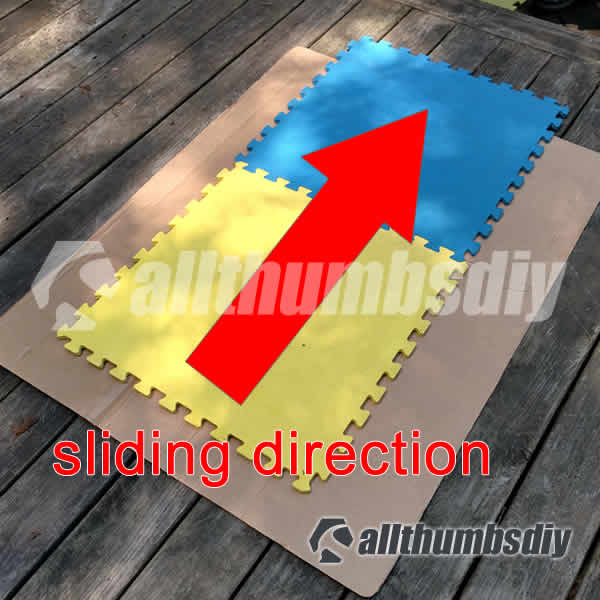
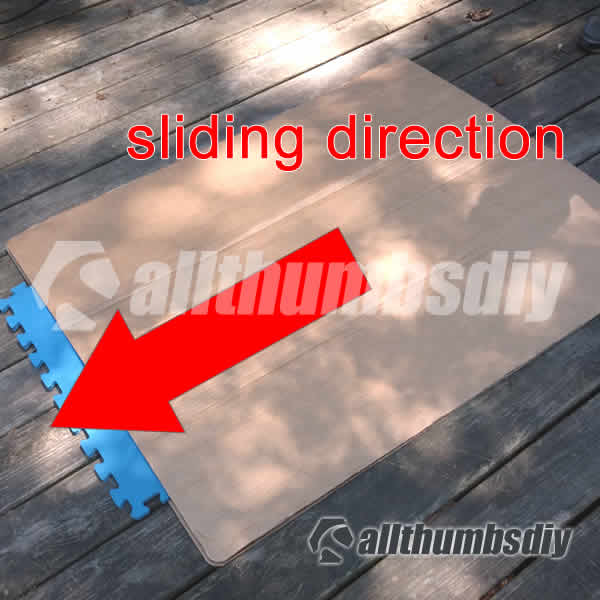
The lower section will be slightly narrower than the top section (the part that kids will land on) so that the lower section can be inserted in to the top section to provide a smooth sliding surface.
Carboard sheets usually come in 47″x47″ size which in my opinion is too wide to transport for most vehicles so will be trimming down the size.
These two sections can easily be assembled/disassembled on site without any tools (other than a short piece of duct tape).
- Step # 1 – Let’s make the top section first. Using a sharp utility knife and a long level (or scrap piece of a straight 2×4), cut the width down to 36″. Leave the length at 47 inches. Cut two sheets this way.

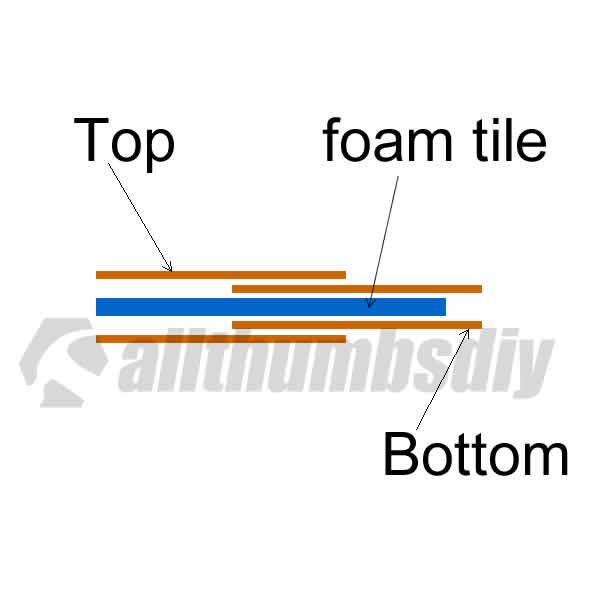
- Step # 2 – I used several leftover foam tiles that came in 24″ x 24″ squares. If you don’t have any, make sure to pick up a set of inexpensive foam tiles I mentioned in the previous section above. Whichever option you go with, you need the total width to be approximately 24 inches wide (so you can end up using a single tile width or double width if purchase smaller tiles)
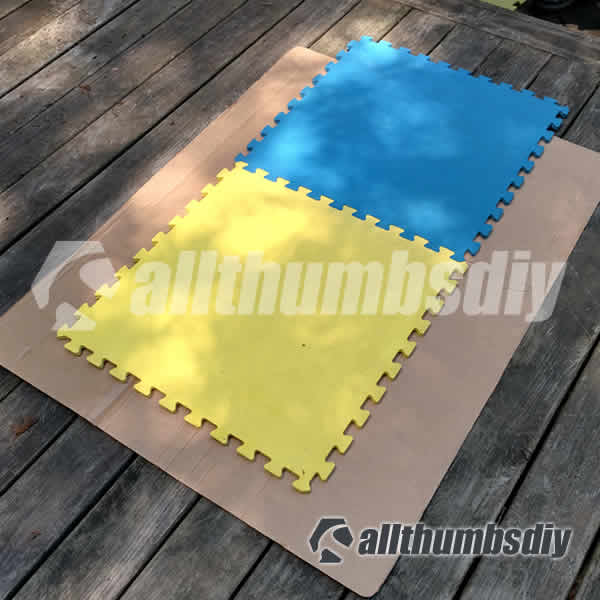
- Step # 3 – Please note that the foam tiles are position slightly lower. This will provide a small area of cushion for the lower section so it minimizes the chance of it sling out. If you have a child that is very hesitant to try to slide, add a second layer of foam tiles to provide extra cushion.
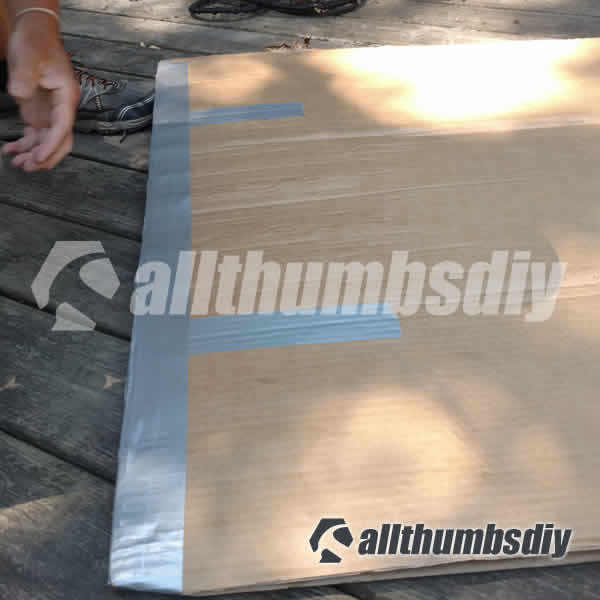
- Step # 4 – Secure the foam tiles with duct tape on three sides.

- Step # 5 – Add a second (top) sheet so that the foam tiles are sandwiched between two cardboard sheets
- Step # 5 – Apply duct tape to all sides (except the bottom side where a tile is sticking out)
- Step # 6 – Now that the top section is complete, let’s work on the bottom. As stated previously, we want the bottom section to be partially inserted into the top section so that the join does not snag while sliding. To accomplish that, we are going to reduce the width from 36″ to 33″ (1.5″ reduction on either side). Leave the length at 47″. Cut two sheets.

- Step # 7 – Apply duct tape to all three sides (except the top edge) to the lower section
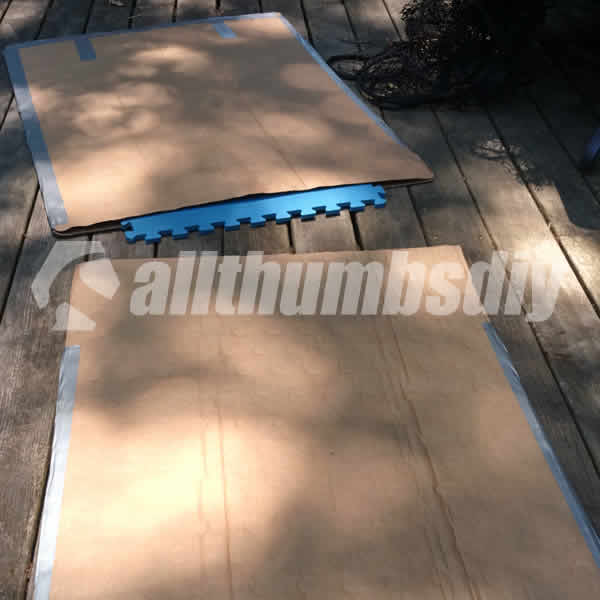
Please note that the bottom section of my sliding pad does NOT have any foam tiles inside. But if you have very young players, you may consider adding extra tiles to the lower section.
Summary
I had tremendous success in getting my young players to learn how to slide in a safe and fun way.
I hope you found this article to of help to you as well.