• Skip to main content
  • Skip to secondary menu
  • Skip to primary sidebar
  • Skip to footer
  • Storage Shed
  • Portable Generator Shed
  • Backyard Batting Cage
  • Backyard Swing Set
cropped-allthumbsdiy-header-v78-fl.jpg

AllThumbsDIY.com

home improvement projects for do-it-youselfers

Header Advertisement HappyOodles.com
  • Appliances
    • Dishwashers
    • Dryers
    • Refrigerators
    • Washers
  • Building
  • Elect
  • HVAC
  • Outdoor
    • Backyard Batting Cage
    • Backyard Ice Rink
    • Backyard Swing Set
    • Bicycles
    • Geo Dome Play Climber
    • Landscaping
  • Plumbing
  • Power Equip
    • DIY Gaskets
    • Leaf Blowers
    • Generators
    • Snowblowers
  • Tools

How to Replace a Trane Blower Motor – Part 2

July 18 by kevin 12 Comments

allthumbsdiy-images-how-to-replace-trane-blower-motor-d10-part2-header

DANGER, WILL ROBINSON – READ FIRST

How to Replace a Trane Blower Motor is a multi-part series article, broken into Part 1, and Part 2.


ABSTRACT

Part II of the article series contains information on removing the old blower from Trane XL80 air handler / furnace and replacing it with a new motor and capacitor from Dayton.

STEP-BY-STEP REPLACEMENT GUIDE

  1. Click here for previous steps from Part 1
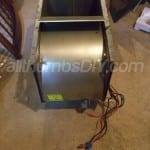
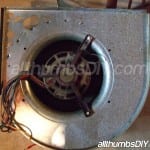
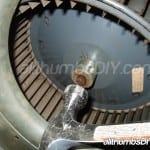
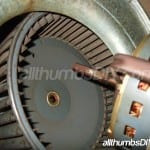
  2. Slide out the fan shroud towards you (you will need to carry the weight to slide it out (fig.6.1, 6.2, 6.3 and 6.4). At this point, take a special note the front of the housing with the arrow (fig.6.1 and fig.6.3 – yellow arrow). This indicates the direction of the fan rotation which will in turn, match the rotation direction of the motor. You will need to put it back in the exact same direction as before.
  3. allthumbsdiy-images-how-to-replace-trane-blower-motor-a75-remove-motor-shroud-2-fl
    fig.6.1
    allthumbsdiy-images-how-to-replace-trane-blower-motor-a80-remove-motor-shroud-3-fl
    fig.6.2
    allthumbsdiy-images-how-to-replace-trane-blower-motor-a85-blower-motor-completely-removed-fl
    fig.6.3
    allthumbsdiy-images-how-to-replace-trane-blower-motor-a90-blower-motor-shroud-side-view-fl
    fig.6.4
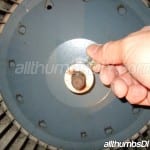
  4. From the left side of the housing, remove the square nut that is attached to the shaft using a pair of pliers. This square locking nut holds the blower motor shaft in place (fig.6.5).
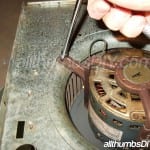
  5. From the right side, remove 3 screws holding the motor mounting bracket using a 5/16″ socket (fig.6.6).
  6. Using a hammer, lightly tap out the blower motor shaft (fig.6.7) to loosen the blower motor from the fan shroud (fig.6.8).
  7. allthumbsdiy-images-how-to-replace-trane-blower-motor-a95-remove-square-locking-screw-fl
    fig.6.5
    allthumbsdiy-images-how-to-replace-trane-blower-motor-b10-remove-motor-mount-fl
    fig.6.6
    allthumbsdiy-images-how-to-replace-trane-blower-motor-b15-tap-out-spindle-fl
    fig.6.7
    allthumbsdiy-images-how-to-replace-trane-blower-motor-b20-left-out-motor-fl
    fig.6.8
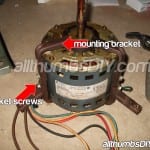
  8. Remove the motor and mounting bracket. Please note that mounting bracket consists of top and bottom brackets joined by 6 metal screws (fig.6.9).
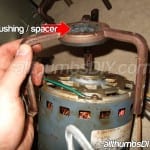
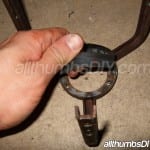
  9. Remove two screws from each bracket leg holding the motor. Remove the top and bottom brackets and safely store the screws to use later (fig.6.10).
  10. Remove the old rubber bushing that was attached to the bottom bracket (fig.6.11). We will not need this bushing because the new motor comes with a bushing/spacer.
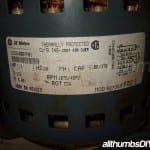
  11. Take a closer look at the old GE motor label (fig.6.12) and note the specifications.
  12. allthumbsdiy-images-how-to-replace-trane-blower-motor-b25-old-motor-fl
    fig.6.9
    allthumbsdiy-images-how-to-replace-trane-blower-motor-b50-old-busing-spacer-fl
    fig.6.10
    allthumbsdiy-images-how-to-replace-trane-blower-motor-b55-remove-bottom-bushing-fl
    fig.6.11
    allthumbsdiy-images-how-to-replace-trane-blower-motor-b25-old-motor-2-fl
    fig.6.12
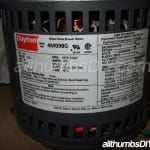
  13. Compare the specs between old motor (fig.6.12) to new motor (fig.6.13) to ensure compatibility. Please note that new motor comes in with a 3 speed vs 4 speed with the old motor. There is a slight degradation in efficiency but I was told that Dayton motor was certified by Trane to be a compatible product. If you have the time, you may want to search for an exact match.
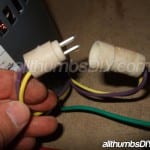
  14. On a more positive note, a new Dayton motor has a nifty connector (fig.6.14) which allows you to change the direction of the motor spin by flipping the connection (Clockwise=PURPLE TO PURPLE and YELLOW TO YELLOW; Counter-clockwise=PURPLE TO YELLOW and PURPLE TO YELLOW).
  15. Insert the new motor into the bottom bracket (fig.6.15)
  16. Attach the top bracket to the motor (fig.6.16)
  17. allthumbsdiy-images-how-to-replace-trane-blower-motor-b35-new-motor-dayton-4m098g-fl
    dig.6.13
    allthumbsdiy-images-how-to-replace-trane-blower-motor-b40-dayton-reversible-direction-connector-fl
    fig.6.14
    allthumbsdiy-images-how-to-replace-trane-blower-motor-b65-install-new-motor-to-bracket-fl
    fig.6.15
    allthumbsdiy-images-how-to-replace-trane-blower-motor-b70-install-new-motor-to-bracket-2-fl
    fig.6.16
  18. Due to new bushing being slightly thinner than the old one, there was a very small “play” so I shortened the alignment screw holes on each bracket legs by one notch (fig.6.17) and re-installed six screws.
  19. Cutoff excess spindle screws stubs with a hack saw (fig.6.18)
  20. Carefully note the flat side on the spindle and line it up to the fan shroud
  21. Insert the motor, checking the make sure that flat side lined up on the other side; then re-attach the square screw
  22. With motor in place, spin it lightly to make sure that fan is balanced and is not hitting the shroud
  23. Re-attach the green ground wire to the motor
  24. Use previous disconnect steps in reverse to re-install everything
allthumbsdiy-images-how-to-replace-trane-blower-motor-b75-install-new-motor-to-bracket-3-fl
fig.6.17
allthumbsdiy-images-how-to-replace-trane-blower-motor-b77-install-new-motor-to-bracket-4-fl
fig.6.20
allthumbsdiy-images-how-to-replace-trane-blower-motor-b78-new-motor-wiring-fl
fig.6.19
allthumbsdiy-images-how-to-replace-trane-blower-motor-b798-new-motor-back-in-shroud-fl
fig.6.20

 
Well, another successful project! If you found this article to be useful, why not share it by clicking on one of the social icons below. Oh, and by the way, don’t forget to sign up for my newsletter!
 

RELATED POSTS

  • How to Replace a Trane Blower Motor – Part 1
  • How to Replace a Trane Blower Motor – Part 2
  •  

Filed Under: Component Replacement, HVAC Tagged With: blower motor replacement, trane blower fan replacement, tranel xl 80

Affiliate Programs Keeps AllThumbsDIY Free

AllThumbsDIY.com participates in the Amazon Services LLC Associates Program, an affiliate advertising program designed to provide a means for sites to earn advertising fees by advertising and linking to Amazon.com.

Additionally, AllThumbsDIY.com participates in various other affiliate programs, and we sometimes get a commission through purchases made through our links.

*Amazon and the Amazon logo are trademarks of Amazon.com, Inc., or its affiliates

Reader Interactions

Comments

  1. Benson Zhang says

    June 30 at 10:34 pm

    You are great! great details. I will follow your instruction to get it done!

    I called repair shop. They told me that, the trip fee is 175. A replacement of motor in the ballpark of 750-850.

  2. kevin says

    July 1 at 5:16 am

    @Benson-

    Awesome! Just take your time when dis-assembling your unit, making sure to take plenty of pictures along the way.

    Good Luck!

    Kevin

  3. James Gill says

    April 20 at 3:39 am

    Hello Kevin,

    My blower motor decided to go out, so I used the amazing step-by-step that you provided and it helped me diagnose the faulty motor which caused the bad run capacitor. I seem to have the same blower motor that you had; 5KCP39JG-P752 on a Trane/American Standard Inc. XE 78. The unit model is CUD080c936A1 which I cannot find any parts for anywhere. I was curious what you thought of this motor that I found on Grainger as a replacement:
    (NOTE the 4 speed)(Capacitor also required is 7.5mfd)

    https://www.grainger.com/product/DAYTON-1-3-HP-Direct-Drive-Blower-3LU79?searchBar=true&searchQuery=3lu79

  4. kevin says

    April 25 at 4:04 pm

    @james-

    there are many different nuances when it comes to replacing motors. since i am not a trained hvac technician, i highly recommend you visit local hvac center to recommend a suitable replacement motor.

  5. Rob T says

    March 21 at 10:23 pm

    Thank you, thank you, thank you!!!!!! It took me about 3 hours total time and cost me $110 for both the motor and capacitor -that’s even less than the cost of just a service call. Although I have a Trane XE 90, the setup is about the same. Your step-by-step instructions and pictures were great. You saved me major bucks.

  6. sheryl says

    July 18 at 12:32 pm

    I seem to have a similar unit to yours, how tightly attached was that old mount on your new motor? My replacement motor seems to have a little play(can rotate a bit) and im busting a gut trying to get it one notch tighter on all 3 arms…so it wont move….before installing it onto the fan

  7. kevin says

    July 26 at 9:31 pm

    Hi Sheryl-

    It wasn’t super tight but there should not be a “play” as that will constantly vibrate and generate noise…..if you cannot tighten enough to take away the play, install couple of rubber hose washers as spacers..

  8. Mike says

    December 5 at 7:35 am

    Thanks for the valuable information…. I was quoted a price from a heating and cooling company for $900 to replace a blower motor on our 1996 Trane furnace… I was able to purchase a new blower and capacitor from Grainger for $130 and installed it myself, the furnace is working great now…
    Thanks again,
    Mike

  9. Justice Carmon says

    December 10 at 6:07 am

    Thank you so much! Our old unit was thrumming and it was due to a bearing wearing out.

    Thanks to your clear instructions, I was able to get a new motor and capacitor and cage at a local shop. Total cost $255. That was just fine, because servicemen were quoting $1000 to put in replacements. In two hours – I was being very cautious and was re using the frame and motor bracket – I had it in and working smoothly.

    My Trane XL80 is doing great now. So from my household on December 9th, 2020, I say “Thank you!”

  10. Don Linton says

    December 30 at 3:46 am

    Hi Kevin, Great pictures and descriptions of replacing the motor in the XL 80 Trane. I had one installed in 1994 and has been a faithful furnace. It has woken me up at about 3:30 am two nights in a row with a very low chatter noise. I did look in the bedroom register (I had just replaced all 5 on the upper floor this fall from the old in wall GE registers) and found a piece of black foam tape that may be causing the noise; however your video gave me the confidence to at least pull the cage out and take pictures of the motor tag, wiring and other info so I could find one and a capacitor. I live in Calgary and the cold weather is just around the corner. The OEM from one supplier 4 speed is $415 and the other not OEM is $335 CDN. The one you are using that the Trane rep said was OK is only a 3 speed which these suppliers sell for $172. Did you ask him/her what the difference between the 3 and 4 speed was? I did upgrade our attic insulation this fall as well but I want to make sure I use the right motor especially when it kicks into high on those cold days.

  11. kevin says

    December 30 at 9:42 pm

    Hey Don-

    Thank you for your kinds words. As far as the motor speeds are concerned, I believe the technician told me that it was more important to match the amp and rpm as Trane xl80 usually used two or three speeds. My replacement motor has been working beautifully since I made this repair back in 2012!

Trackbacks

  1. How to Replace a Trane Blower Motor – Part 1 says:
    July 18 at 9:13 pm

    […] How to Replace a Trane Blower Motor – Part 2 […]
Leave a Reply

Your email address will not be published. Required fields are marked *

Primary Sidebar

E-mail Newsletter

Outdoor Power Equipment

allthumbsdiy-snow-thrower-john-deere-1330se-ref-page-2-featured-img-fl

John Deere 1330SE Walk-behind Snowthrower – Reference Page 2

allthumbsdiy-echo-pb-413h-leaf-blower-troubleshoot-featured-fl

Troubleshooting and Repair Solutions for My Echo PB-413H backpack Leaf Blower

Adjusting Zama C1M-K77 Carburetor on Echo PB-413H Backpack Leaf Blower

allthumbsdiy-snow-thrower-john-deere-1330se-headlights-featured-fl

Troubleshooting a Broken Headlight on John Deere 1330SE Snow Blower

allthumbsdiy-snow-thrower-john-deere-1330se-wiring-harness-layout-featured-image-1-fl

John Deere 1330se Snowblower – Wiring Harness for the Handle Group

Popular

allthumbsdiy-swing-set-parts-updated-for-ebook-featured-fl

Swing Set Parts – updated for ebook

Backyard Batting Cage Delayed by a Snow Storm in November

Building a Backyard Batting Cage

allthumbsdiy-bike-rack-calculate-seat-post-diameter-header-fl

How to Calculate the Diameter of a Bike Seat Post

allthumbsdiy-bike-rack-rear-featured-fl

LOPEZ Alloy Rear Bike Rack Pannier Review

Footer

Recent

  • How To Fix Brake Problems on Schwinn Ascension Mountain Bikes
  • How to Troubleshoot and Replace the Main Control Board #WR55X10956 in GE Refrigerator
  • How To Test and Replace Thermistor Temperature Sensors
  • How to Know If Your Refrigerator Door Seal is Good or Bad
  • Maintaining a GE Profile PFCF1NFW Refrigerator

Categories

Search

Copyright © 2022 · Magazine Pro On Genesis Framework · WordPress · Log in