
NOTE: This is an old article. An updated post can be found here – Complete Guide to Making Your Own Window Sill

If your exterior window sill is rotted and can’t find a matching sill from your large box retailers or lumber yards, I may be able to help you.
Introduction
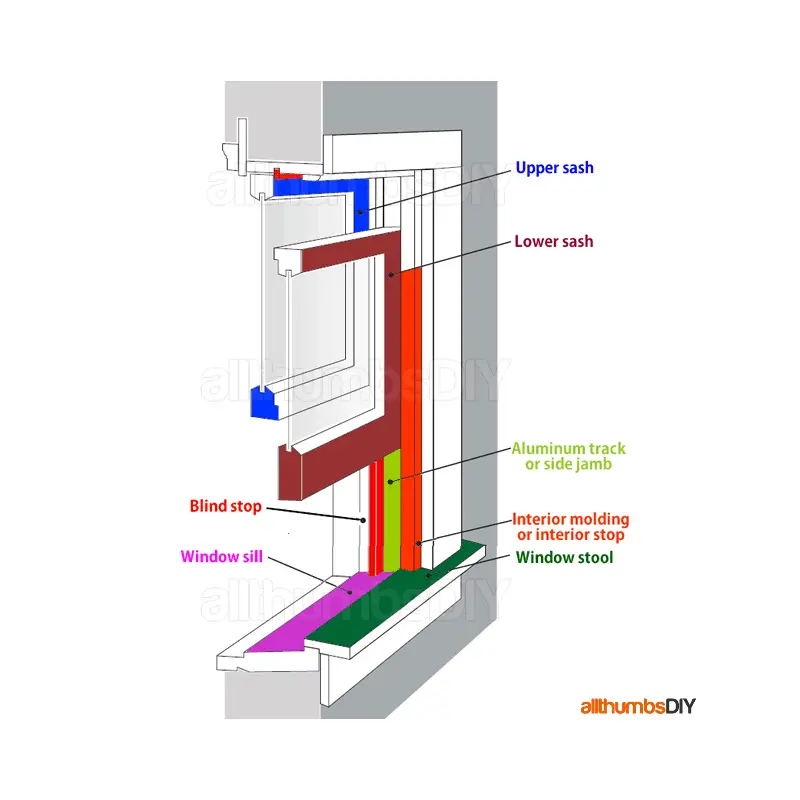
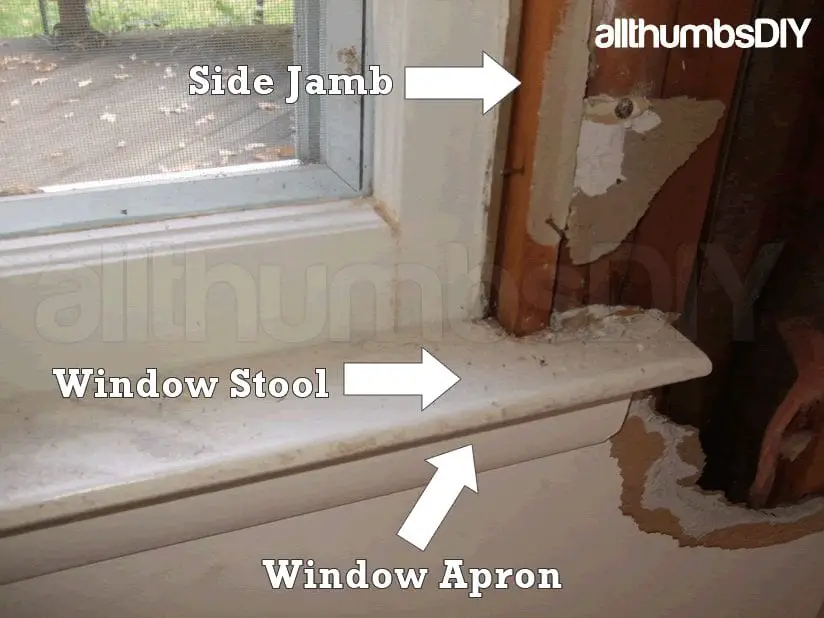
I know I have mistakenly used the term “window sill” to describe various parts of windows so let me clear that up first.
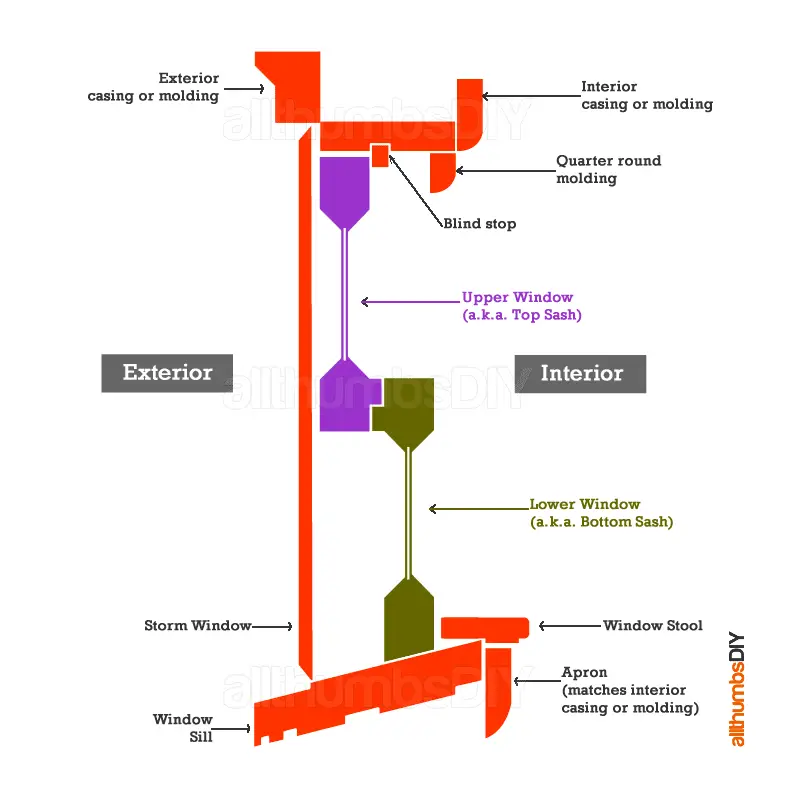
The very first thing is to take a look at your existing window sill, both from the inside and outside.
Profiling the sill nose and other finishing touches can be done AFTER we remove the old window sill but the two most important parts to know BEFORE removing the window sill are the angle and thickness of your window sill.

Other than judging the condition of the window sill, it is very difficult to accurately gauge the sill angle just by looking at it so we will need some way to measure the sill angle.
We will obtain the sill thickness by measuring the exterior sill nose as well as from the inside by removing the window stool and apron.
PLANNING
Materials
- 2″ X 6″ kiln dried lumber (or other sizes depending on your needs)
- 1 lb box of 2 1/2″ Deckmate screws
- Wood or composite shims
- Loose insulation
- Window caulk
- 1″ finishing nails
Tools
- Tape measure
- Table saw or circular saw (additional setup required)
- Inclinometer (to measure angles, you can buy or make one)
- 4″ metal drywall spatula
- Wonderbar / crawbar
- Claw hammer
- Mash hammer
- Router
- Jig saw
STEP-BY-STEP GUIDE
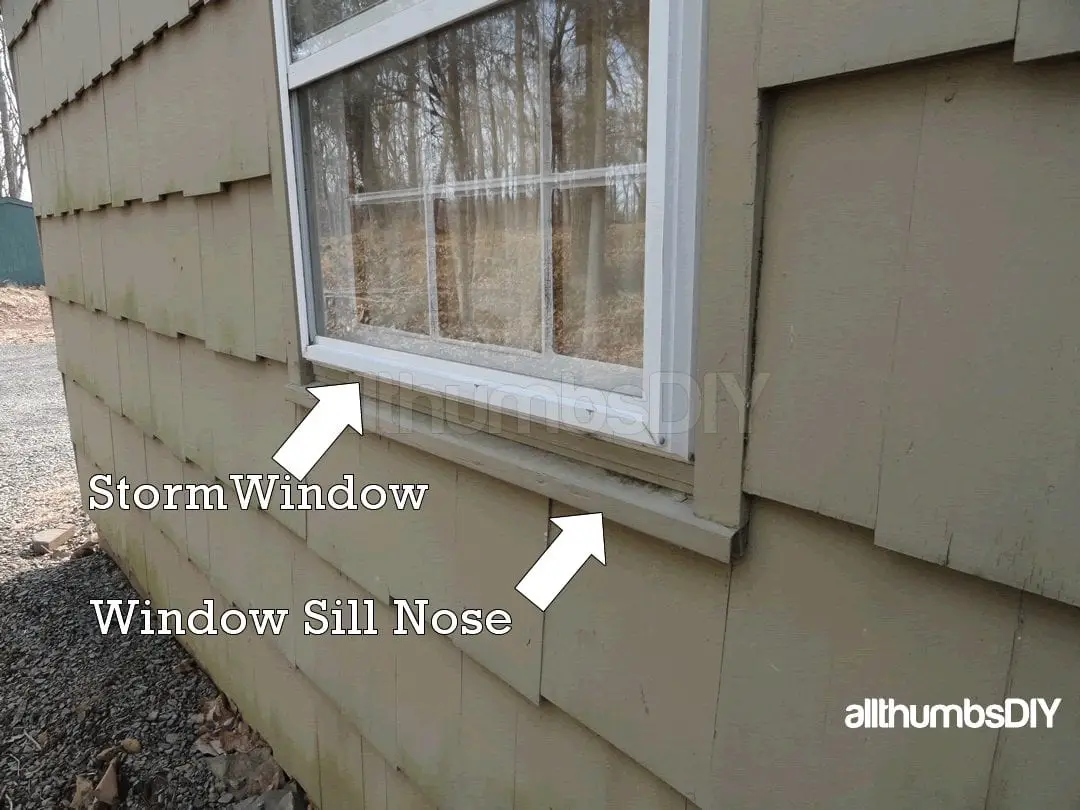
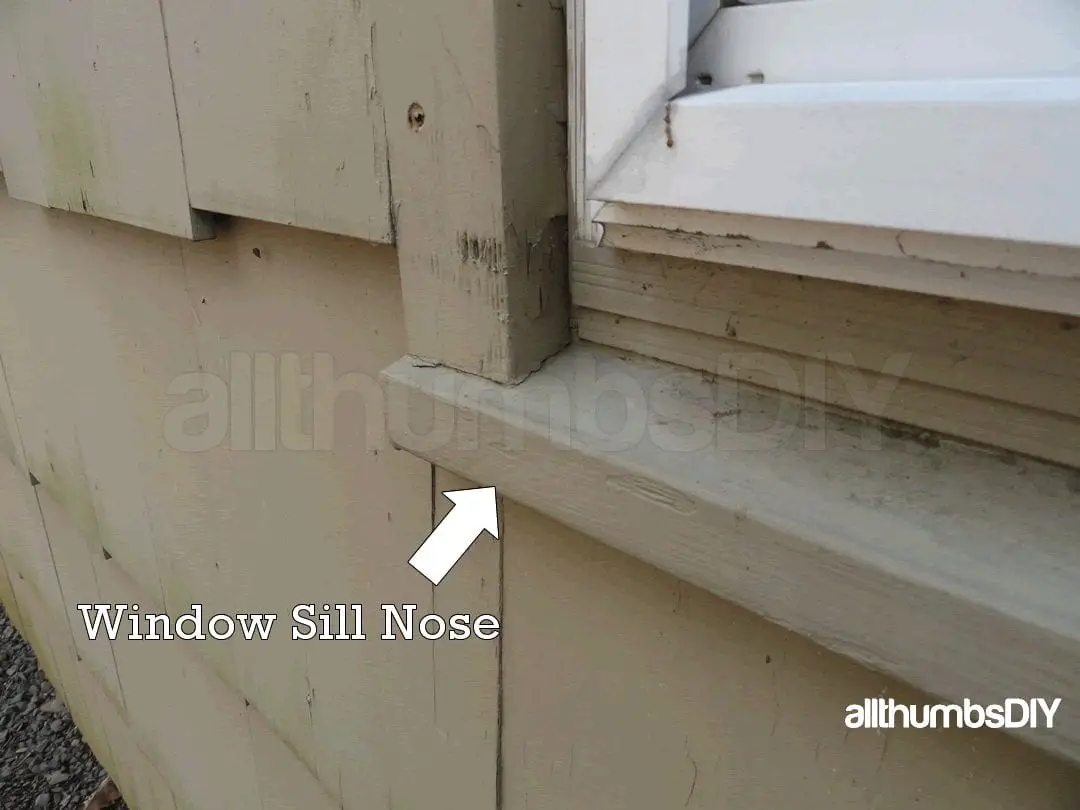
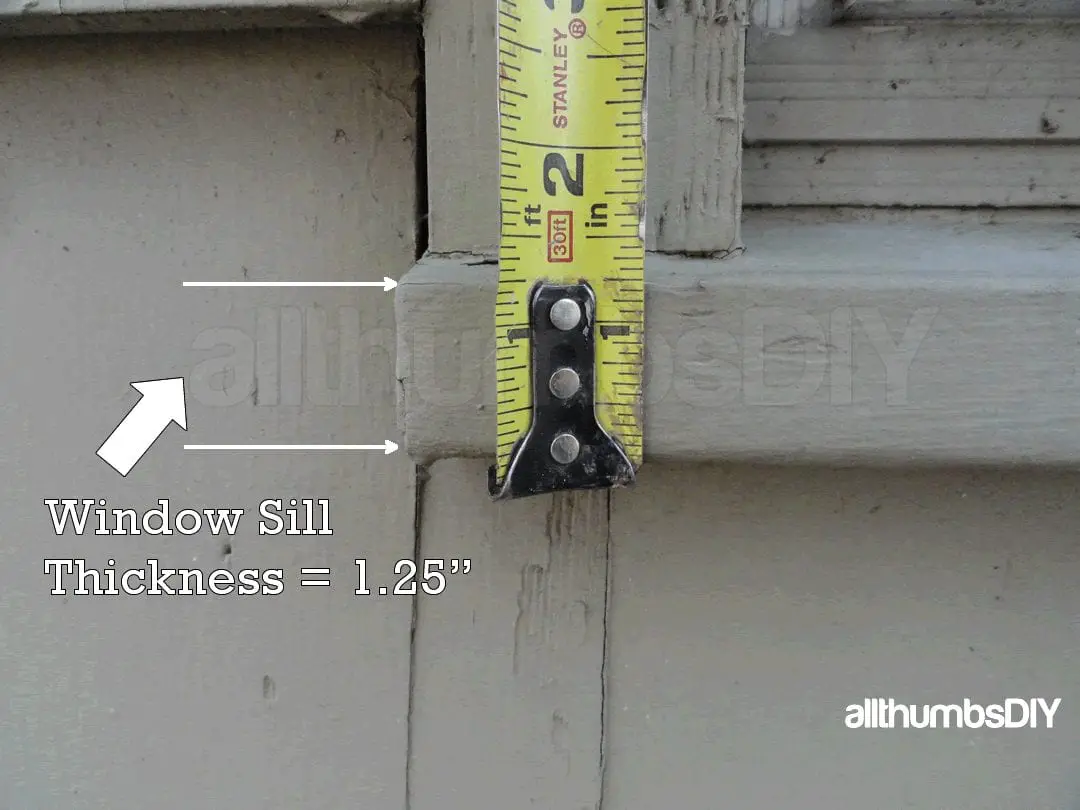
- Step # 1 – Measuring an Old Window Sill – Thickness
- Take your tape measure, go outside and take a look the bottom part of the window. You should be able to see a protruding wood trim. Take a measurement of the window sill nose.
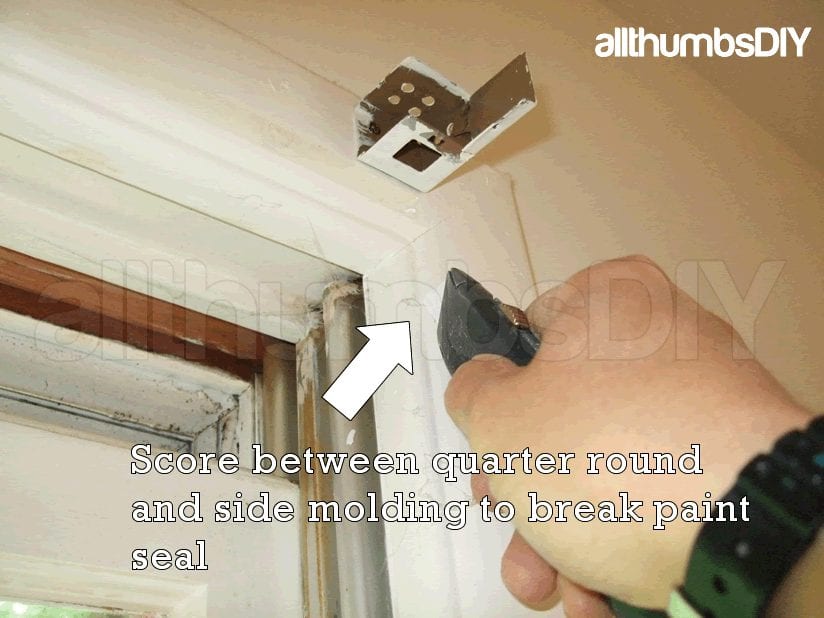
- Step # 2 – Remove Interior Window Trim
- Break the paint seal (fig.3.1). Use a sharp utility knife to score between the quarter round- and side trim moldings.
- Step # 3 – Separate two moldings (fig.3.2).
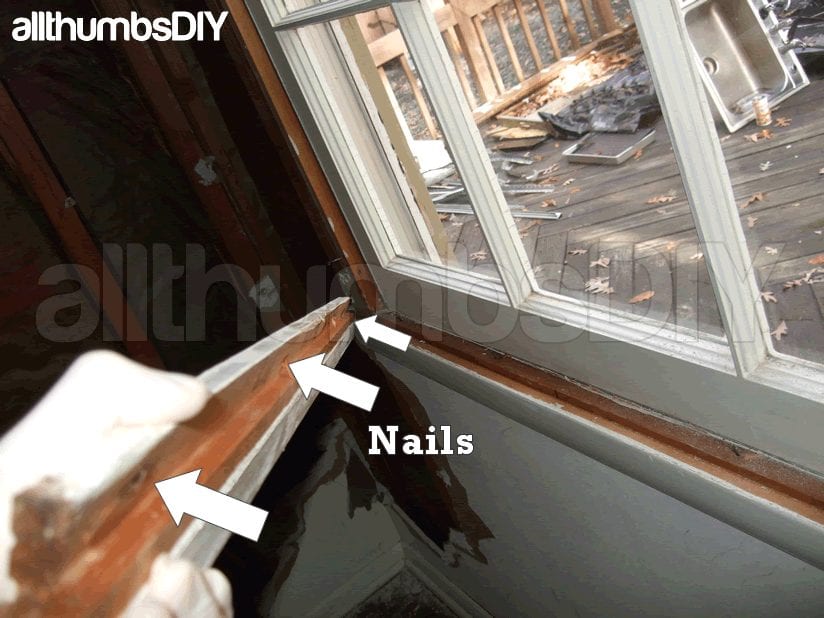
- Using a hammer, gently tap the 4″ metal drywall spatula between the quarter round and side trim moldings. Using a light rocking side-to-side, then up-and-down motions, gently create a small gap between the quarter round and side trim moldings. Then find and mark finishing nails by sliding up and down with the spatula in between the gap.
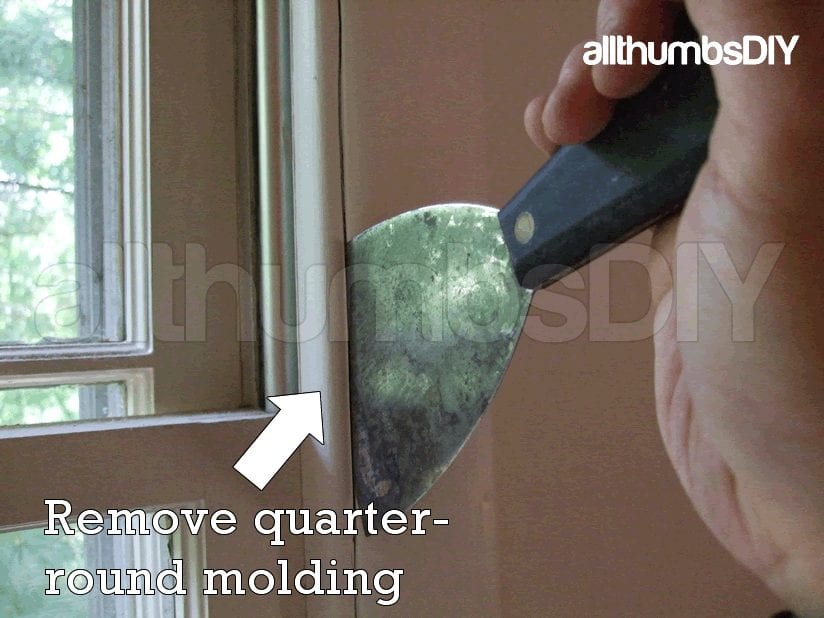
- Step # 4 – Remove quarter-round moldings
- Using a flat tipped craw bar (i.e. Wonderbar), gently pry off the nails, making sure to work all nail points little bit at a time (fig.3.3). Of course if you don’t plan on re-using the quarter round molding, you can be less careful and just pry them off. Repeat these steps for the other quarter round molding.
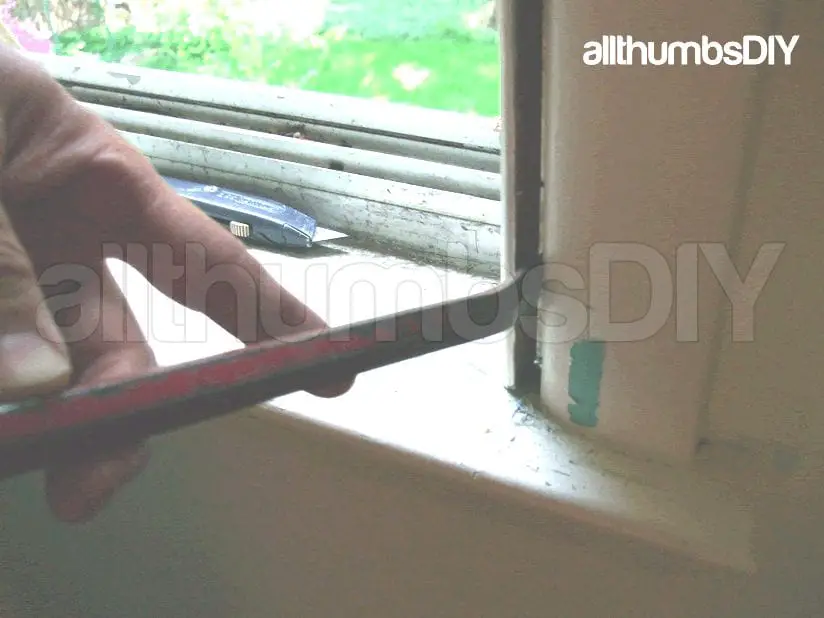
- Step # 6 – Remove the side trim moldings.
- We normally do not remove these moldings when installing replacement windows but we need clear access to the window stool so we have to get it out. Use the same method as before to gently pry off the side moldings. In order to remove the window without damaging the drywall, use the 4″ metal spatula as a backerboard against the Wonderbar.
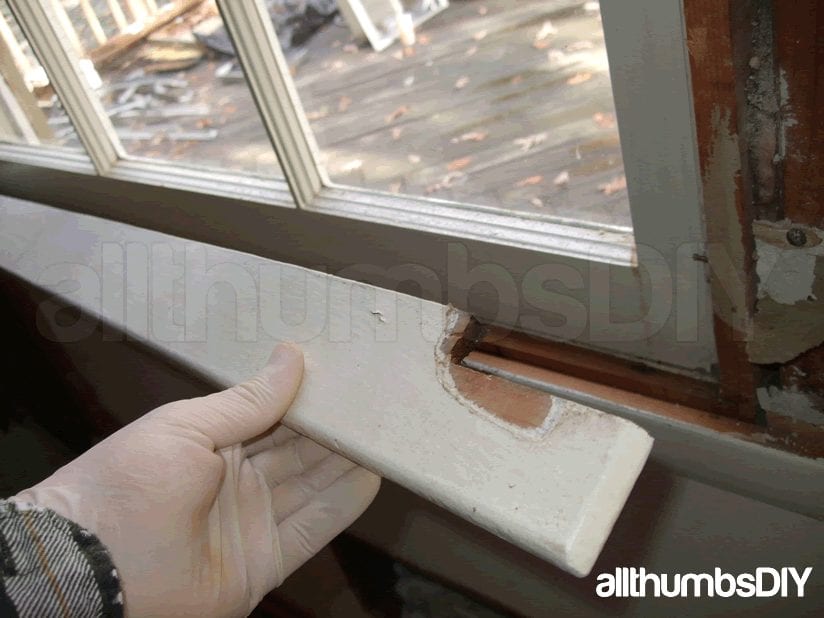
Step # 7– To remove the window stool
- Using three-pound mash hammer, gently tap the underside of the window stool (fig.4.2). A claw hammer is not recommended because you must strike it harder and it has a less surface area so it will damage the wood surface. Again, if you don’t plan on saving it, whack it away!
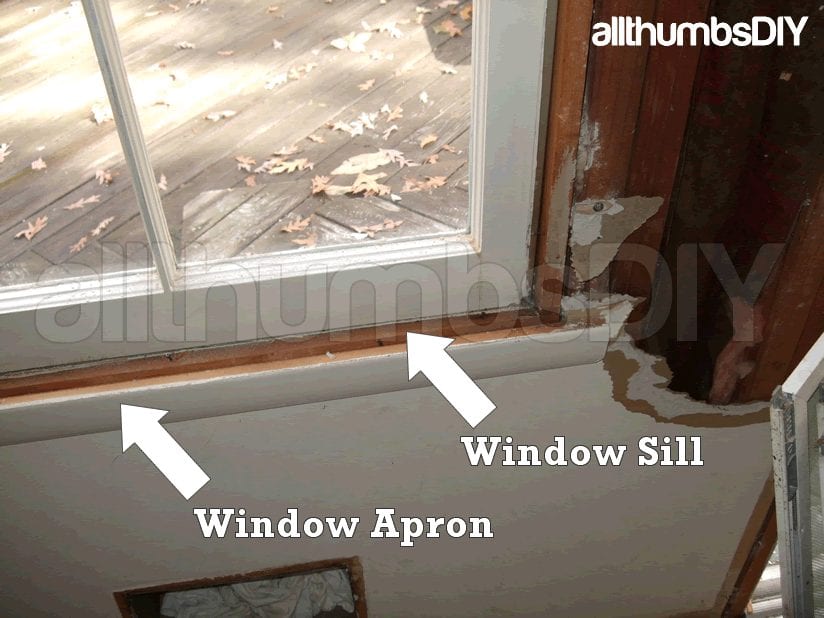
- Step # 8 – Use the same method to remove the window apron (fig.4.4)
- Please note that some window pictures may show drywall damages. That’s because I could not find ideal pictures from the same project so I had to “borrow” pictures from my kitchen remodeling project.
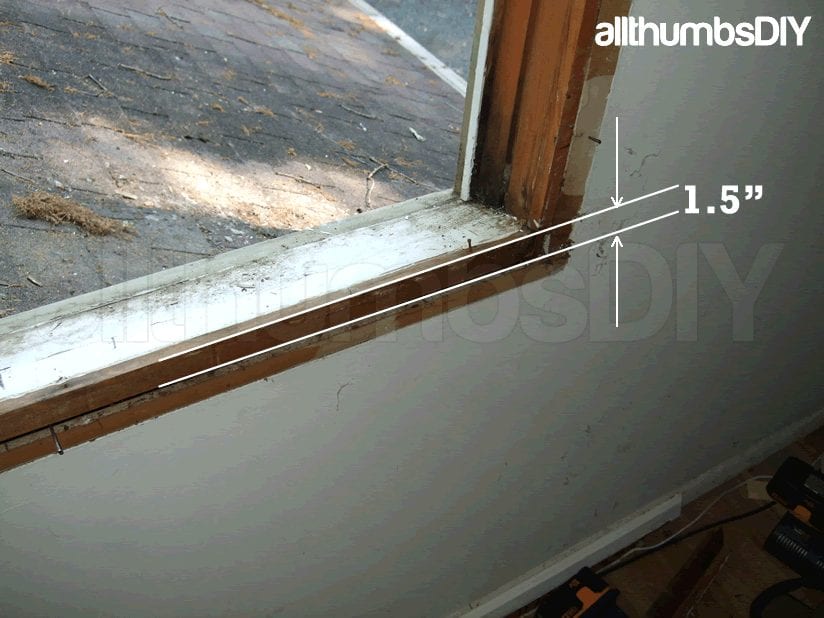
- Step # 9 – Take the measurement. It should be approximately 1.5″ thick (fig.4.6)
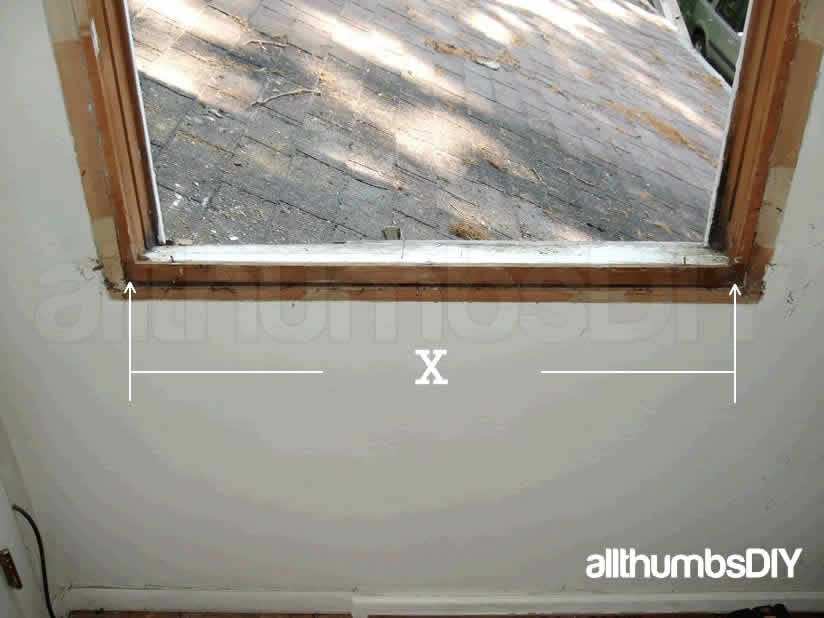
- Step # 10 – Measuring the width of an old window sill
- Now that the window sill is exposed inside, its a simple two step process to measure the width.
- From the inside, take the measurement from end-to-end (fig.5.1). Pay special attention to the side jamb and window sill. My side jamb was notched at an angle to accept the window sill (fig.5.2).
- Step 11: From the outside, take the measurement from end-to-end


That’s it for measuring the window sill.
I know it’s a lot of work but these steps hopefully will ensure that your replacement window has the correct height, angle and depth dimensions.
Click here for the How To Make Your Own Window Sill – Part 2 article.
RELATED ARTICLES
- How to Make Your Own Window Sill – Part 3
- Windows For Home 101 – Window Types and Window Anatomy
- Replacing Leaky Rotted Basement Windows – Part 1 of 3
- Replacing Leaky Rotted Basement Windows – Part 2 of 3
- Replacing Leaky Rotted Basement Windows – Part 3 of 3
- Installing Replacement Windows Part 1 of 3
- Installing Replacement Windows Part 2 of 3
- Installing Replacement Windows Part 3 of 3
- Reviews – Inclinometer
Vanessa
Thursday 4th of May 2017
Where can I get an exterior window sill that is sloped. I have a couple of windows that are of different widths.
You mentioned in the beginning that you may be able to help.
Thanks so much. Your tutorial is great.
Vanessa
kevin
Sunday 7th of May 2017
@ Hi Vanessa-
Sloped sills are usually found at your local lumber yard (not Home Depot, Lowes, etc.) The article was for folks who could not buy one.
Thanks
Allen Rippe
Sunday 17th of April 2016
I have been working on replacing 2 raised panels which fill that porti0n of the window openings,, not filled by the bedroom windows,. It has a name. Something like, "waist panels". Having watched this rot from 1987, I''m determined to swap the panels, raised panels in this case, for ones I re-make, myself, cobbling together sheets of Hardie Backer Board. No sooner than the components of the hard part have been finished, than I notice that the MOST rotten portion of the panels, is the bottom sill, as it lies, against the brick, veneer-sill, bricked in by the brick mason. I went an bought some 1" x 4" Hardie board trim, while 1 thicknes, doesn't match the 1-1/8" thickness of the existing sill.; and two thicknesses is too thick. Then it occurred to me that this bit of mill work, must be, what they call, "SILL'", >>. Imagine that. They make this in PVC. If I can get paint to adhere reliably to PVc, I'm going to use that instead. I have a router table, but haven't run into bits which are suitable to routing out, Hardi-Cement Board product. Besides, in this market, Jardie 9s not sending any 2" x *6" or x 8" product, (to Memphis).
kevin
Monday 25th of April 2016
@allen-
great job identifying alternative solution. please send me some pix and let us know how it turns out!
kevin
info at allthuumbsdiy dot com
How To Make Your Own Window Sill – Part 3
Monday 9th of July 2012
[...] Make Your Own Window Sill is a multi-part series article to show you how I got the project done ( Part 1, Part 2, Part [...]
How To Make Your Own Window Sill – Part 2
Monday 20th of February 2012
[...] If you are visiting this site via search engine, you may first want to read How to Make Your Own Window Sill – Part 1 [...]
How To Replace A Rotted Window Sill
Monday 20th of February 2012
[...] window sill. This would be the best option if you have the equipment and patience. Head on over to How To Make Your Own Window Sill article for more [...]