
SCOPE
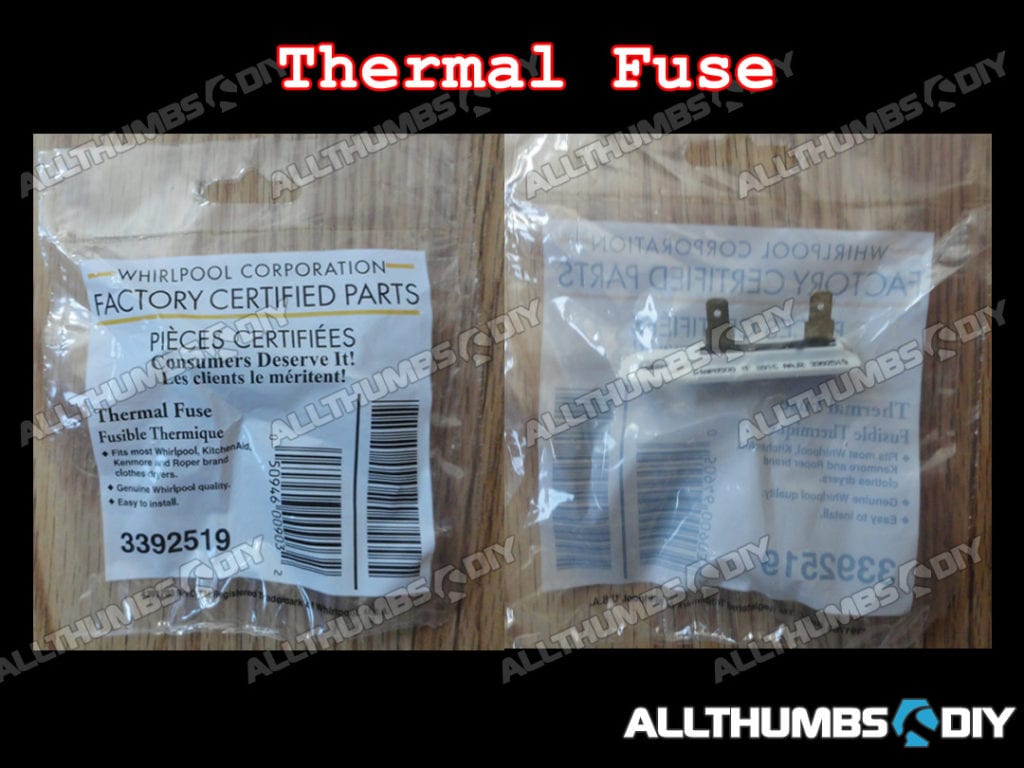
Thermal fuse and gas valve coils work together to produce heat. Gas coil’s job is to either turn on or off the supply of natural gas to the dryer. Thermal fuse’s job is to alert the central computer to turn off the unit when there is excess heat.
I will show you how how I replaced my thermal fuse, thermistor and gas valve coils a Whirlpool Duet gas dryer (Model # GGW9250SU0).
| What is a Thermistor? |
|---|
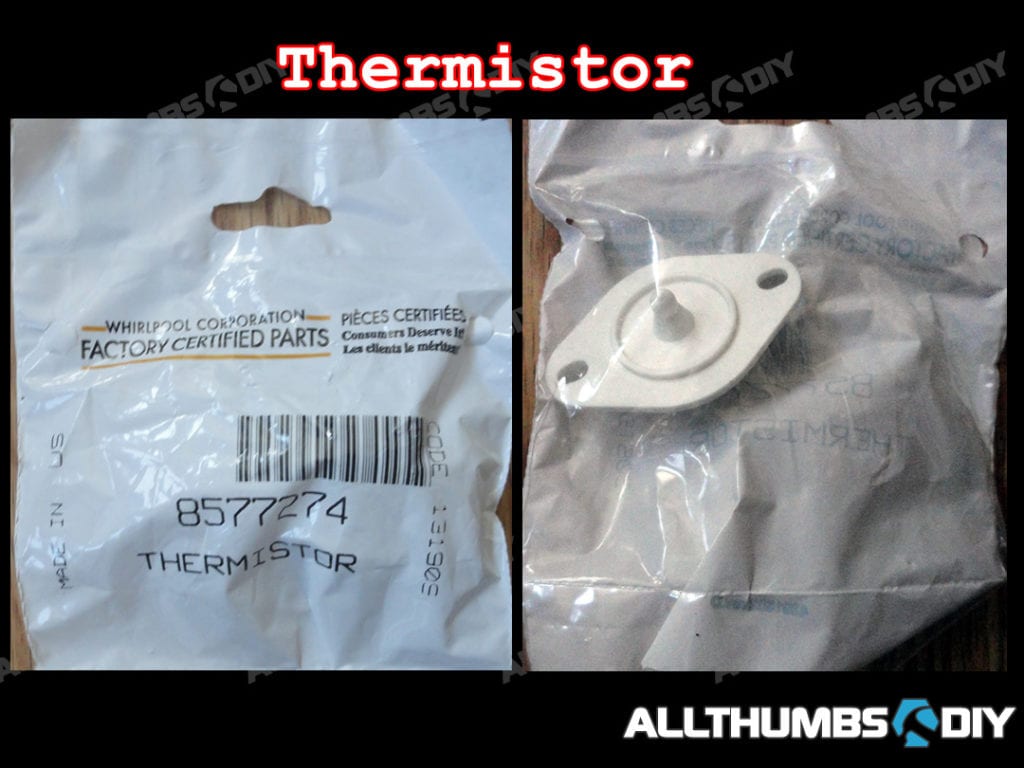
| Thermistor’s job is to provide temperature readout to the dryer’s computer; thermal fuse’s job is to break the circuit if the dryer exceeds the specified maximum heat range. Thermistor is sturdier than a thermal fuse but because it is relatively inexpensive, I like to replace thermistor at the same time. |
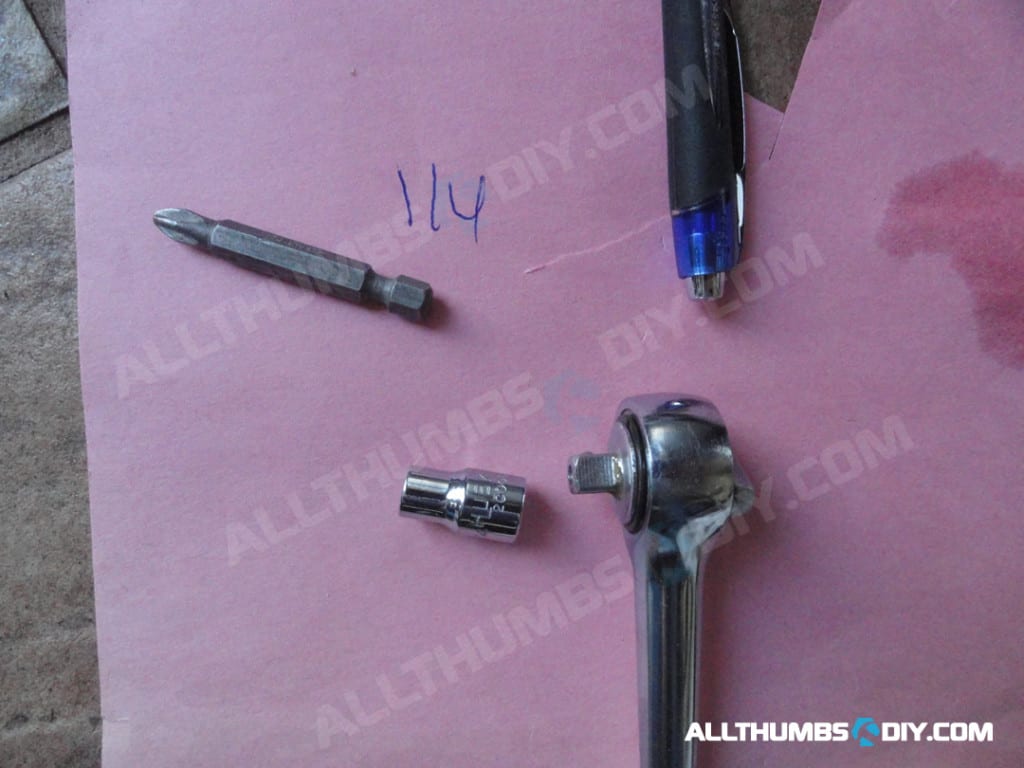
REQUIRED TOOLS
- Screw drivers – Small and medium sized Phillips and Flat-head
- Mini sockets and a ratchet – 1/4″ socket + mini ratchet (Don’t have one? Pick up one of these (SATA 25-Piece Ratcheting Stubby Screwdriver Set – ST09342SJ);
- Phillips drill bit
- Disposable baby wipes – Don’t laugh; you can clean some amazingly tight spaces with baby wipes and a stick!
REQUIRED PARTS
If at all possible, I recommend purchasing extra thermal fuses as they don’t last.
| Part # | Desc | Check Latest Prices |
| 3392519 | Thermal Fuse, Whirlpool | Whirlpool OEM ThermoFuse |
| 279834 | Gas Coil Valves, Whirlpool or FSP | Whirlpool OEM Dryer Gas Valve Coils (2 pack) |
| 85277274 | Thermistor, Whirlpool | Whirlpool Dryer Thermistor OEM |
| 697770 | Blower Cover Plate Seal | Whirlpool Duet Gas Dryer Door Seal Foam OEM |
REPAIR STEPS – THERMAL FUSE AND THERMISTOR
- STEP # 1 – Unplug the dryer from the power source;
- STEP # 2 – Shutoff the gas supply;
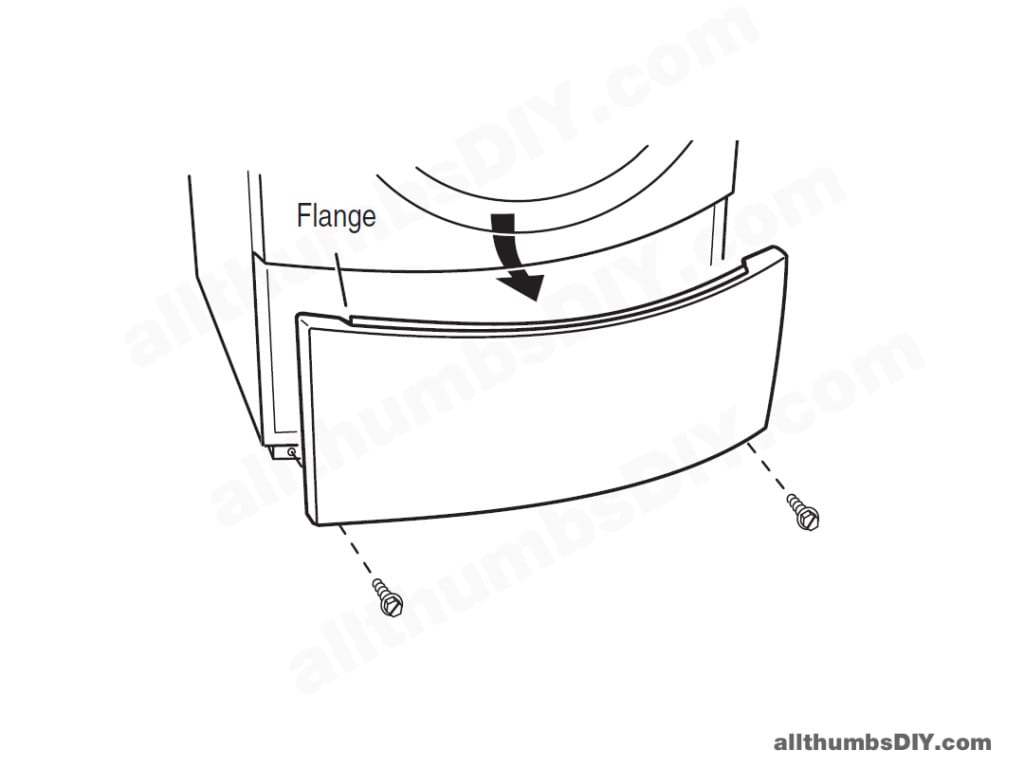
- STEP # 3 – Remove the toe kick panel (Fig. 1) to access sensors (Use 1/4″ socket + ratchet to remove two small sheet metal screws);
- STEP # 4 – There is a folded Service Technician Instruction Guide. Set it aside;
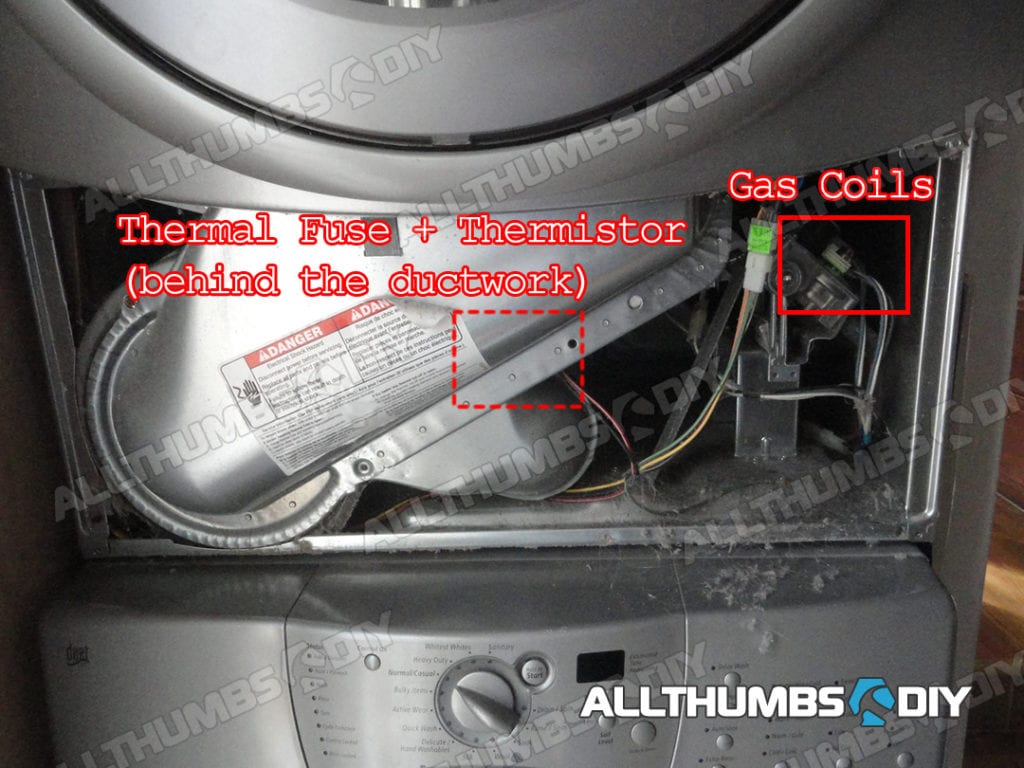
- STEP # 5 – Locate the thermistor; mark on the thermistor to indicate which post connects to black and red wires; disconnect wires;
- STEP # 6 – Locate the thermal fuse; apply a small black tape on one of the red wires; mark on the thermal fuse to indicate which post connects to red wire with black tape; disconnect wires;
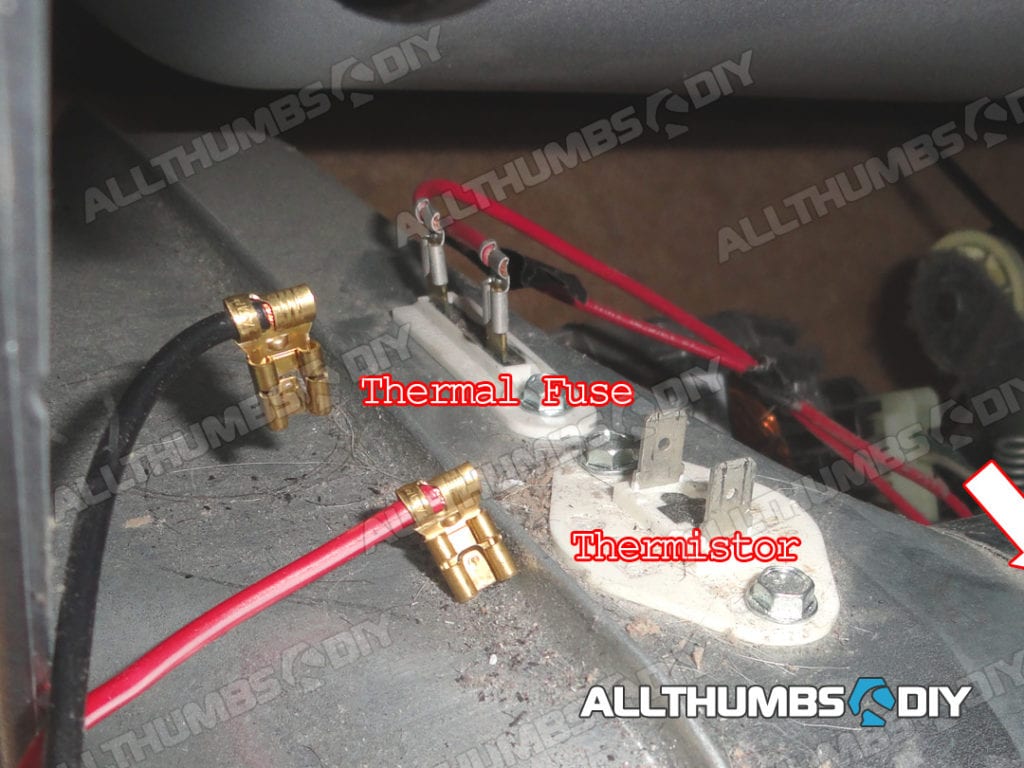
- STEP # 7 – Using a 1/4″ socket, remove total of 3 sheet metal screws (1 for the thermal fuse and 2 for the thermistor);
- STEP # 8 – Install a new thermal fuse and thermistor and re-attach all wires, using the previous markings as a template;
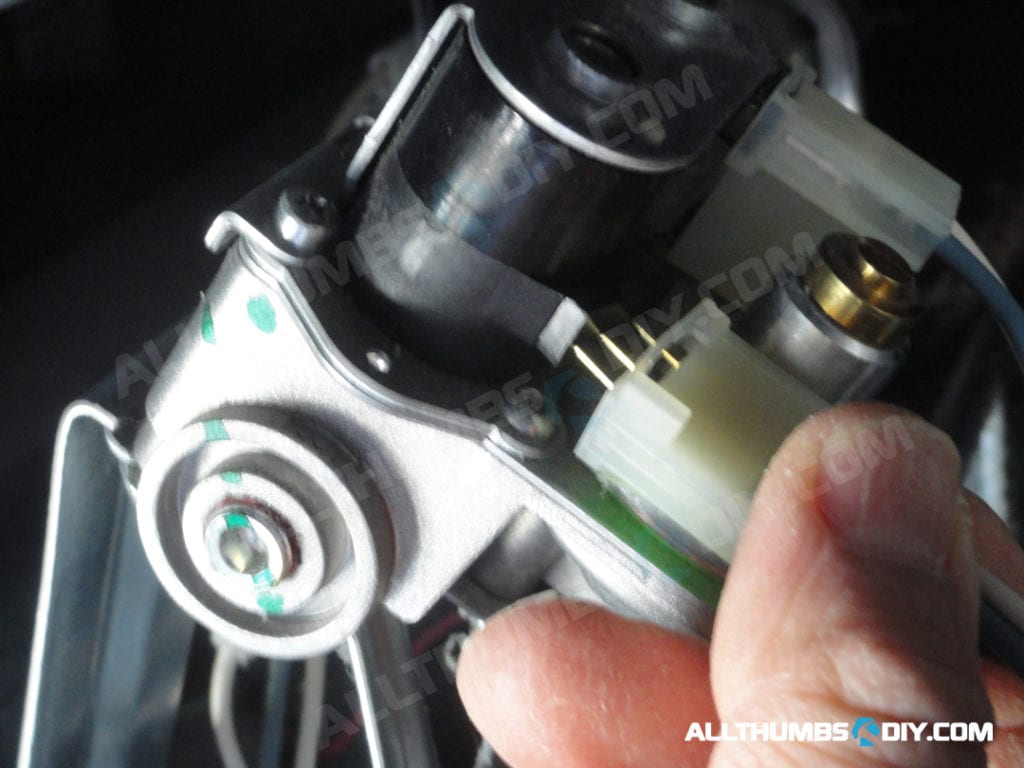
REPAIR STEPS – GAS VALVE COILS
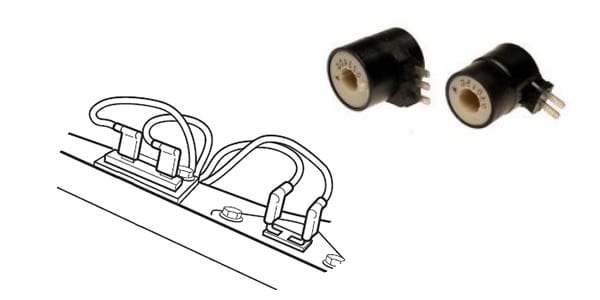
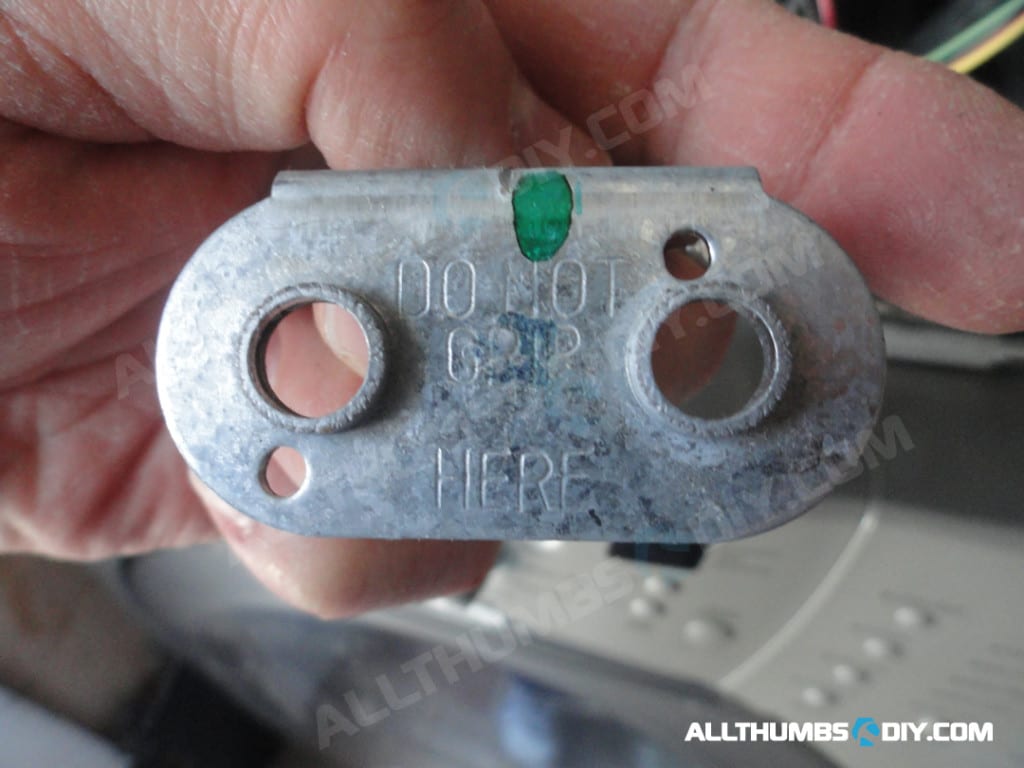
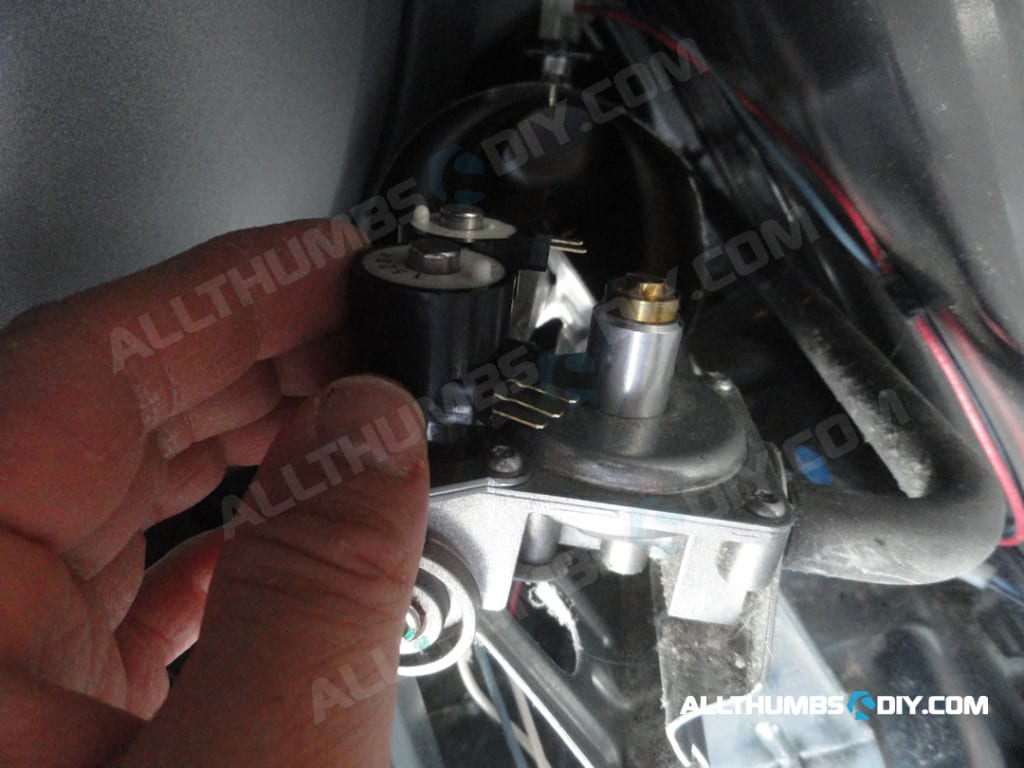
Both gas coils look virtually identical with 3 exceptions:
- First gas coil (located nearest to the toe kick panel) has a metal sleeve;
- First gas coil has part number markings;
- First gas coil has 3 prongs;
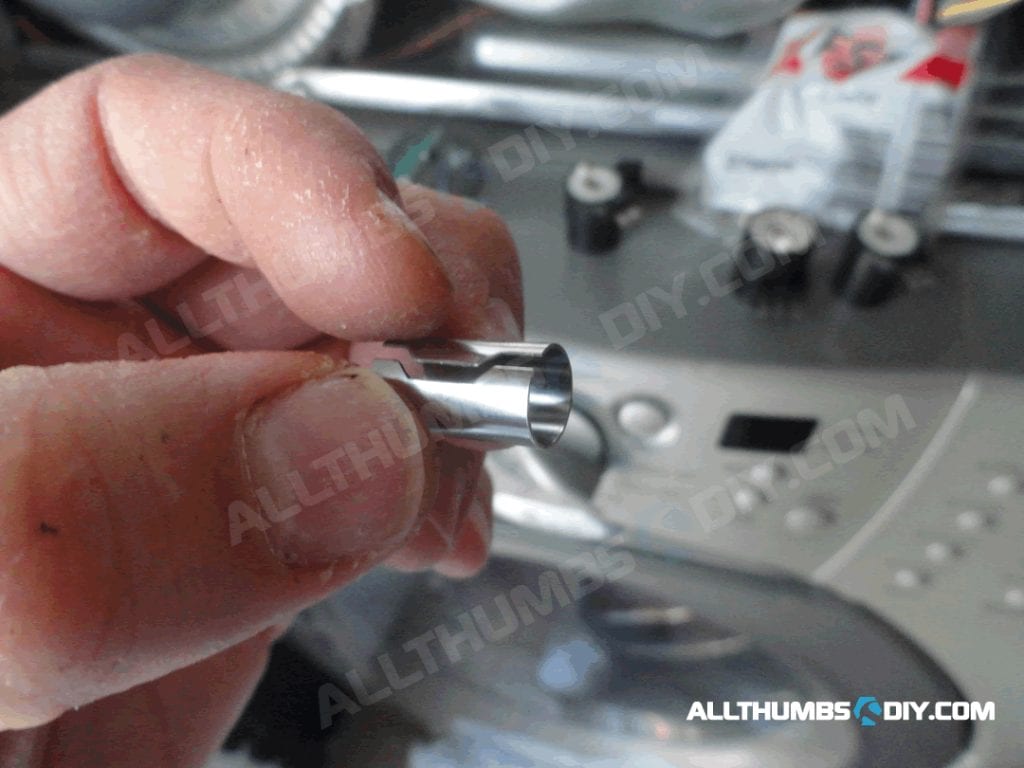
Please note that you will also need to RE-USE the metal sleeve.
- STEP # 1 – Mark and draw all wiring positions BEFORE disconnecting them from the gas valve coils; since there are two set of wiring harnesses, I applied a small black piece of tape on the front set of wires;
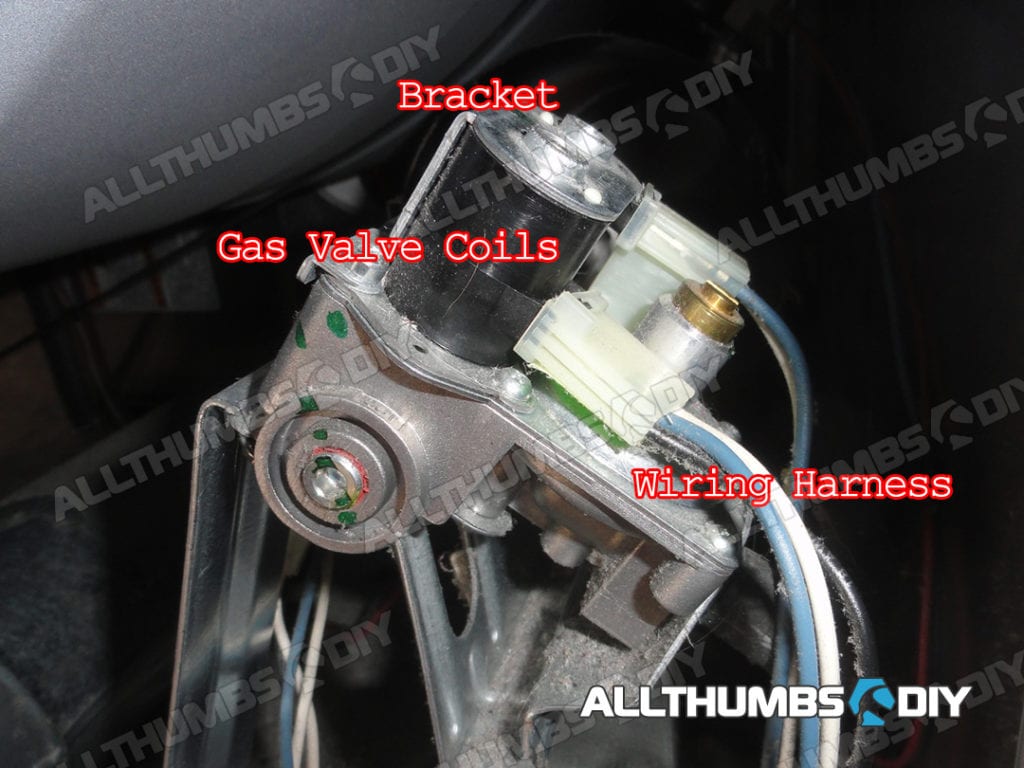
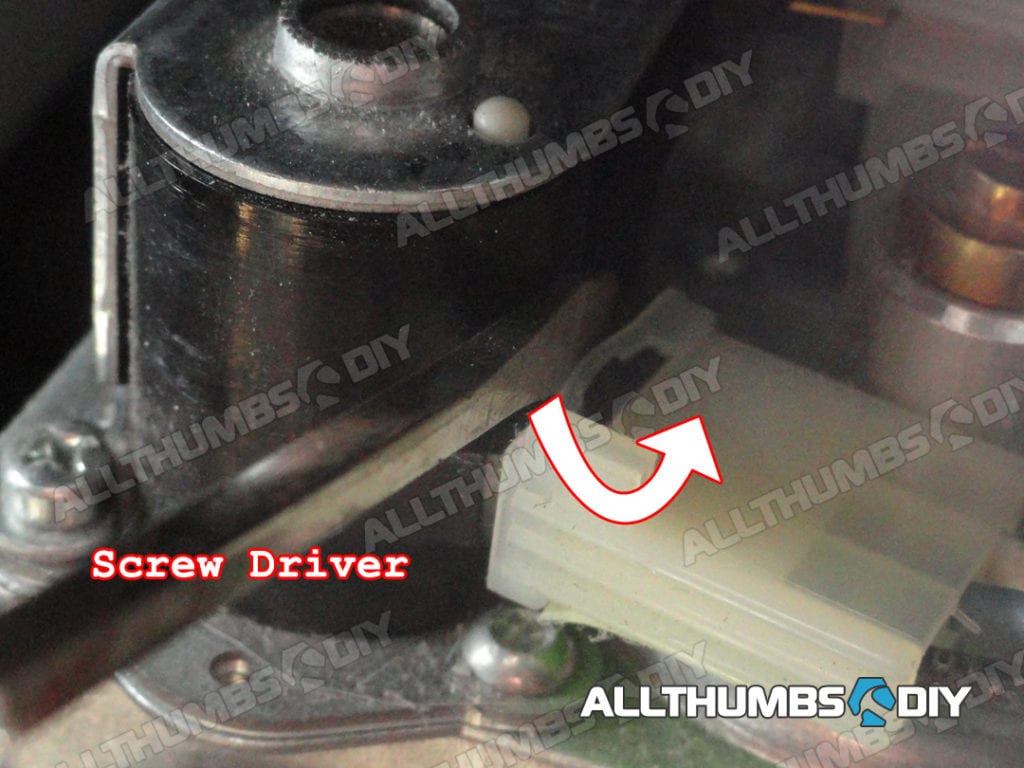
- STEP # 2 – Note that the wiring connector is held down by a small plastic tab. Use a small flat head screw driver to gently pry them off the tab;
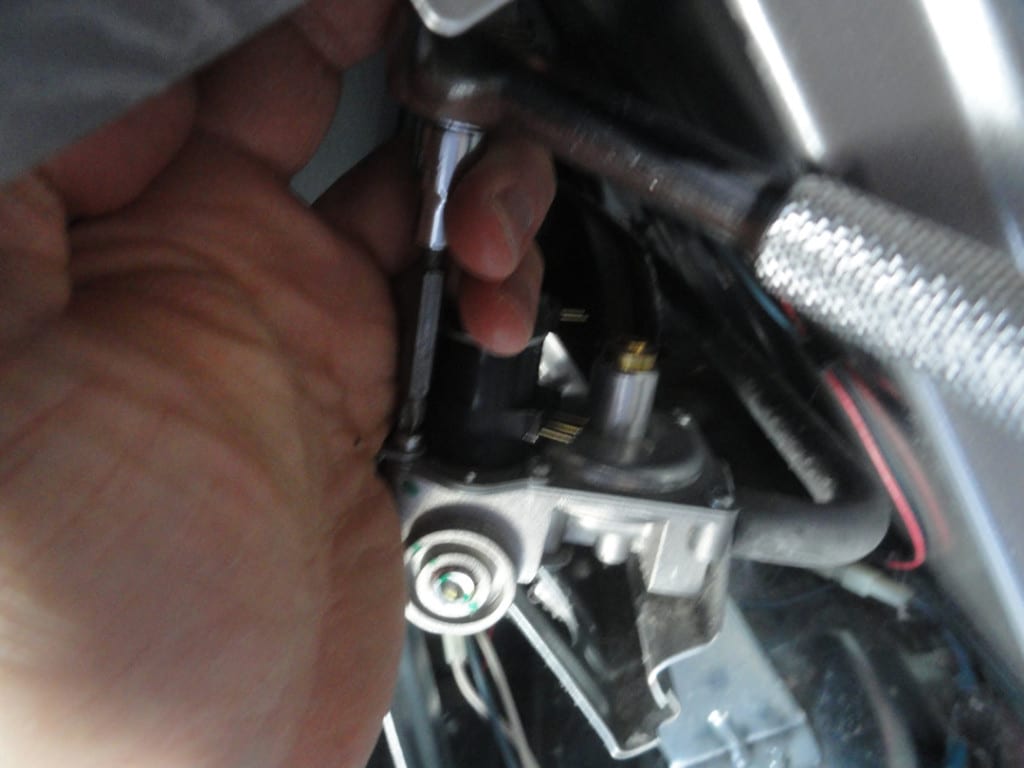
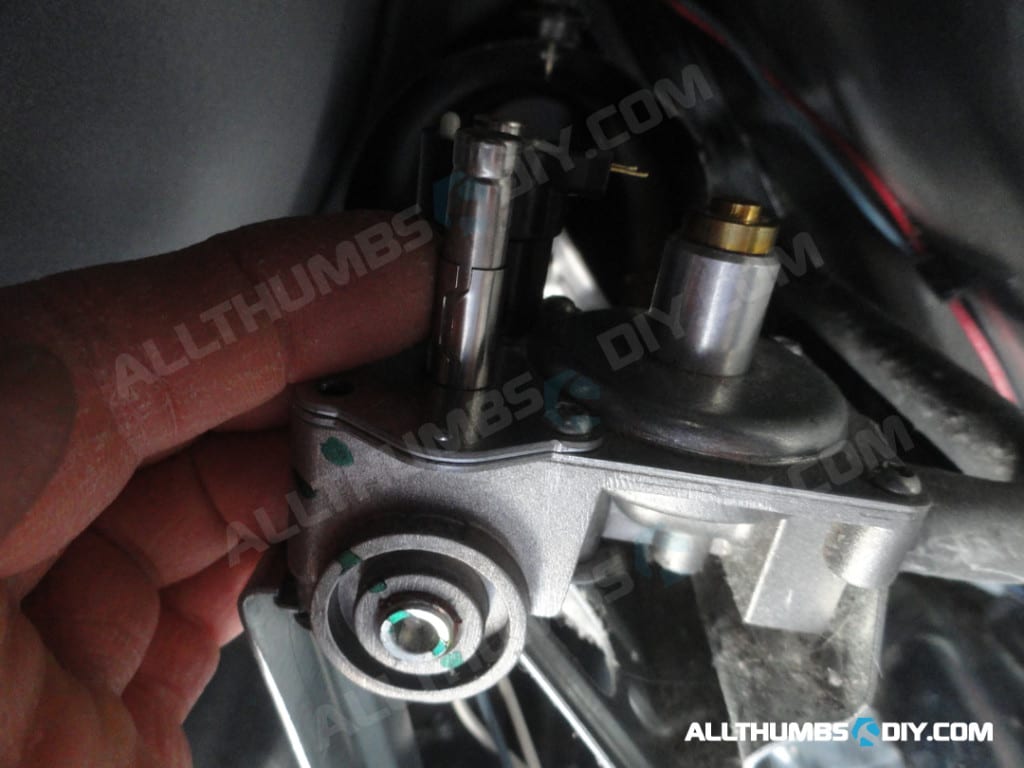
- STEP # 3 – There is a metal bracket, over the gas valve coils, held down by one Phillips screw. I used a Phillips screw bit with 1/4″ socket to remove it (Fig. 6 & 7);
STEP # 4 – Gently remove the cover bracket and set it aside;

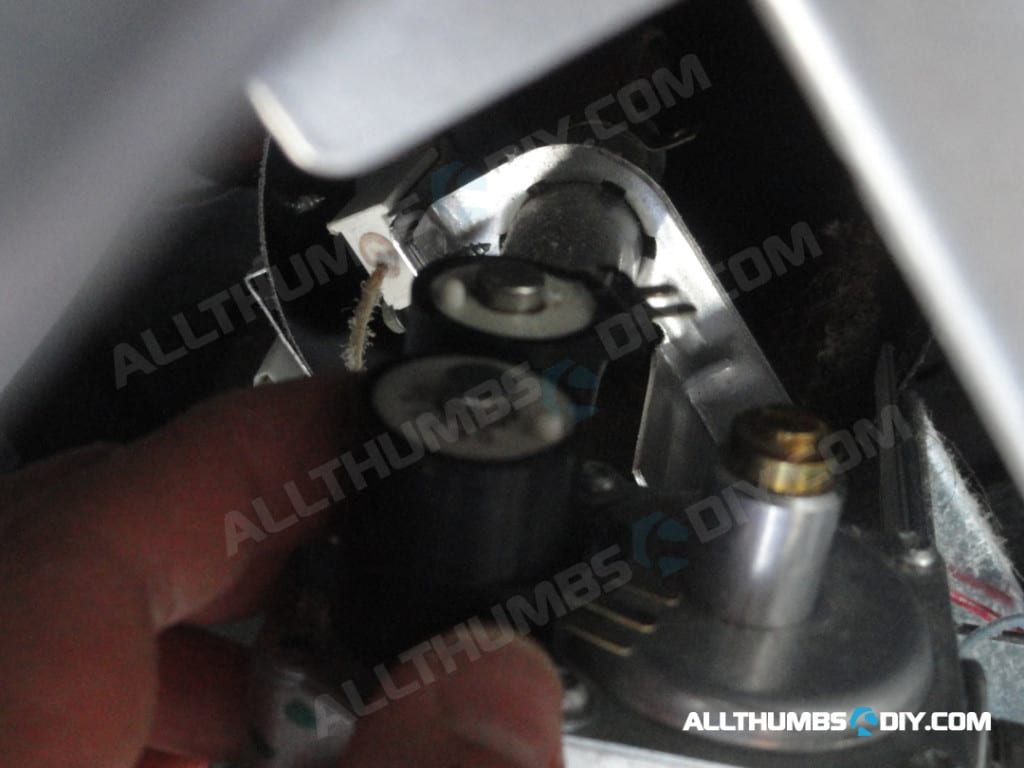
STEP # 5 – Remove gas valve coils by gently sliding them up from metal posts (Fig. 10);
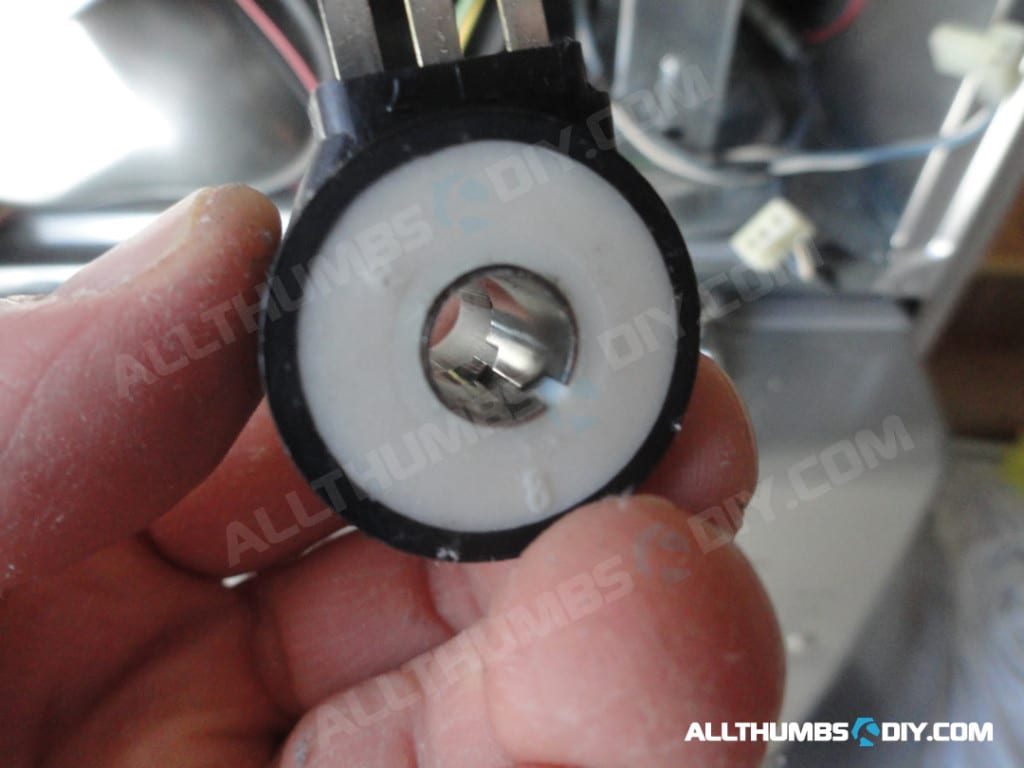
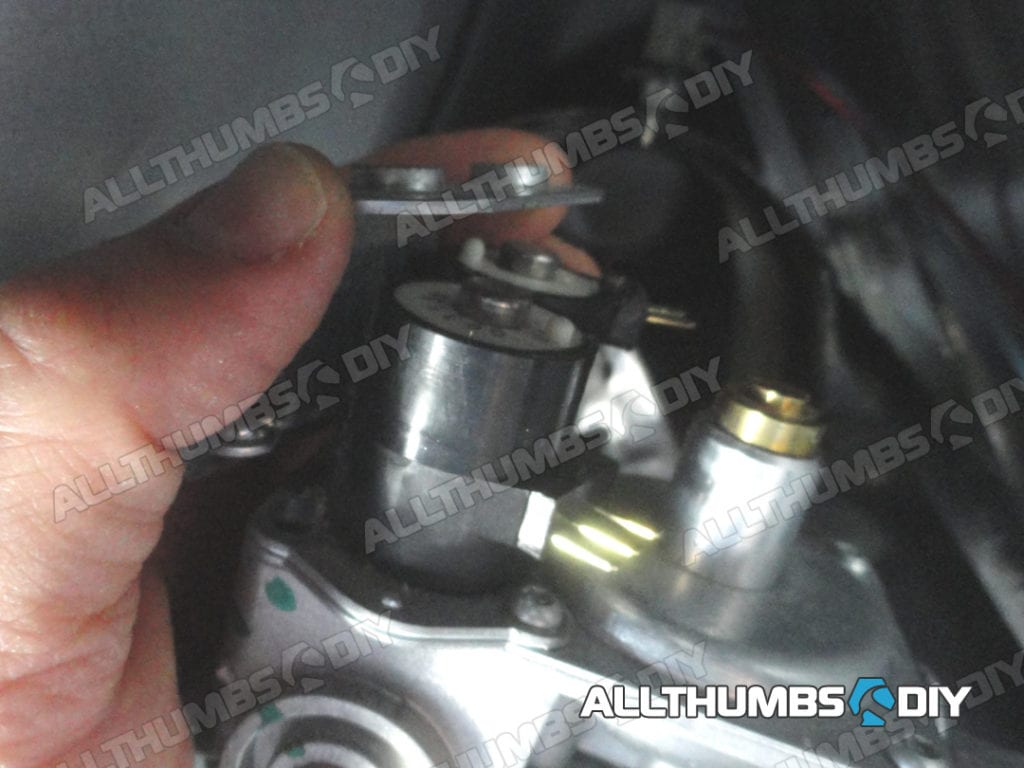
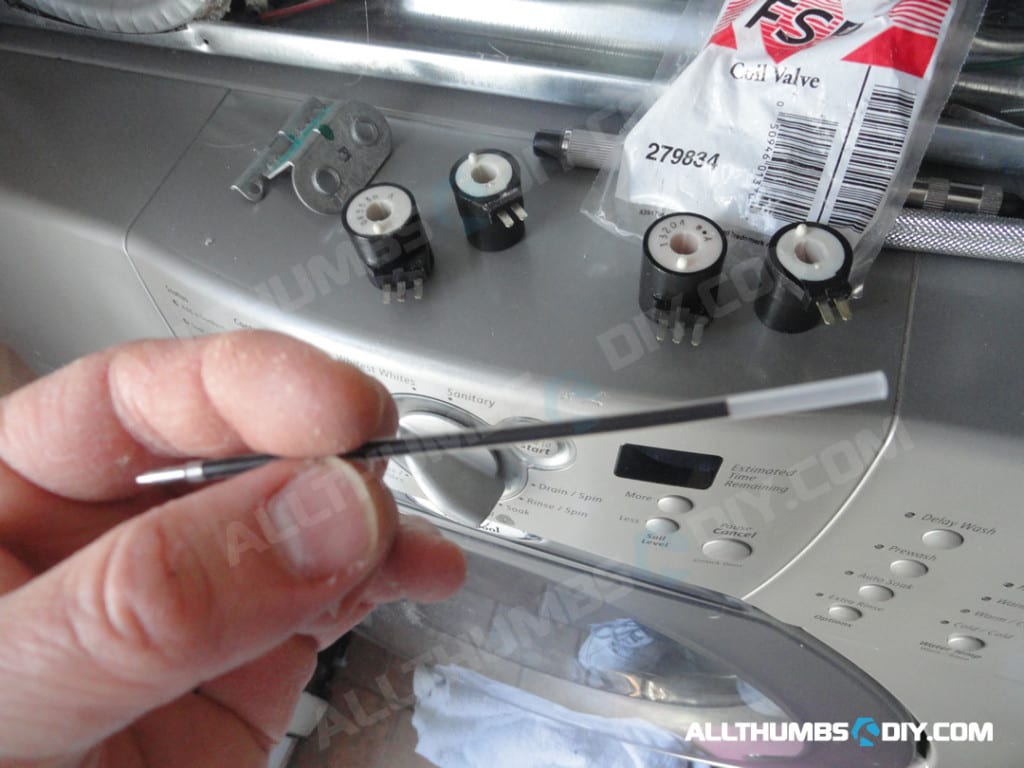
STEP # 6 – Transfer the metal sleeve (Fig. 11) from an old gas coil with 3 prongs to a metal post for 3 prong gas coil (I used a plastic pen innards to reduce the chance of scratching the inside of gas coils);

STEP # 7 – Install new gas coils, remembering to install correct gas coils into proper metal posts;
STEP # 8 – Re-install the gas valve coil cover bracket and re-attach 2 wiring harnesses;
GENERAL CLEAN-UP STEPS
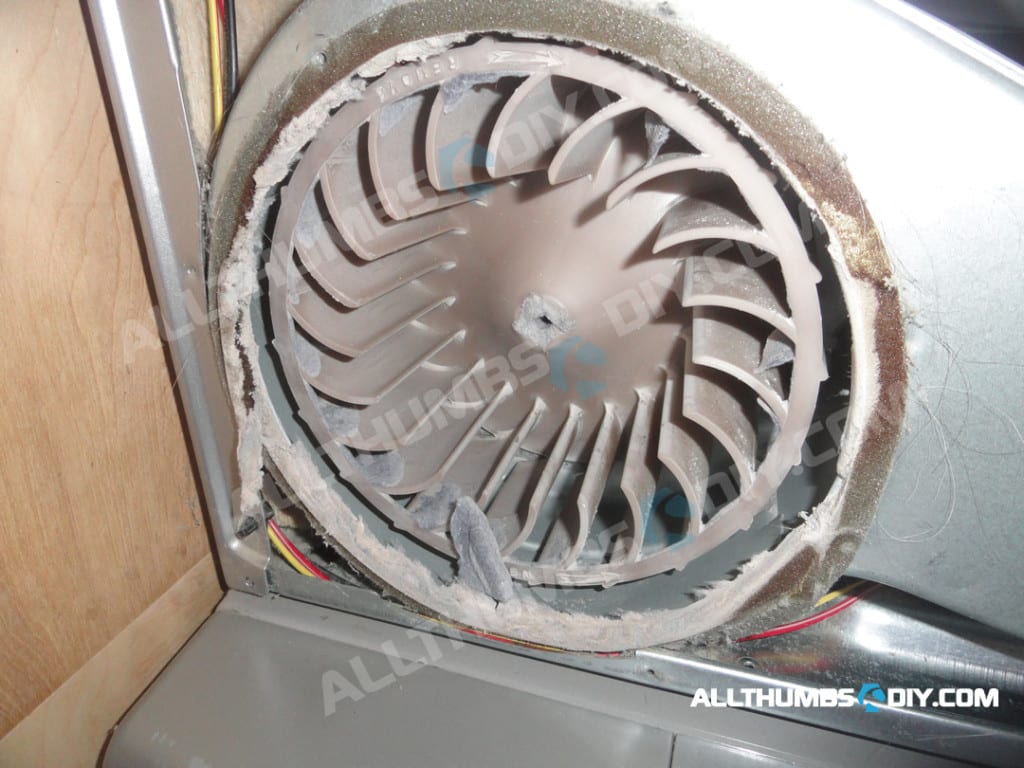
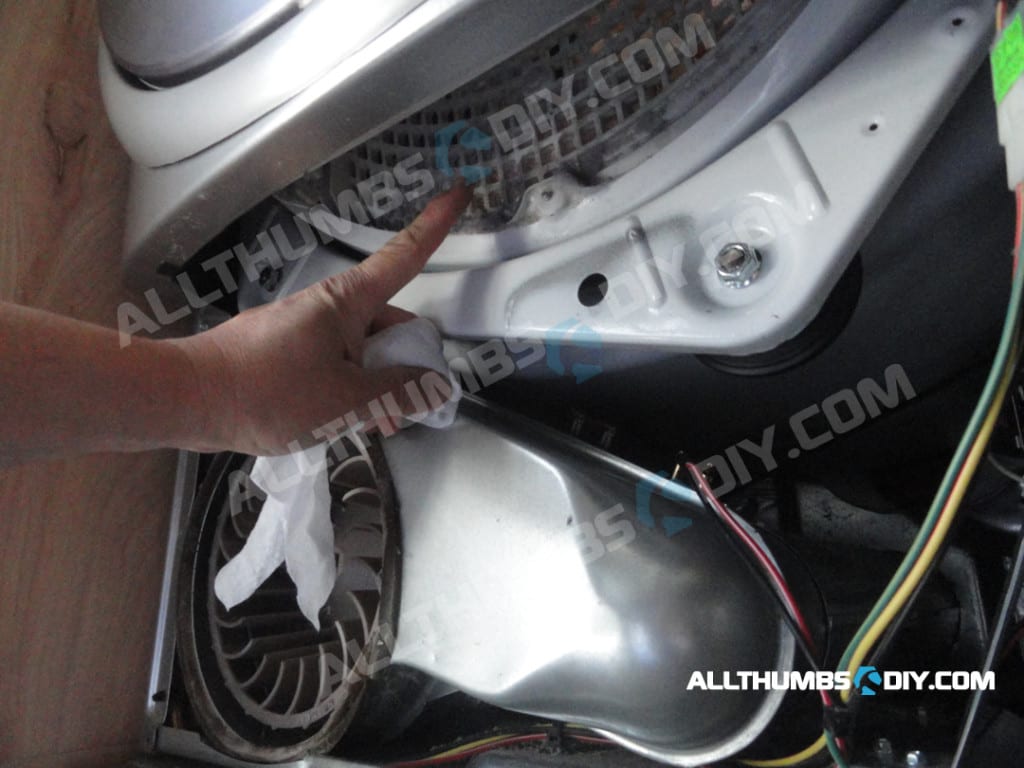
With the panel off, I wanted to take this opportunity to clean the blower motor caked with hair and dust.
-
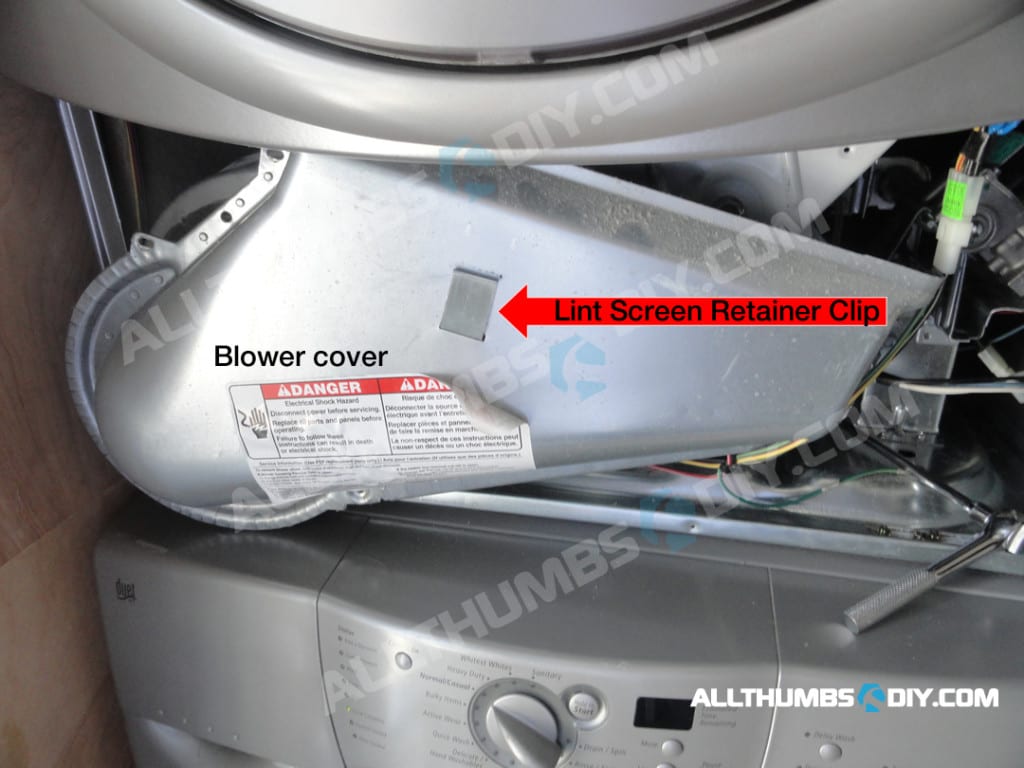
- STEP # 1 – Remove the lint screen;
-
- STEP # 2 – Using the same 1/4″ socket, remove 3 sheet metal screws to take the blower cover off;
- In Fig. 17, note the flat metal clip which holds the lint screen tightly in place;
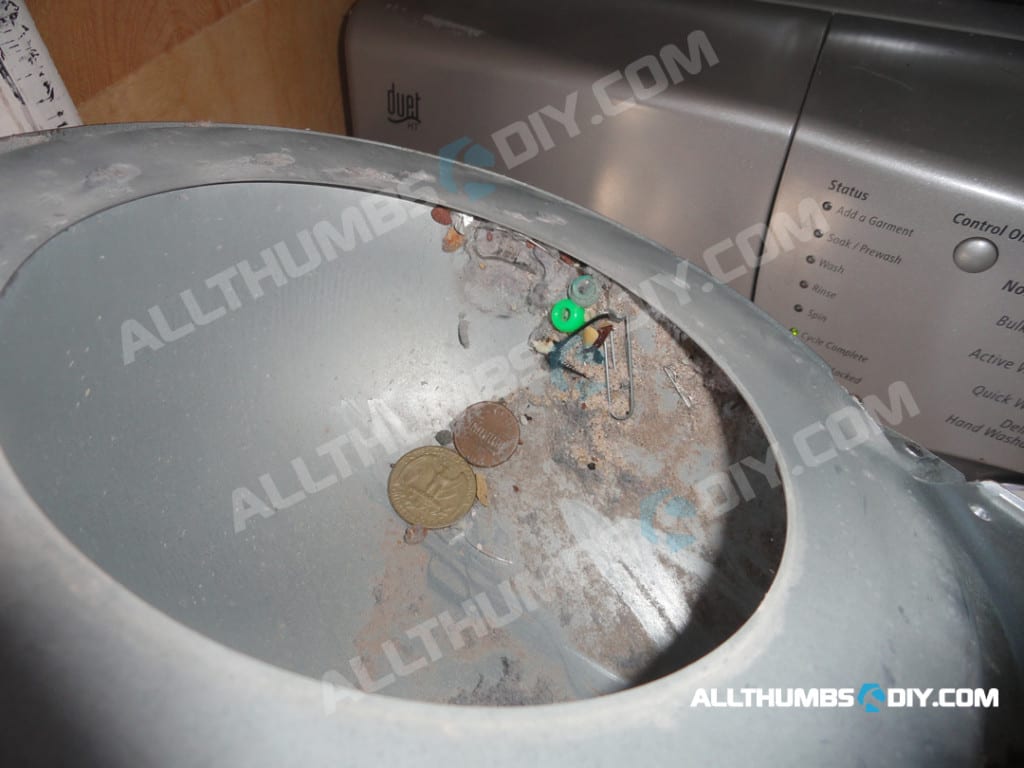
- Fig. 18 shoes the inside of the blower cover with lots of lint and other junk;
- STEP # 2 – Using the same 1/4″ socket, remove 3 sheet metal screws to take the blower cover off;
-
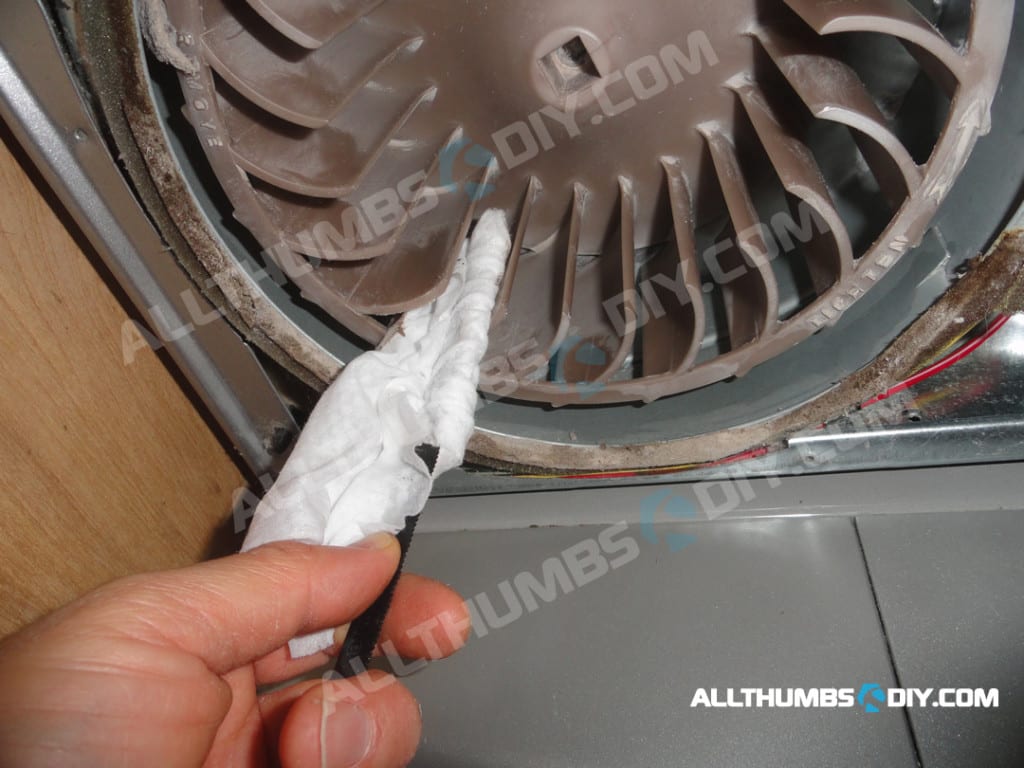
- STEP # 3 – Using (wet) baby wipes, a replacement mini hacksaw blade (to clean between fan blades) and vacuum, get the gunk off (Fig. 19 & 20);
- STEP # 4 – The circular foam is probably shot and will need to be replaced.
- STEP # 4a – Take a Sharpie pen and trace around the foam circle;
- STEP # 4b – Using a metal 2″ putty knife, carefully scrape off the foam;
- STEP # 4c – Use Windex and paper towel to clean off any glue residue (try not to erase the mark);
- STEP # 4d – Use wet wipes to clean off all residue & let it dry for few min;
- STEP # 4e – Apply the new replacement blower cover foam seal;
-
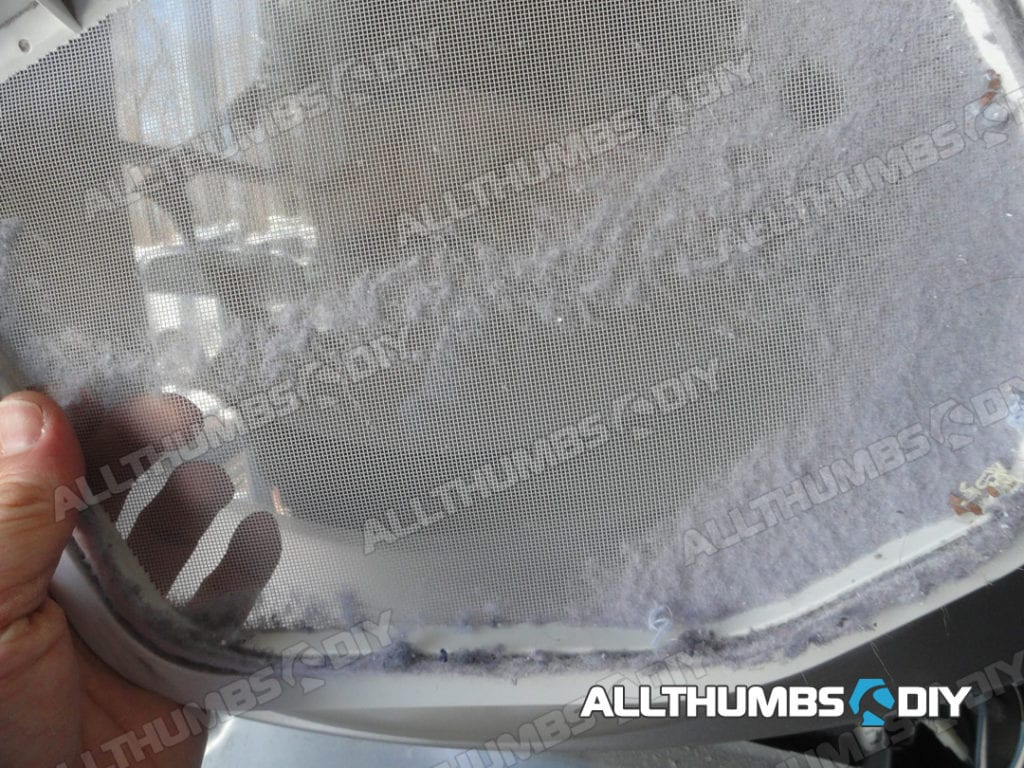
- STEP # 5 – Again using (wet) baby wipes, clean the lint grill area (Fig. 21);
-
- STEP # 6 – Re-install the blower cover;
- STEP # 7 – Time to check. Plug in the dryer, turn on the gas supply and start the drying cycle (keep your distance). You should see a flame kick in and stay on for more than 20 seconds;
- STEP # 8 – Turn off the dryer;
- STEP # 9 – Re-install the toe kick panel;
- STEP # 10 – Place some wet clothes in the dryer for a test runs
LAST WORDS
I had some ridiculous repair estimates (anything from $200 to $500) to get my Whirlpool Duet gas dryer repaired. Not only that, my previous experience with incompetent repair technicians in the past made me very weary these so called “experts”.
With little more than $50 in parts and plenty of patience, I was able to get the job done correctly the very first time and saved a lot of money.
If you found this article to be useful, why not sign up for my newsletter? Just look for a signup form on the upper right hand side of your screen. Thanks!

REFERENCE LINKS
- Whirlpool Duet Gas Dryer (Covers Models GGW9200L & GEW9200L) – Service Manual
- Whirlpool Duet Sport Gas/Electric Dryer (Covers Models WED8300SW, WED8500SR, WGD8300SW & WGD8500SR) – Service Manual
Joanne Sundeen
Wednesday 31st of August 2022
Will these instructions work with the 9260 model? I already purchased the thermal fuse based on another video but now I’ve found your more detailed instructions, I feel I should order the other possible parts before taking apart the dryer. Thanks. Joanne
kevin
Friday 9th of September 2022
Hi Joanne,
Not sure as I do not own the 9260 model...
Sam
Wednesday 9th of September 2020
Thanks for the help. Waiting on parts. Sometimes it is a challenge to take these appliances apart because you don't know if it screws off , twists off , or just pulls off. The step by step info is great.
scot olsen
Wednesday 27th of March 2019
Kevin,
Kudos to you for delivering such a great tutorial which covers three of the possible heating issues, After replacing those three things I still found my heating cutting out after 30-40 seconds. Like the Scott above, I kept checking and found that the high temp thermostat cut off (Whirlpool W10423382 Thermostat Fix) above the burner tube was malfunctioning. After ordering my thermostat I now find my clothes are completely dry after a normal cycle. One other thing, I found that the technical service sheet attached to the inside of lower panel offers some nice troubleshooting advice to help determine where the problem could be.
I have had my Duets for over 11 years and we run 3+ loads per week. They are very well made and with your advice should last many more years. Scot
kevin
Thursday 28th of March 2019
Thanks for sharing your comments with us Scot!
With 2 young children playing baseball and softball, we are running at least 2 loads per day!
Just make sure to clean your exhaust vent to prevent heat build up.
Kevin
Bill
Wednesday 6th of March 2019
Awesome site and posting. I have a 10 yrs old duet gas dryer. This past summer it stopped spinning due to a worn out belt. I had the local repair company come and they replaced the belts, rollers and such with the whirlpool “dryer repair kit”. It cost me about $300 parts/labor, I later realized the kit was $33 on appliance pros!! Hindsight, and watching how simple it was for the guy to do the repair is 20/20. Anyway, FFWD to last week, no heat from the dryer. I figured, might as well start shopping.....but glad I started researching and found your posting. For me, blown fuse (no continuity) and after pulling the dryer out of its hiding spot could see that the exhaust hose was severely kinked. Thermistor was fine. And the temp sensors checked out. Even though the resistence looked okay, and because I could reach them I replaced the gas coils too. Thanks for your help!!!!!!!
Scott
Friday 12th of January 2018
Kevin, I have a whirlpool duet gas dryer approximately 8 years old. I had no heat, burner would not ignite. I replaced all the parts that you had recommended. I also replaced the igniter which didn’t fix the problem either. I finally tried bypassing the high limit thermostats that are on the burner housing. There are 2 of them, located on the top of the burner housing. I disconnected both and ran a jumper wire. This was my final attempt before spending $160 for a service call plus parts. I plugged dryer back in and turned on gas. Presto, burner fired up. I removed both of the thermostats and took them to my local parts shop. They bench tested both of them to discover only 1 was bad. The new thermostat was $36. I installed the new thermostat and it works like a charm. I just wanted to share my repair story. Side note, I have 2 dogs. There was so much dog hair and lint built up inside, I am surprised that the lint and hair had not caught fire. It needing repair was a blessing in disguise.
Scott
kevin
Friday 12th of January 2018
@ Scott-
Wow, great job of sticking with the problem and solving it! I would suggest having some spare parts on hand so that you can repair your dryer faster next time.
But other than replacing thermal fuses every couple of years, my Duet dryer is built like a tank!
As far as dog hair and lint, make sure to clean the vent pipe too.
Thanks again for sharing your story.
Kevin