
Key Points
- When both Fresh Foods (FF) and Freezer (FZ) compartments are not working, the usual culprit is a failed inverter (relay) or compressor
- Inverter cannot be tested directly so its functioning status can only be derived from testing the compressor windings
Intro
On April 2014, I discovered that my 6 year old (GE Profile PFCF1NFWA) refrigerator suddenly could not hold the temperature. Instead of holding at 0 and 37 degrees (freezer and refrigerator respectively), I found both of them at 48 degrees (and climbing).
We have a tendency of piling frozen food in the bottom drawer so I thought it was nothing more than an improperly sealed freezer door so I emptied it out, unplugged it for 2 hours, then after plugging it back in, left the refrigerator undisturbed overnight.
It worked for a day but then the temperature started to climb again which indicated a component failure.
Required Materials
- GE Refrigerator Inverter (also known as the compressor relay – Buy GE INVERTER WR87X10111 (replaces WR49X10283)
- Compressed Air Cans – Use a can of compressed air to gently blow hard to reach areas; I normally buy falcon dust-off electronics compressed gas duster 4 cans / pack; I do not recommend using air compressors as it’s pressure it can actually cause damage to the refrigerator components
- Wood or plastic shims – I stack couple of these underneath the front of the refrigerator to gain 1/2″ or more for better access; you can buy any kind but I prefer the plastic shims (2 packs)
- Pipe Cleaners – to reach small crevices and between coils (just buy some inexpensive pipe cleaners like this one)
- Condenser Coil Brush for Refrigerator – you don’t want a long, inflexible handle; instead you want a soft-tipped, long brush head like this Flexible Dryer Vent Cleaner Refrigerator Condenser Coil Brush Auger Lint Remover
- Digital Multimeter (DMM) (Don’t have one? Read my reviews here)
Required Tools
- Mini ratchet wrench / ratchet sockets / 3/8″ socket
- Phillips / flat Screwdrivers
- Vacuum
- Digital Multimeter (DMM) (Don’t have one? Read my reviews here)
Step-by-Step Troubleshooting Steps
If you have never worked on a refrigerator before, I highly recommend that you read my post “Complete Reference Guide to GE Profile PFCF1NFW Refrigerator.
A real quick snapshot of how everything works is that based on thermistor measurements, the motherboard sends a control voltage to the inverter board. Inverter board in turn supplies or discontinues electricity (coming from the outlet) to the inverter compressor to cool the refrigerator.
- Step # 1 – Utilize the refrigerator’s self-diagnostics to see if it could detect a failed component; you can use it by following the steps outlined in my post How to Access the Self-Diagnostic Feature on GE PFCF1NFW Refrigerator Using the Temperature Display Control
- Step # 2 – Confirm that both fresh food and freezer compartments have working lights and fans
- Step # 3 – Slide refrigerator away from the wall to gain access to the rear access panel
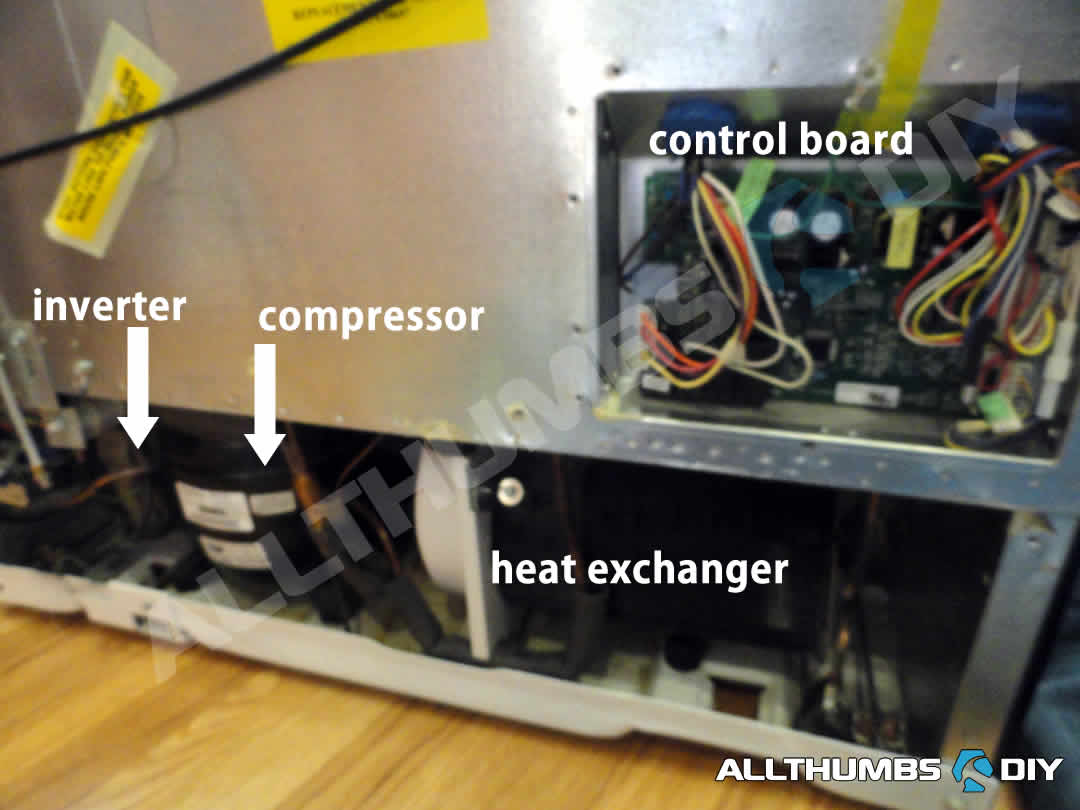
- Step # 4 – My refrigerator (and freezer) both had working lights and fans, I then decided to test the control board (i.e. motherboard), inverter and inverter compressor using my digital multi-imeter (DMM)
- Step # 5 – Unplug the refrigerator
- Step # 6 – Using a 3/8″ socket, remove the screws and put aside the cardboard access cover
- Step # 7 – Using the same socket, remove the metal access cover above the condenser (i.e. heat exchanger)
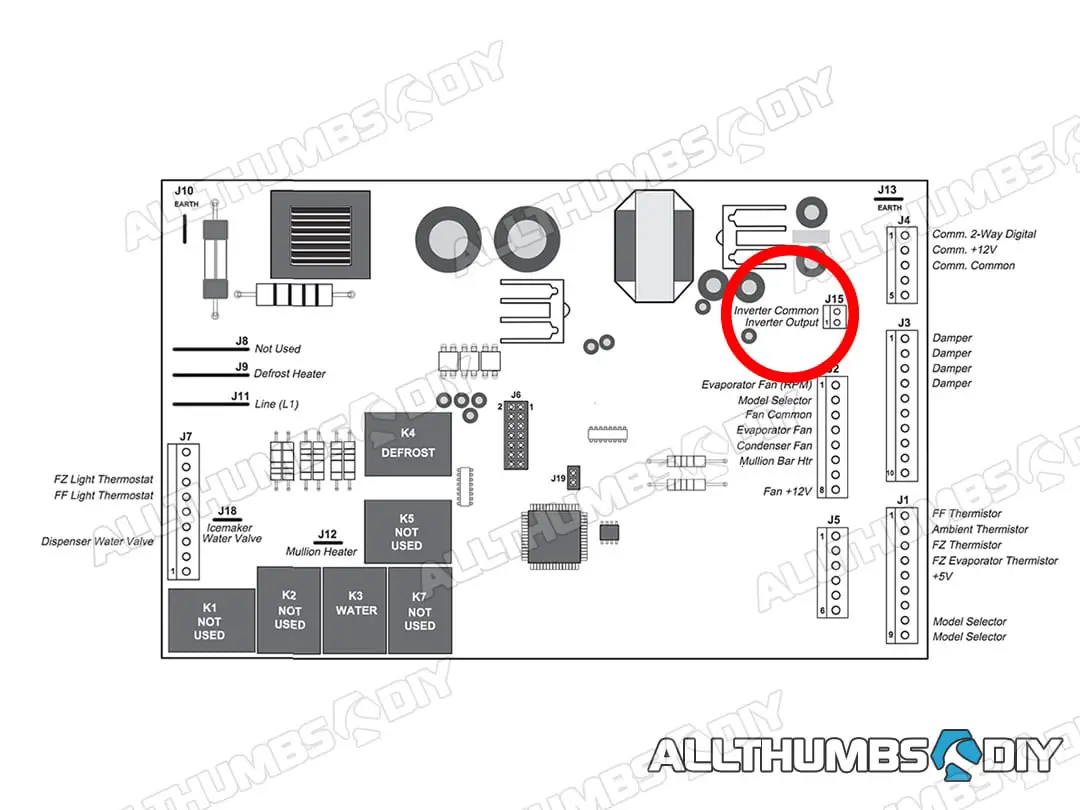
- Step # 8 – Using a DMM, test the J15 jumper. The output value should be anywhere between 4-10 volts 9VDC). Since mine checked out at 5.11 volts, I moved on to the inverter and compressor
- Step # 9 – The compressor itself is NOT serviceable by a DIYer due to the fact that refrigerant recovery must be done. Neither can the inverter be tested directly. We have to utilize a process of elimination to decide whether the inverter should be replaced or not
- Step # 10 – Take a look at the compressor. You will see a gray box attached to the left side of the compressor. This is the inverter.
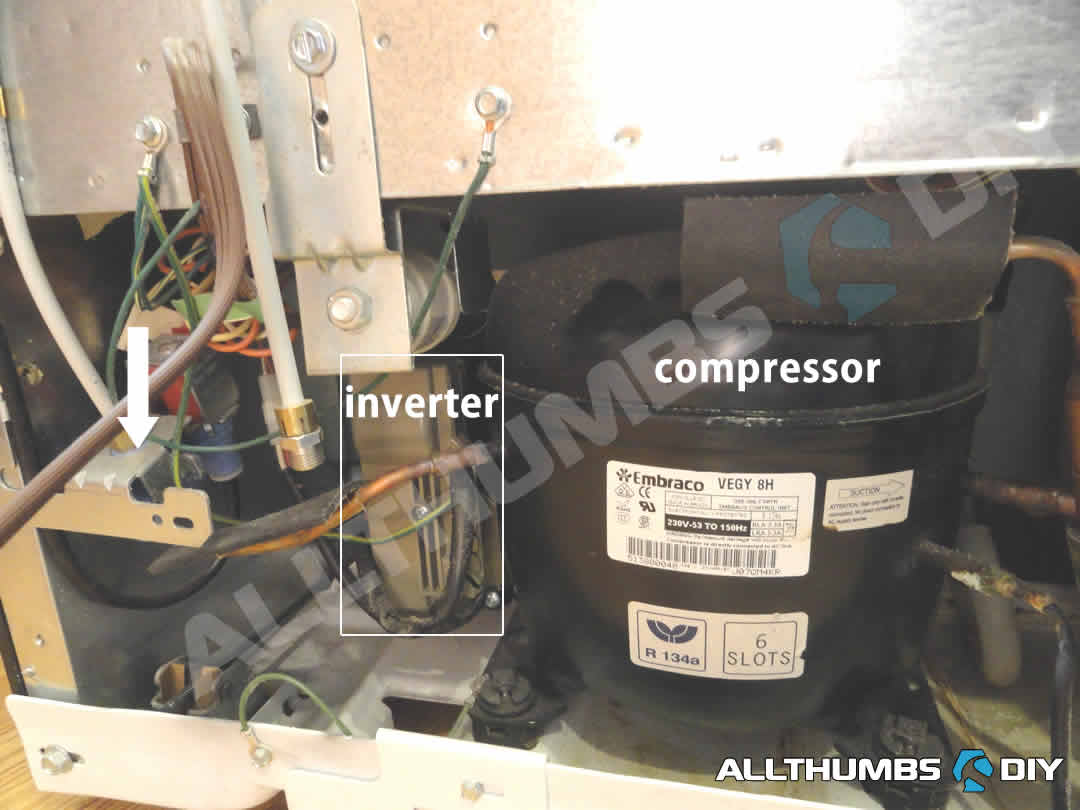
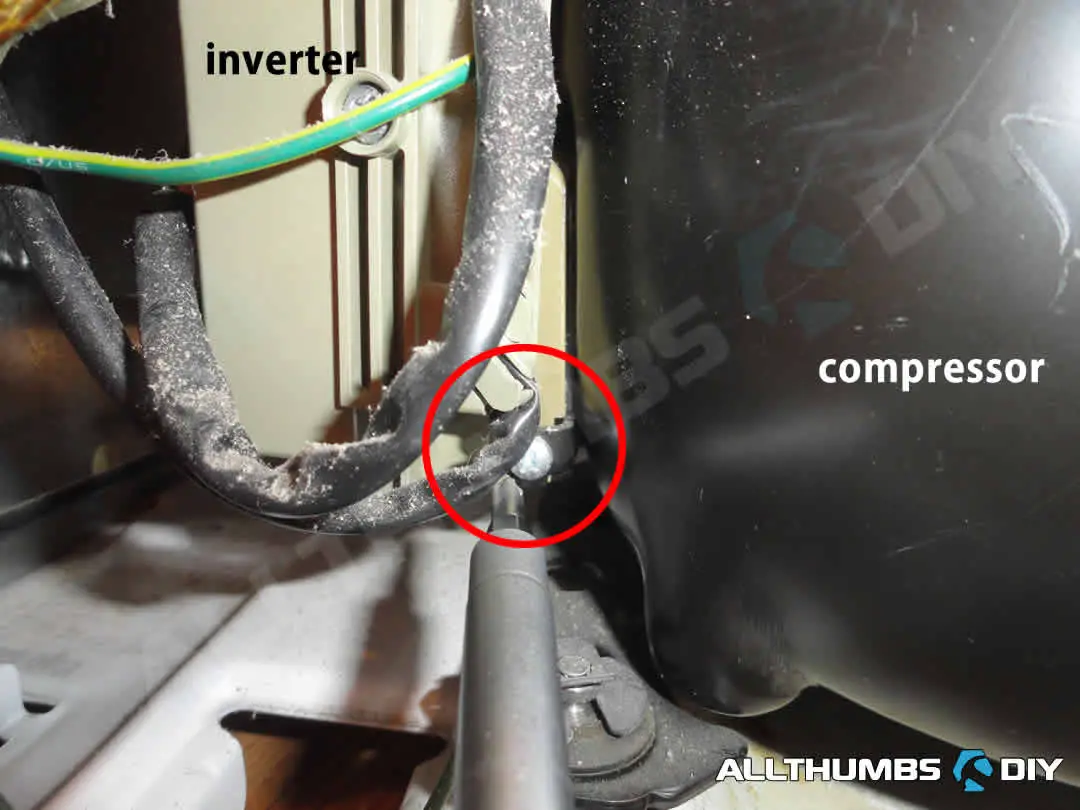
- Step # 11 – Please note that you DO NOT NEED to disconnect the two push-lock clips located just left of the inverter box (indicated in red circles)
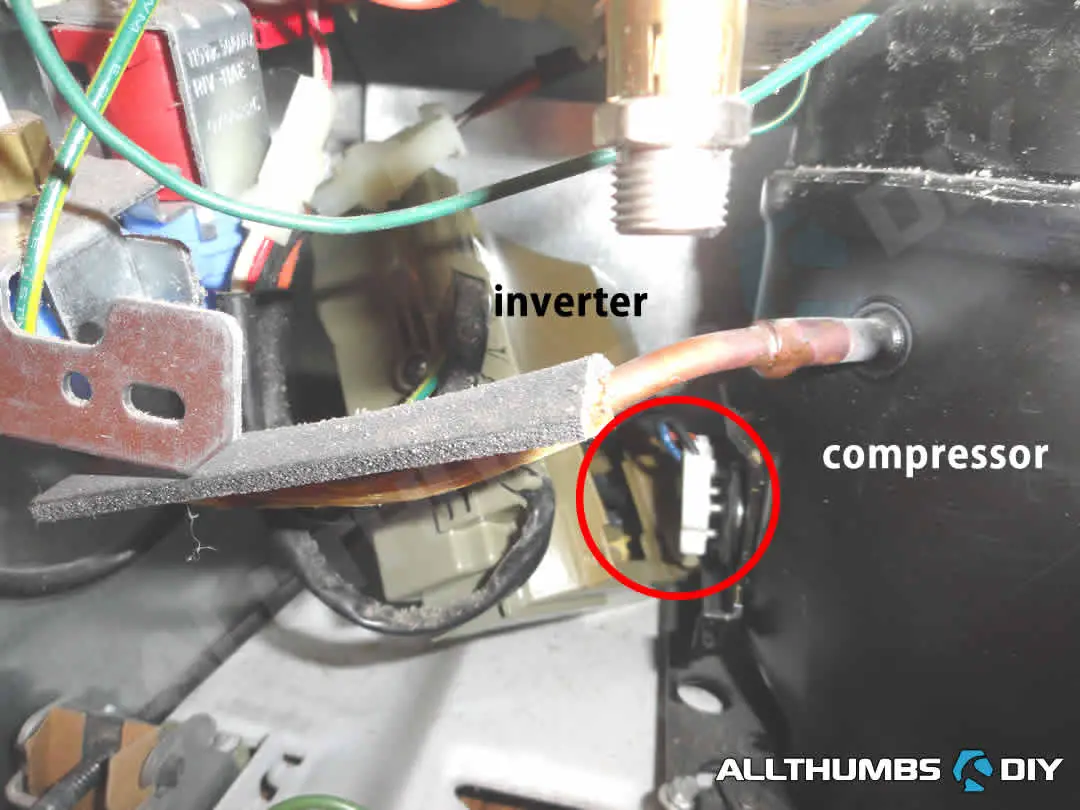
- Step # 12 – Use a medium-sized Phillips screwdriver to remove the screw on the bottom of the inverter
- Step # 13 – Gently lift the invert to the left to expose the push-lock clip attached to the 3-post compressor. Using a medium sized flat head screw driver, gently work back and forth the loosen it. Then use your fingers to pry it off (It’s a tight squeeze so if you have large hands, you may need to recruit someone with smaller hands.)
- Step # 14 – With the inverter disconnected, I can now test compressor’s resistance (ohm). This step was necessary due to the fact that I did not own a special tool to test the inverter directly
- Step # 15 – The compressor has 3 posts and they need to be tested in pairs using our DMM. In the end, we will have measured 3 pairs
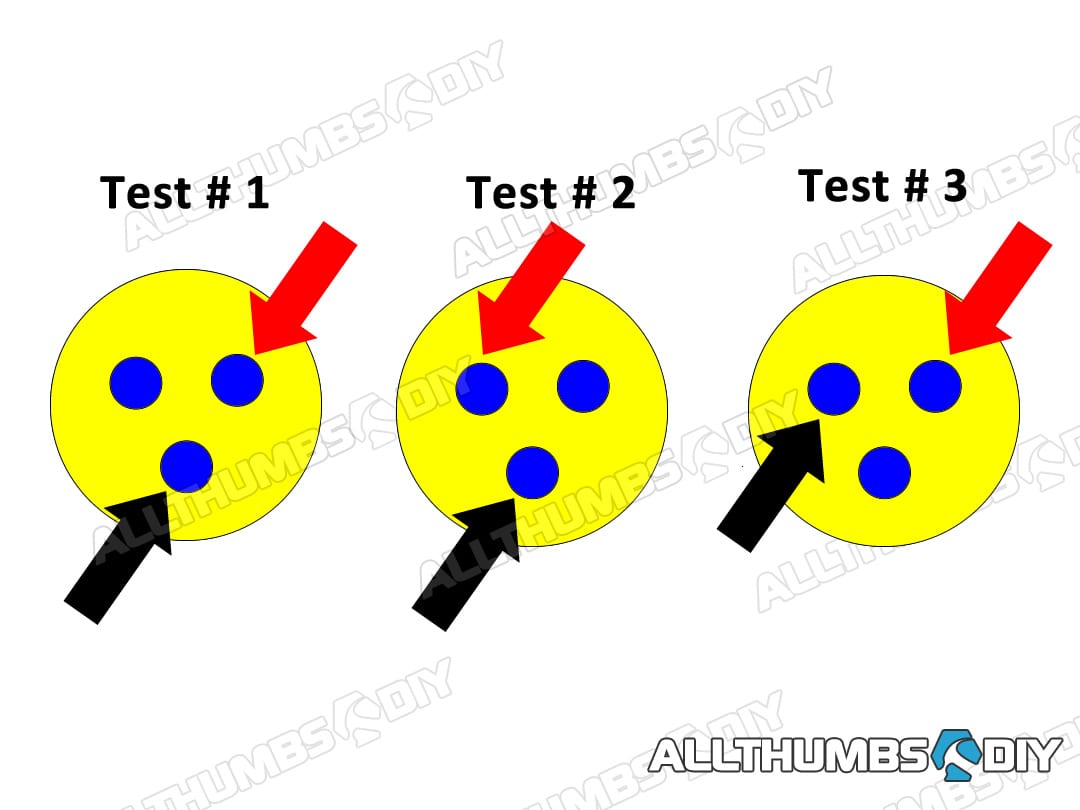
- Step # 16 – For each test, the resistance measurement should be 5.5-7.5 ohms. My DMM readout indicated 6.6 ohm across all pairs so the compressor was determined to be in working order. If you happen to encounter infinite resistance to one or more tests, your compressor will need to be replaced.
- Step # 17 – Since my primary control board and compressor were in working order, by process of elimination, I determined that my inverter board was faulty.
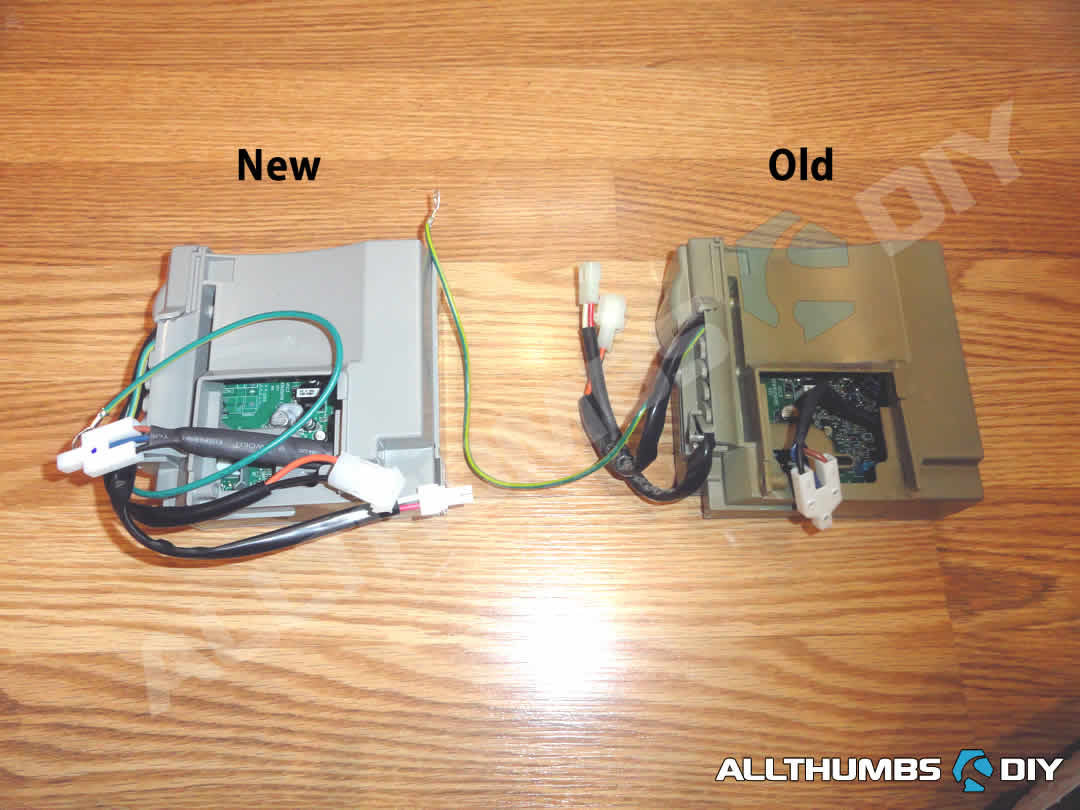
- Step # 18 – The new inverter is slightly smaller and GE seemed to have applied more heat-resistant insulators around various connections. The new item also came with 2 adapter wires should you need them (I did not need them).
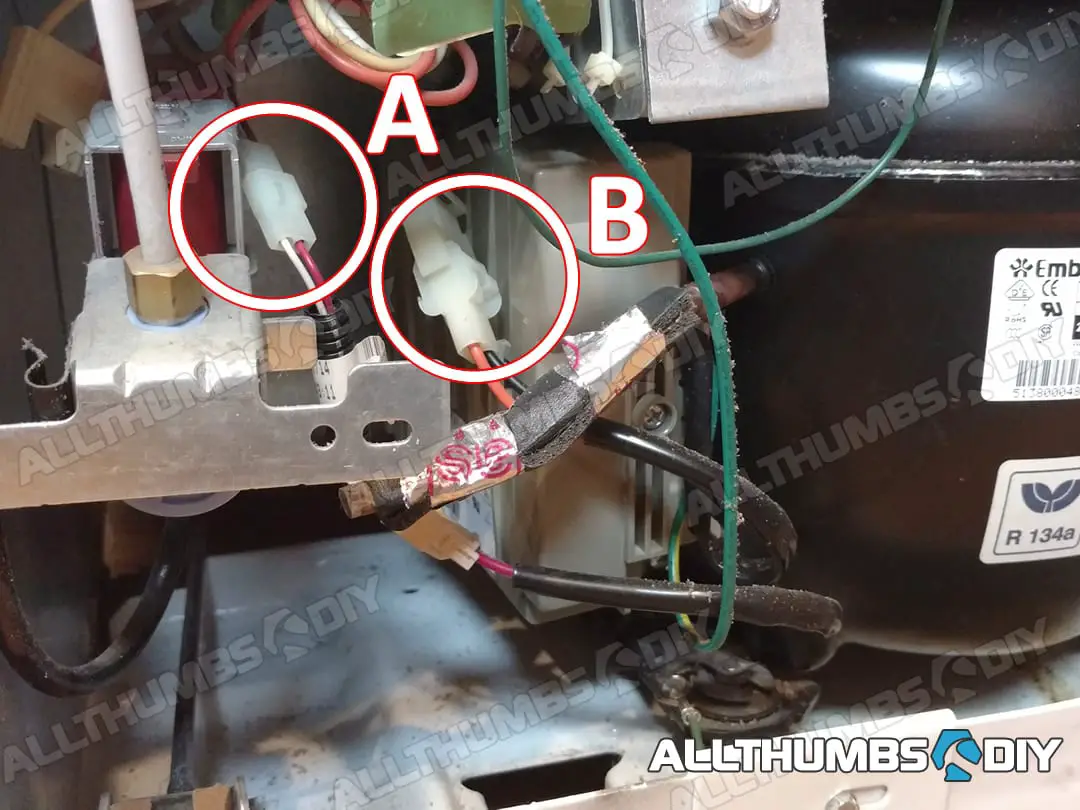
- Step # 19 – Remember those two wires to the left of the inverter I mentioned earlier? They simply need to be disconnected (held by clip locks) as well as the ground wire attached to the refrigerator’s frame
- Step # 20 – Upon plugging in the refrigerator, I let the temperature stabilize over 24 hour period without adding any food. I am happy to report that it has been working beautifully.
Conclusion
So why did my inverter fail? My guess is that the freezer door was not completely sealed overnight and the compressor ended up working overtime which may have placed extra stress on the inverter. So check to make sure that you do not over-stuff the bottom freezer and the doors are properly sealed shut.
After 2 weeks, I am happy to report that my refrigerator is still working and that I saved around $325 in labor charge.

Bob Griffiths
Monday 18th of July 2022
Kevin sez: “If you tested all three posts on your compressor, and your J15 jumper checks out, the lack of cooling problem is probably caused by a failed inverter.“
Right you are! I finally got the part ordered and installed it a few days ago. The fridge is now humming along nicely. Long May it Run!!
My sincere thanks to you Kevin for posting this info. Your advice not only was great but you saved me buying a new fridge. You are the best! Much appreciated! THANK YOU!!,
Dan
Tuesday 28th of June 2022
Hello Kevin,
I have a ge pfss6pkx. Temps in both compartments rose. Melting ice and softening ice cream, ice maker not making ice. Fan blowing on compressor worked only intermittently. Repairman replaced motherboard 3 times before one finally worked/cooled but that fan still only works a few seconds at a time. Now 6 months later freezer is warming up again. I put a small space fan behind the fridge and all returns to normal. Maybe just that fan or inverter? Thanks
Bob Griffiths
Thursday 23rd of June 2022
Kevin, I have a pgcs1pjxass. I have lights and fan but no cooling in either the fridge or freezer section. But I’m confused by your instruction at Step #4. How do you get a voltage reading at J15 if the fridge is unplugged? Without power to the motherboard, I would expect to get a 0.00vdc, which is what I’m getting. BTW, the compressor studs checked out fine. So I think it’s the motherboard or inverter. THANK YOU!
kevin
Thursday 23rd of June 2022
Hi Bob,
Yes, you need to plug-in your refrigerator to test the J15 jumper (I need to fix step #5).
If you tested all three posts on your compressor, and your J15 jumper checks out, the lack of cooling problem is probably caused by a failed inverter.
Good luck!
D whalen
Tuesday 14th of June 2022
GE profile side by side. When outside temp goes above 70ish, evaperator coils freeze up. Defrost heater works in diagnostic mode. Thermistors all pass diagnostic mode. Cleaned condenser coil it was pretty dirty. Any ideas as to what could he the problem? The fridge works great in the winter but this is the second summer in a row where this freezing up is happening as the outside temp rises.
kevin
Thursday 23rd of June 2022
Hi,
I am going to guess that you have a failed defroster thermostat. You will have to google your specific model...
Rj
Friday 11th of February 2022
Looking for help get profile freezer warm but fridge holding pretty steady