
KEY POINTS
- This post applies to Model # C2002 Type 3. If you have Type 4, your drain valve may be different
- If you arrived to this page via a search engine, you may want to read How to Repair a Leaky Pancake Air Compressor – Part 1 first
Introduction
Now that I received my parts I am ready to start the replacement process (please read my first post if you need to buy a replacement part)
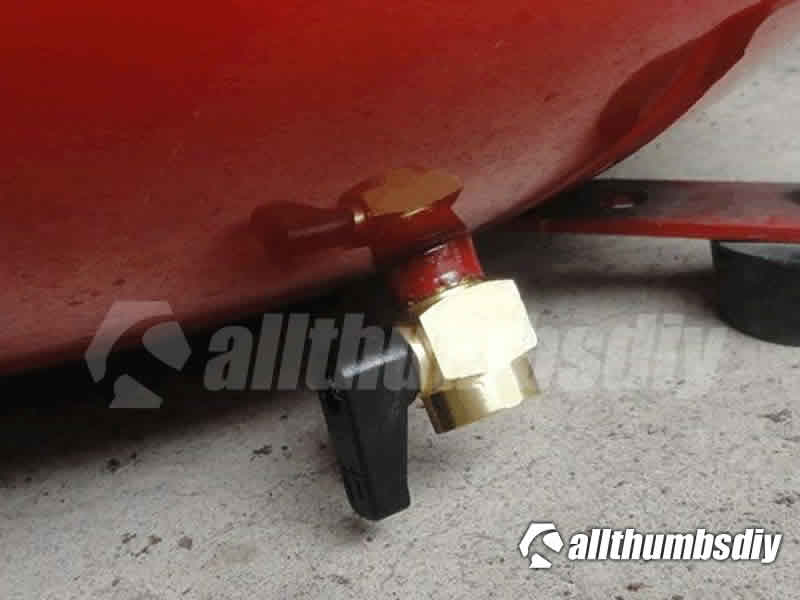
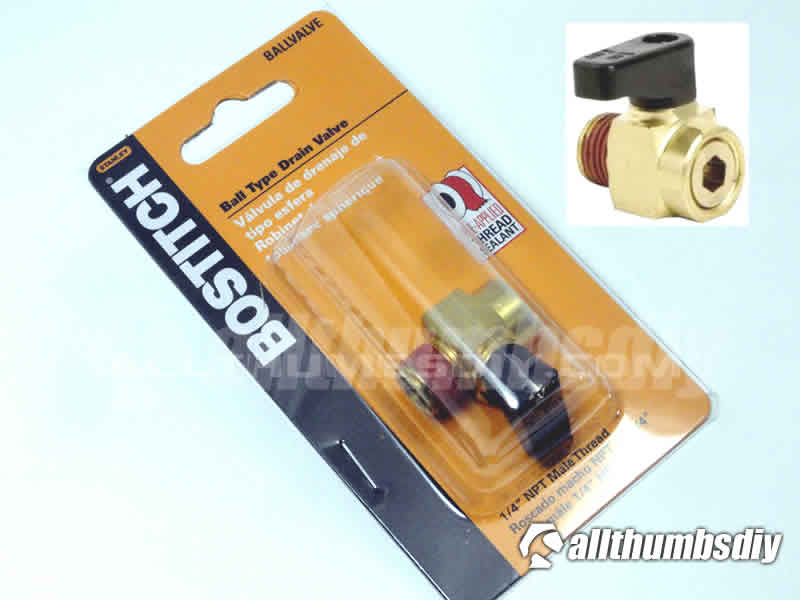
I primarily chose the ball valve because it does not have an O-ring and allows me to quickly drain the tank.
Caution
- Some pancake compressor tanks come with an air inlet nut that is welded to the tank. This part is welded and should not be disturbed while installing a new valve
- Some drain valve design may have a Torx / Allen head built into the drain valve assembly. You should NOT disturb this screw.
Step-by-Step Instructions
- STEP # 1 – Open the drain valve and empty the air tank
- STEP # 2 – Unplug the compressor
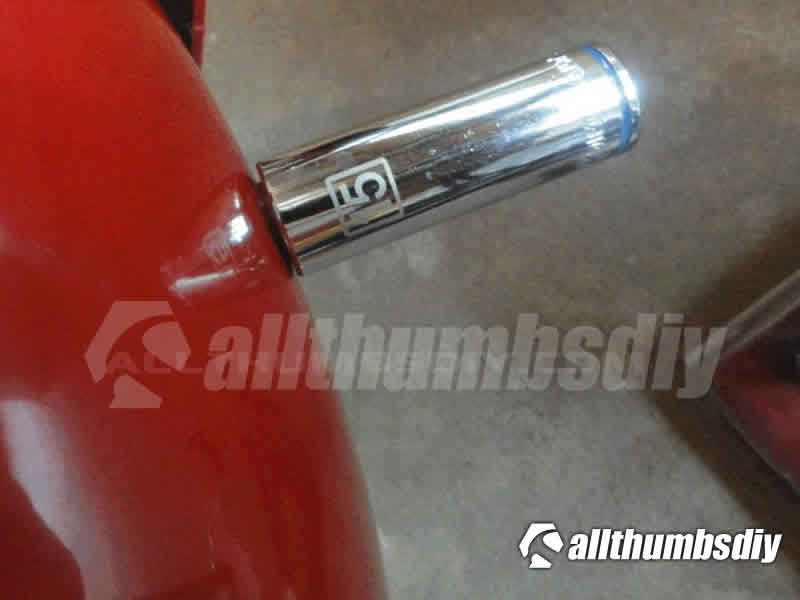
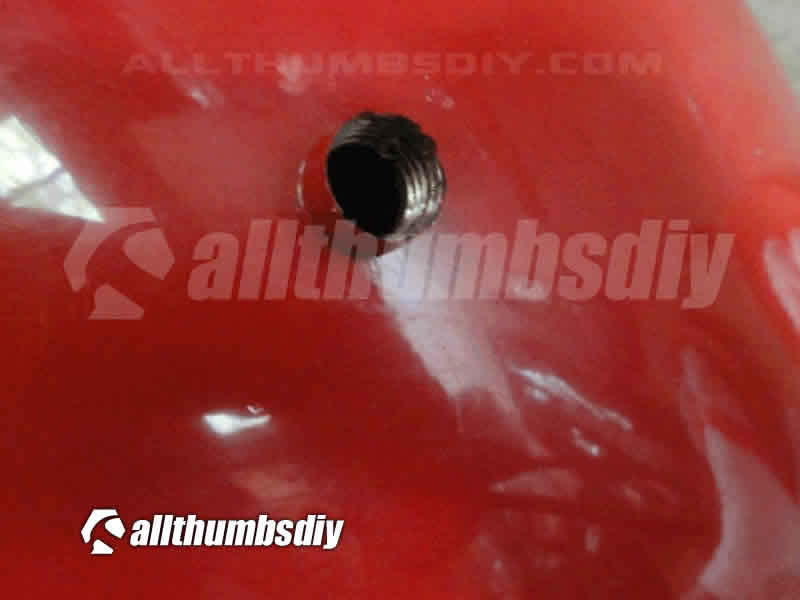
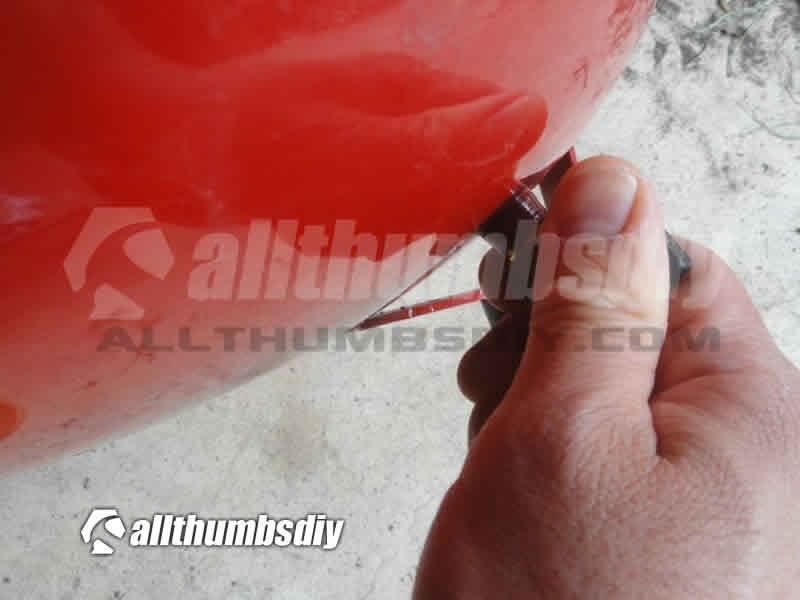
- STEP # 3 – Place the 15mm deep socket over the drain valve nut and turn counter-clockwise to detach from the compressor
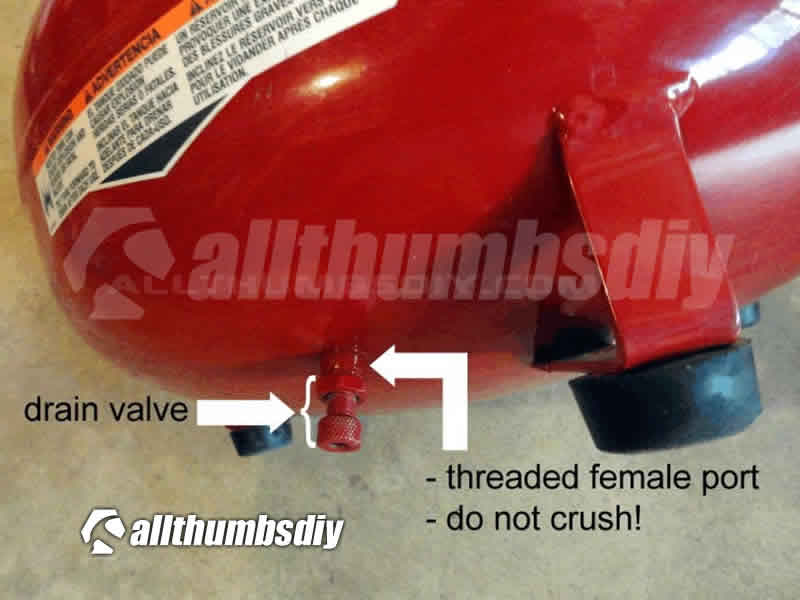
- STEP # 4 – if you are using a pair of adjustable pliers, make sure to grab the nut, not the threaded female port!

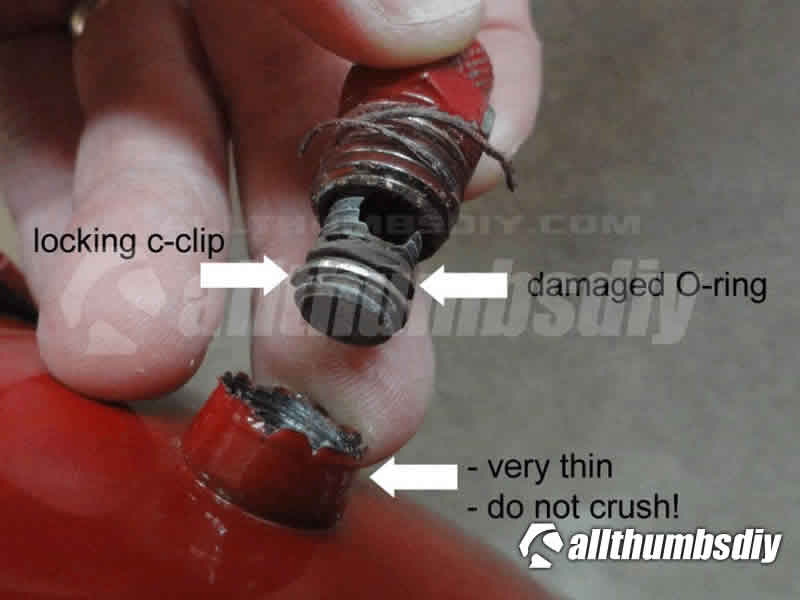
- STEP # 5 – Please note that the female threaded port (i.e. part of the compressor) is EXTREMELY thin
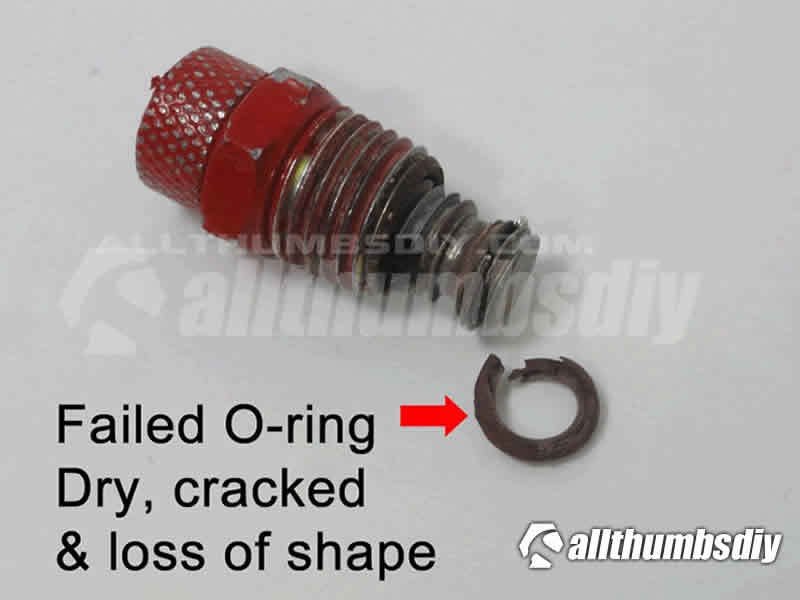
- STEP # 6 – If re-using the old valve, clean the thread with the tooth brush. Below is my failed compression style drain valve
- STEP # 7 – Inspect the new Bostitch drain valve and pre-applied pipe sealant thread (red)
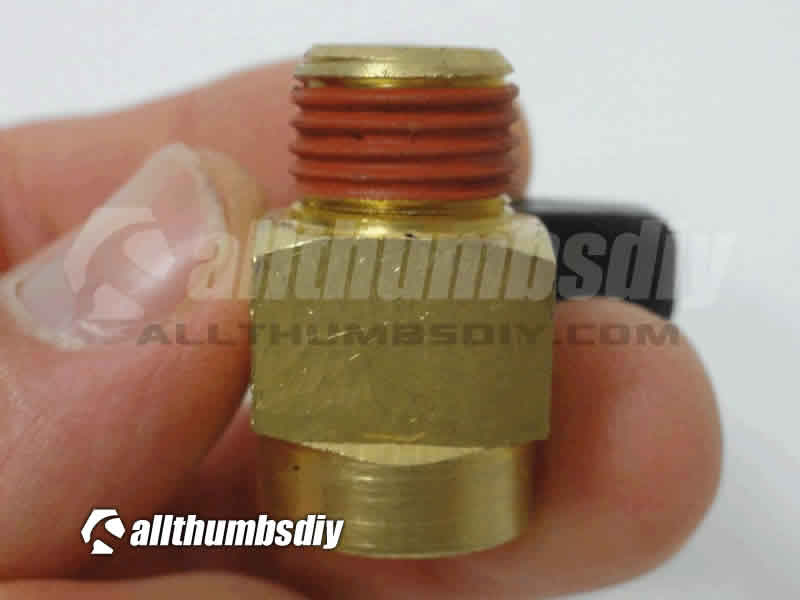
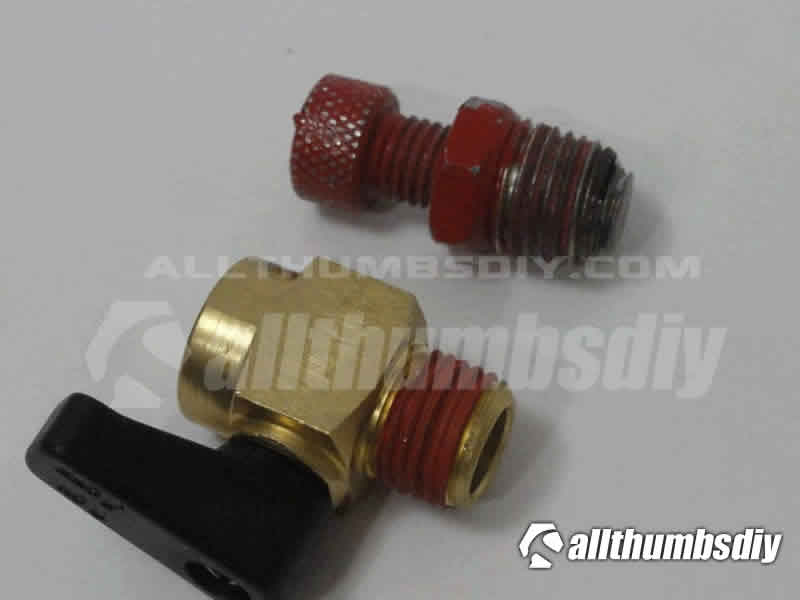
- STEP # 7 – Install Bostitch drain valve by hand first (fig. 4b), then use the adjustable pliers to tighten (fig. 4c). I tightened until the the drain valve assembly barely touched the “neck” of the female port
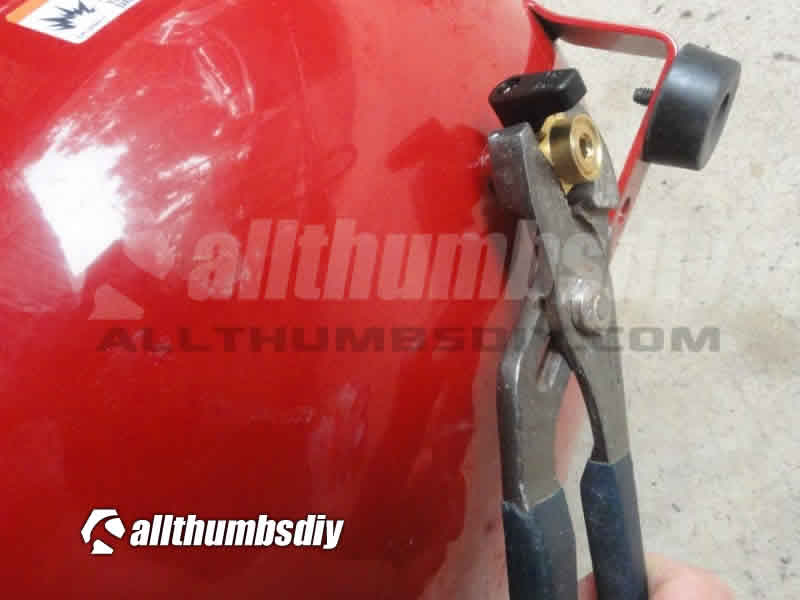
- STEP # 8 – It worth repeating that please DO NOT OVER-TIGHTEN the valve. The inlet port is very thin and if it becomes damaged, you will need to grind off the “neck” and either tap a new thread or weld on a new nut
- Stand away from the drain valve, in case the drain valve suffers a catastrophic failure and it becomes a projectile 🙂
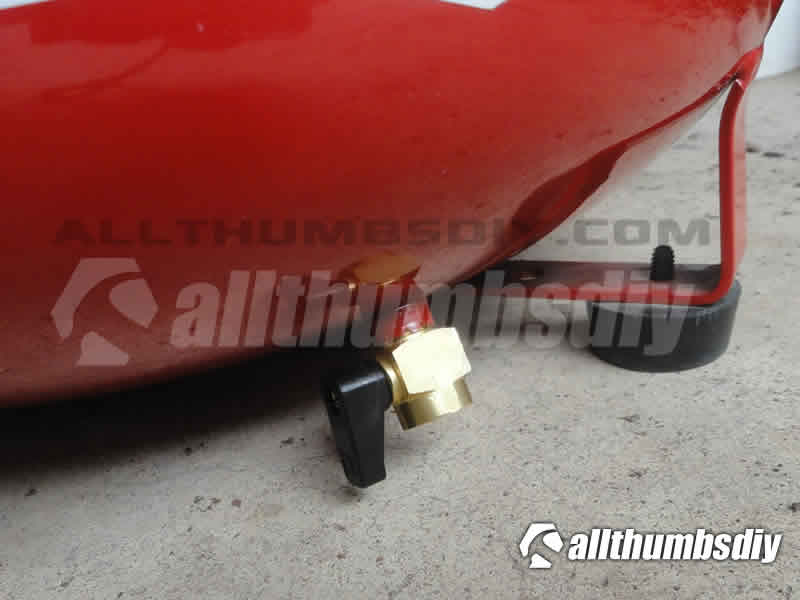
- Close the valve, plug in and turn on the compressor for testing.
Summary
The finished product has slightly less handle-to-ground clearance but the handle still can be opened while the compressor is on the ground.
By the way, please make sure to drain the tank properly (tilted towards the drain valve) so that any moisture can be expelled from the tank (to minimize corrosion).

Reference Links
- How to Repair a Leaky Pancake Air Compressor – Part 1
- Porter Cable – Product Page (Model C2002, Type 3)
- Porter-Cable Technical Assistance – Toll Free 888-848-5175
- Porter Cable Parts Diagram
- Porter Cable Instruction Manual
Tom
Tuesday 22nd of August 2017
Leaking inside the plastic could be a faulty pressure regulator. It is a plastic piece that breaks... See here for YouTube video on how to fix faulty regulator... https://www.youtube.com/watch?v=s5eWvRzEmuQ
Norm!
Sunday 7th of May 2017
Dear Kevin, Thank you for the precision, brevity, clarity and elegance of your explanation. Will purchase the Bostitch valve as you suggest and will install as per your excellent instructions. Much appreciated!
kevin
Monday 8th of May 2017
@ Hi Norm-
Thanks for your comment and good luck!
Kevin
John Davidson
Saturday 3rd of December 2016
Mine is leaking air from the main control valve area. Is it wise to change all the teflon tape with fresh stuff. It is not leaking from the release valve or the bottom drain. It charges up to 150lb. then releases down to 120lb. and the leak stops. Any suggestions.
Dennis
Wednesday 1st of June 2016
Did you ever find out how to repair the leak inside the plastic housing? My leak sounds like it is coming from inside.
kevin
Saturday 4th of June 2016
@dennis-
I haven't had a chance to take it apart yet. I agree the leak sound is coming from under the plastic housing..
Martin
Sunday 7th of June 2015
I was hesitant to work on my leaking pancake compressor until I saw your article. Thank you very much for giving me the confidence and saving me 75 bucks!
Martin
kevin
Monday 8th of June 2015
@martin-
thank you for your kind words!
kevin