
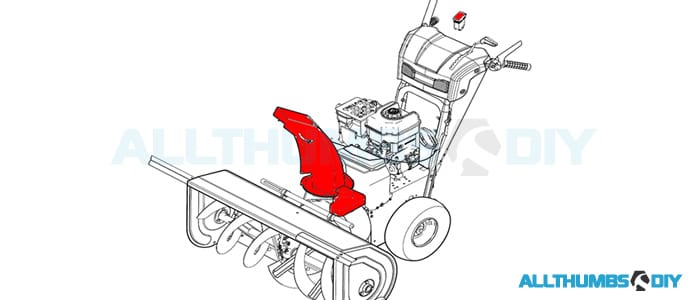
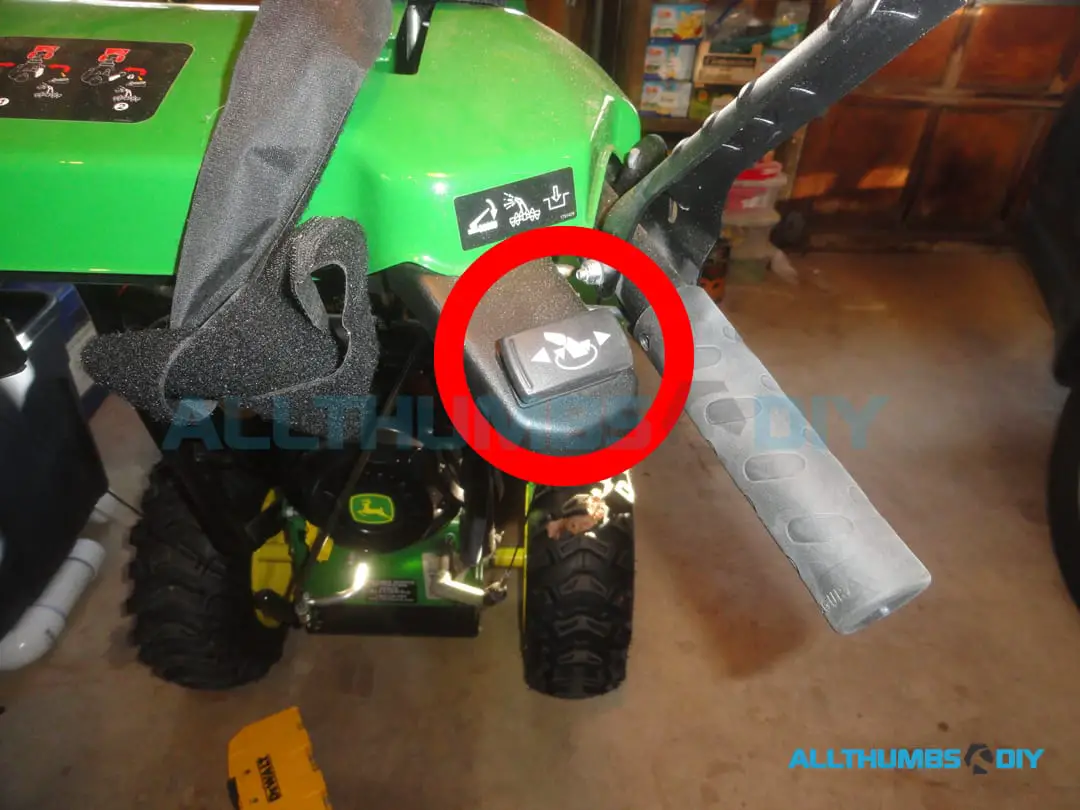
One of the thing I love about my John Deere 1330se is that it comes with two rocker switches to control the chute rotation and chute deflector.
However, we need to expect that all electric components (especially ones that are exposed) operating in a wet and cold environment will most likely have issues at one point.
Coupled with John Deere 1330se electrical system not having any fuses, other electrical problems, such as dim or non-lit headlights can mask the root cause of a problem.
PROBLEM / SYMPTOM
- Electric chute rotator switch fails to rotate to the left and/or to the right side
APPLICABILITY
Replacement parts mentioned in this article should be applicable to these snowblower brands/models:
- John Deere 1028E, 1330se, 1332pe, 1338pe
- Simplicity L1730e
- Murray 1330se
DIAGNOSIS
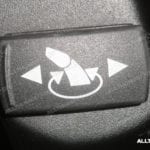
Rocker Switches house a button for operation that can be pressed on either end like a seesaw to connect or disconnect an electrical circuit. They are often used as ON/OFF switches on the main power supplies for electronic devices.
The name “rocker switch” comes from the rocking motion that the switch makes when the button is pressed and it is also sometimes called a seesaw switch.
The rocker used in JD 1330se consists of 6 wires in a floating ground where the middle 2 contact pads provide ground and power.
- If your chute is rotating to one side but not the other, you can simply unplug and flip the bottom of the switch upside down to see if the problem gets reversed;
- For example, let’s say that you are able to turn the chute to the left only but you can when the switch is flipped. This indicates that you have a faulty rocker;
- However, if you still cannot turn to the left after flipping over the switch, you most likely have a bad motor (check my John Deere 1330se Resource page to look for a solution);
QUICKEST / SIMPLEST SOLUTION
Why?
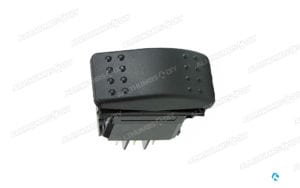
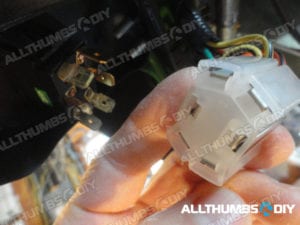
All current rocker switches, including non-OEM parts, come in a PACKARD / AMP style connector. The problem is that the receiving connector on your snowblower is the original Euro-Look 6 pronged female connector.
Briggs OEM kit comes with a proprietary adapter harness so that you can simply install your new rocker switch, plug in the harness in between the new rocker switch and the Euro-Look female connector. I spoke to Carling Technologies that this harness is ONLY AVAILABLE as part of the B&S kit and that it cannot be purchased separately anywhere else.
So if you purchase a non-OEM rocker switch with the PACKARD connector, you will have to rig up your own wiring adapter harness, which will probably involving cutting off the female adapter from the snow blower.
PROPOSED SOLUTIONS
The contact pads inside can get dirty so sometimes simply wiggling them around works. You can also unplug / plug the wiring harness from the bottom sockets may work.
If none of these work, you can try cleaning it with the steps in the step-by-step guide 2 sections below.
If that fails, you can either replace it with a new momentary (not maintained) rocker switch from Briggs & Stratton (OEM) or 3rd party rocker switch from Coles-Hersee, which is now part of Little Fuse, a non-OEM part.
Even though my switches are working, I picked up a couple spares during the off-season, just in case I am unable to fix it next time.
PARTS
Regardless of OEM vs non-OEM replacement parts, you need to make sure that you buy a momentary rocker switch. You will see a lot of knockoffs that look very similar and are significantly cheaper. These cheapo parts will most likely cause more trouble than your cost savings.
Since Cole Hersee was founded in 1924, they have been a pioneer and leader in the development of heavy-duty electrical products for the vehicle industry, and have earned a reputation for quality and value. Cole Hersee has collaborated on many basic industry standards and is a preferred supplier of over 2,000 dependable vehicle products and accessories.
Littelfuse acquired Cole Hersee in 2010 to offer their customers a more extensive portfolio of products in the commercial vehicle market.
Incidentally, the wiring harness adapter that is part of the Briggs and Stratton kit (part # 1687904) is made by Carling Technologies (now part of LittleFuse).
EXPLAINING ROCKER SWITCHES
The main cost difference between OEM and non-OEM is that OEM parts comes with a instructional label imprinted on the switch. Non-OEM replacement part is generic and does NOT come with any imprinted labels.
One very important note about the a non-OEM Cole-Hersee rocker switch – the rear connector layout is 2×6 pinout in a rectangular shape. John Deere’s wiring harness connector is in the old style, 6 pinout in an oval shape. What this means is that you either need to purchase a harness adapter or splice the wires together yourself.
 |
|
 |
|
- Briggs & Stratton – DISCONTINUED
- – Part # 1754865YP, sold under Murray, Snapper, Simplicity, B&S brands;
- Briggs & Stratton – DISCONTINUED
- – Part # 1752240YP, sold under Simplicity, B&S brands;
- Briggs & Stratton – DISCONTINUED
- – Part # 1737378YP, sold under B&S brand;
I chose to repair the old switch but I did also purchase one as a spare. Replacement steps are identical to the removal process outlined below (but simpler).
REQUIRED TOOLS AND MATERIALS
- Flat-head screwdriver;
- 320 Grit sandpaper; – if this is an emergency repair and you do not have a piece of sandpaper, you can use a small flathead screwdriver to scrape
- Couple of Q-tips;
- No. 2 pencil with eraser
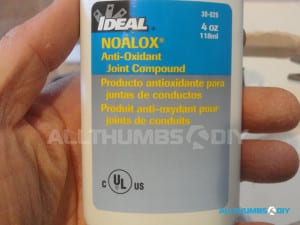
- Noalox® Anti-oxidant Compound; – if this is an emergency repair, you can skip this product (but I highly recommend and apply it to internal contact pads)
STEP-BY-STEP GUIDE
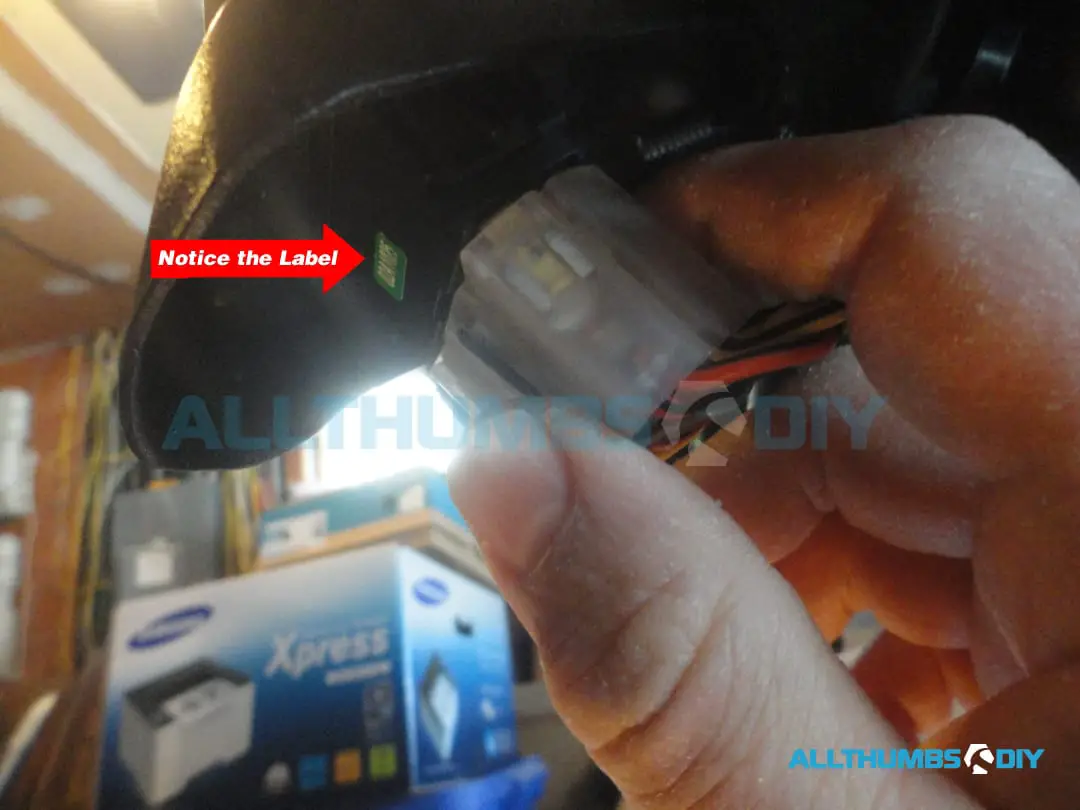
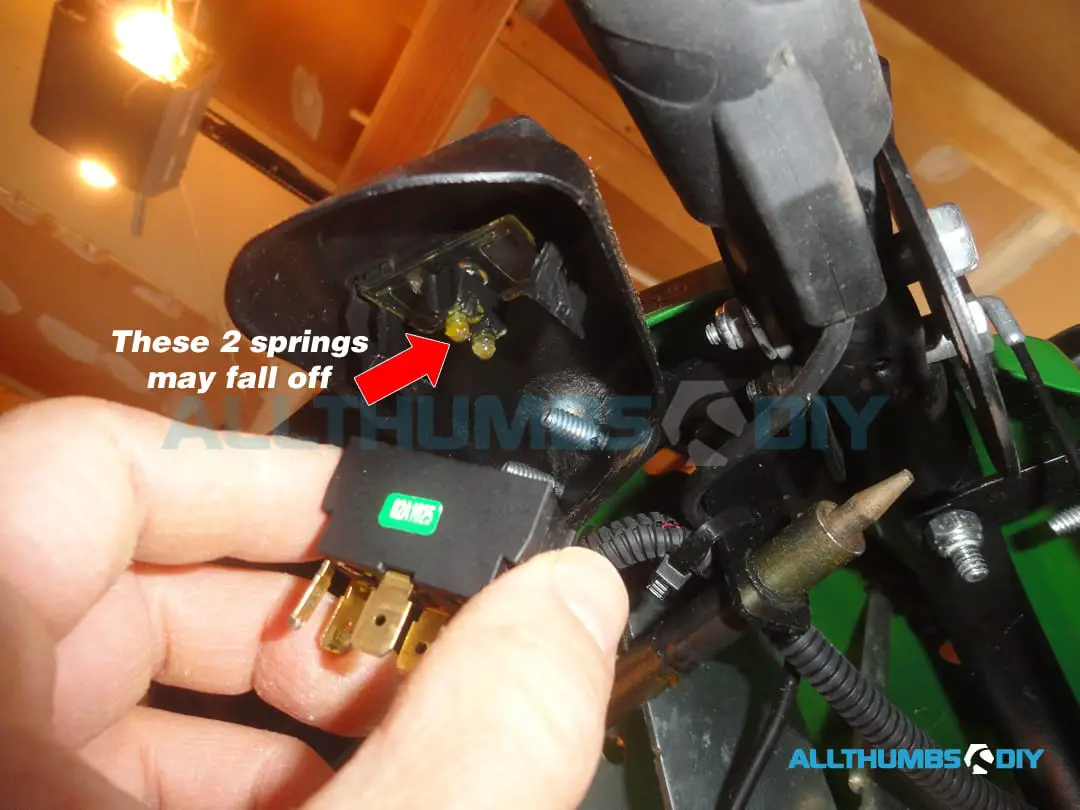
- Disconnect the 6 wire harness socket from the rocker switch terminal by gently rocking it side to side;
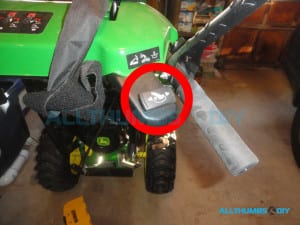
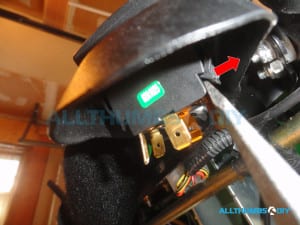
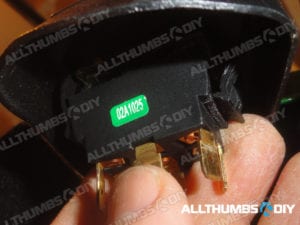
- Make a note of the bottom housing. Mine head a green sticker but if you do not have one, tape on a small note to indicate the right and left side;
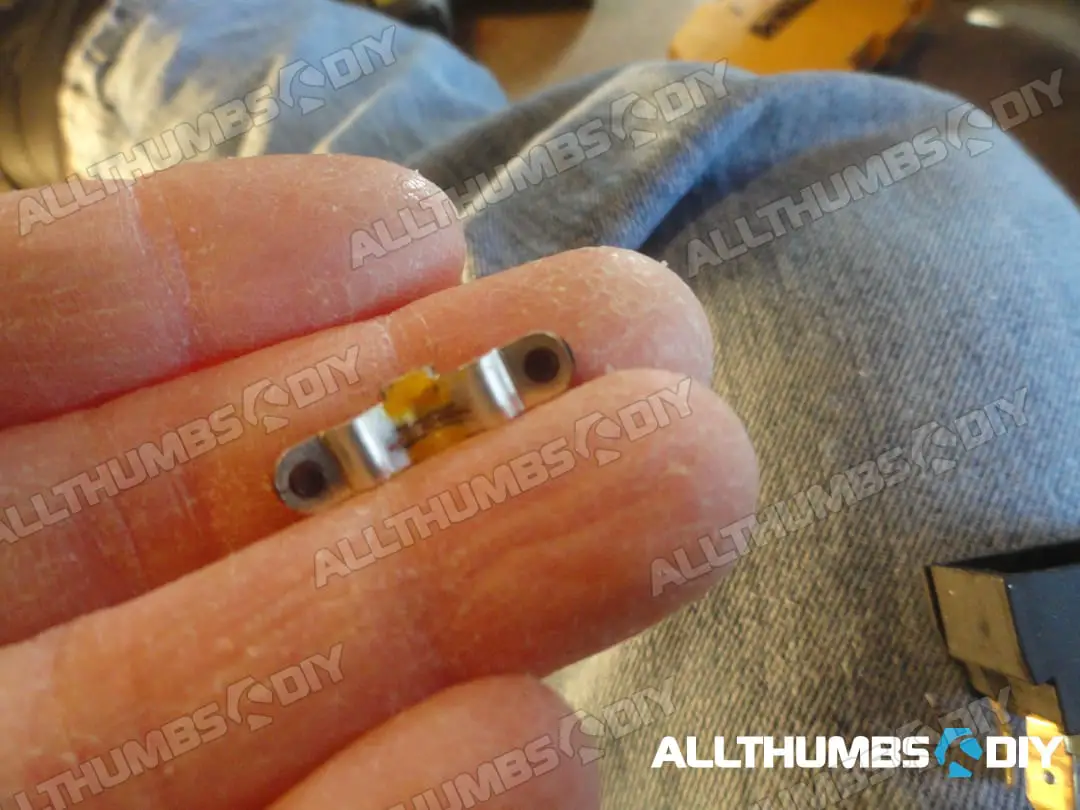
- Please note – there are two retainer springs that are glued in; they may fall out as you remove the bottom housing so place a white towel underneath to catch them, if needed;
-
-

-
-

- There is one half-alligator plastic clip on either side which secures the top and bottom housing pieces together;
- Take a flat head screwdriver and carefully work to separate the clip on one side only then you can slide out the bottom housing. Do not exert too much pressure as that may break off the clip (then you will have more headaches as you will not be able to seal out snow);
-
-
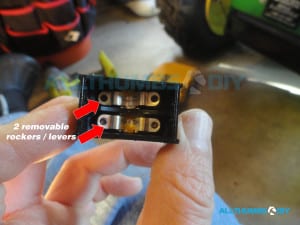
- Remove two rockers from the bottom housing;
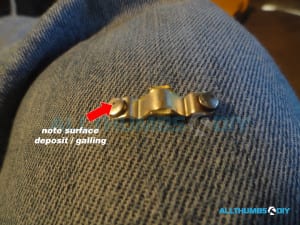
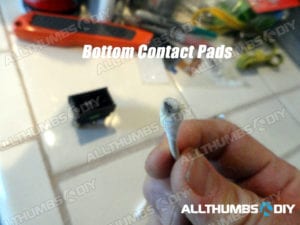
- You will need to clean 6 contact pads located inside the bottom housing, as well as four contact pads on two rocker arms;
-
-

-
-

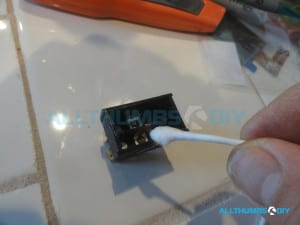
- Using cotton swabs, remove as much residue / surface deposits from the contact pads located on the bottom housing as well as on rockers;
- Use a pencil eraser to remove the remaining residue (if there are any left)
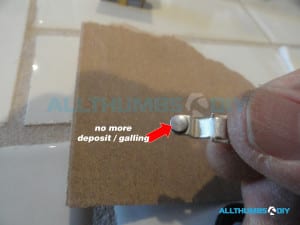
- If the remaining residue is really stubborn, use a small piece of 220 or 320 grit sandpaper and carefully sand off the surface (use gentle touch in order to avoid changing the profile of the contact pads);
-
-
-
- If you do not have sandpaper on hand, use a small flat head screw driver to scrape the top surface. Again, use gentle touch to avoid creating pits or grooves!
- Use a slightly damp papertowel to remove dust and debris
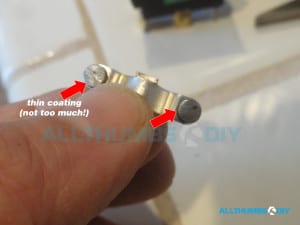
- Apply a small dab of NOALOX on all contact surfaces (no need to glob them on; just a thin coating will do;
-
-
- Re-assemble all parts, making sure that the bottom housing is reinstalled in the correct position (green label facing to you);


correctly and that all wires are attached in the same direction as before
WRAP UP
With little bit of time and patience, I was able to fire up my snow blower and get the chute rotating again.
My best guess is this short fix needs to be re-checked every year (best to do it before winter).
If you found this article to be useful, can you do me a favor and sign up for my newsletter? The signup form is found at the top of the screen on the right side.
Good luck with your repair and let me know how it turns out!

jd
Wednesday 15th of September 2021
Great description and well documented with all the pics. You did a great job!
I have 2 simplicity snow blowers - one as a backup and it has manual crank chute - Always works great
My other has heated grips and electric chute. Pleasure to use but when the switch fails in the middle of a storm, I just use the back up blower.
I picked the m both up very cheap!
Thanks for the great , well organized directions
Joe Walsh
Sunday 14th of February 2021
Kevin, can’t tell you how much I appreciate your tutorials. I am not a “handy” guy, but in the last week I repaired my John Deere 1330SE twice; once to replace the auger belt and once to repair the chute rotation switch. Both were easy to do following your simple to follow instructions. Thanks for all your help. Definite confidence booster. Joe
kevin
Tuesday 16th of February 2021
Hey Joe-
Thanks for your kind words. I am glad the article helped you out.
Kevin
terry ryan
Sunday 31st of January 2021
This is just what the doctor ordered!!
THANK YOU SO MUCH!!
Dieter Paul Schilling
Saturday 18th of May 2019
I’ve ordered the replacement kit two separate times. Once directly from a John Deere dealer and once from the Green Parts Store. Both refunded my money after about a month because they couldn’t give me an estimated availability for the kit. Using the JD part number, I was able to get to your website and find immediate availability from e-replacement parts. Thanks for your help and all the detailed information. I’m now subscribed to your newsletter.
kevin
Wednesday 12th of June 2019
Great job! Thank you for letting us know.
Dean Stenehjem
Tuesday 29th of January 2019
Your instructions for diagnosing and cleaning the contact points and rocker arms were 'spot-on'! Thank you so much for taking the time to write about how to solve this fairly simple problem. The place I usually go to for help has been closed for a week (maybe on vacation?) and a big storm was coming; so was doubly glad to get this taken care of!
kevin
Wednesday 30th of January 2019
Hi Dean-
Thank you for your kind words. I am glad it worked out for you.