
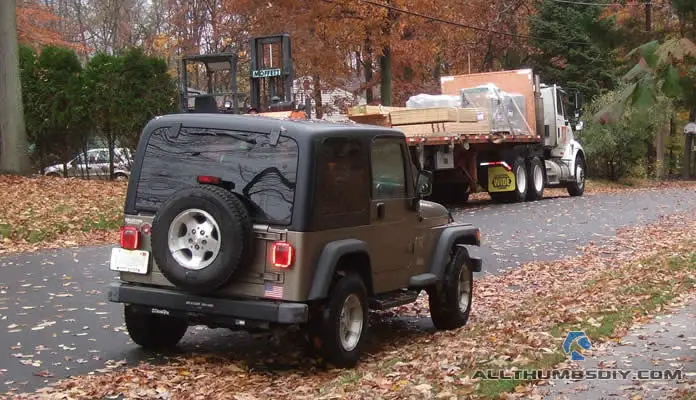
Now that I got my approvals to proceed, it’s time to whip out that credit card and do some shopping. If you will be working on your shed during October, make sure to pick up some 2-MIL plastic sheathing to cover your lumber during inclement weather to prevent premature warping.
Part 1, Part 2 (you are here), Part 3, Part 4 (TBD) and Part 5 (TBD).
# 5 – CALCULATE AND PURCHASE MATERIALS
What I am going to do here is to explain my logic behind certain items in how much quantity. An end section will contain a neat list of all the materials need to build my shed.
My 12 x 8 shed was built with a standard 16″ O.C. stick frame method. Some books recommend 24″ O.C. but I like to build my shed as sturdy as possible (besides 16″ O.C. wall studs line up nicely with flooring joists with 16″ O.C.).
A. SKIDS & CROSS-MEMBER BRACES
Because where I live can be windy at times, I wanted to build a shed that had a very low center of gravity. I also wanted a way to allow air to freely circulate below so that even the pressure treated wood have the opportunity to dry out, increasing its longevity>
One method I thought of was to lay down skids that were actually part of the flooring system with full cross-member braces for rigidity. The entire skid structure weighed over 350 pounds without any content inside the shed, so it probably will never flip over. To build the structure, I needed:
- Two, 6 ft x 6 ft x 12 ft pressure treated lumber;
- Three, 6 x 6 x 8 pressure treated lumber;
Twelve, Simpson-Strong A23Z L-brackets + one pound box of 16d, 3.5″ exterior galvanize nails;Twelve, Simpson-Strong ML24Z L-bracketsBox, Deckmate 3″ screws;Two boxes, Simpson-Strong 1/4″ x 3″ structural screws (50 per box);
-
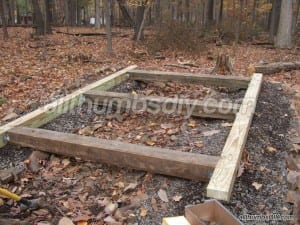
- fig.3.5
B. RIM JOISTS
Two, 2 x 6 x 12 non-pressure treated lumber;Two, 2 x 6 x 12 pressure treated wood;Two, 2 x 6 x 8 non-pressure treated lumber;Two, 2 x 6 x 8 pressure treated wood;
-
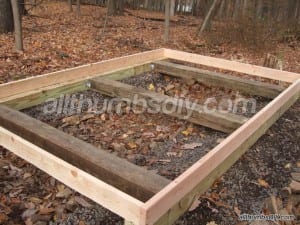
- fig.3.6
C. FLOOR JOISTS
The length of the floor is 12 feet or 144 inches and will have 16″ o.c. To get the total lumber required, divide 144 by 16 ad round up plus 1. I also included two extra 2 x 6 x 8 to install blocking (will make the floor more rigid).
Ten, 2 x 6 x 8 non-pressure treated wood;Ten, 2 x 6 x 8 pressure treated wood;Two extra, 2 x 6 x 8 non-pressure treated wood;Two extra, 2 x 6 x 8 pressure treated wood;
-
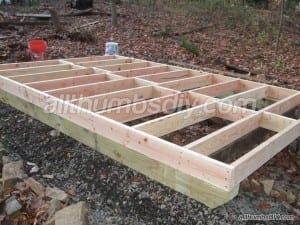
- fig.4.3
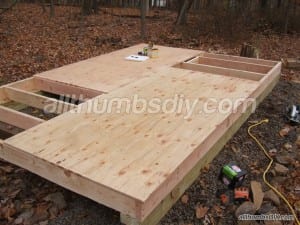
D. FLOORING
I used 3/4″ exterior grade plywood sheets as my flooring (1/2″ flexes too much under load). Since plywood sheets come in 4 ft x 8 ft sheets (32 sq ft), I simply took the total square footage (12′ x 8′ = 96 sq ft), divide by 32 and added one extra sheet for “oops” for total of 4 sheets.
Four, 3/4″ non-pressure treated, exterior grade plywood sheets;Four, 3/4″ pressure treated, exterior grade plywood sheets;
-
- fig.4.4
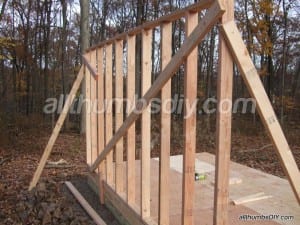
E. WALL STUDS, BOTTOM PLATES AND DOUBLED-UP TOP PLATES
All I did was convert the length of a wall into inches and divided by 16, then rounded up to a whole number then add 1 (if I was using 24″ o.c., I would have divided the total length of a wall by 24):
Wall A – long side
- 12 feet or 144 inches;
- 144 / 16 = 9 + 1 = 10 studs per wall;
- Twenty, 2 x 4 x 8 non-pressure treated wood
Wall B – short side
- 8 feet or 96 inches;
- 96 / 16 = 6 + 1 = 7 studs per wall;
- Fourteen, 2 x 4 x 8 non-pressure treated wood
Bottom Plates
- Two, 2 x 4 x 12 non-pressure treated wood;
- Two, 2 x 4 x 8 non-pressure treated wood;
Top Plates (doubled)
- Four, 2 x 4 x 12 non-pressure treated wood;
- Four, 2 x 4 x 8 non-pressure treated wood;
-
- fig.4.5
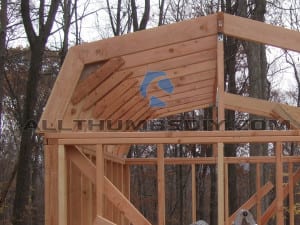
F. RAFTERS
- In a typical gable end roof (if you forgot what it looks like, go to fig.2.1 in How I Saved $1500 Dollars By Building My Own Shed – Part 1 article), you can use what’s called a multiplier run chart to compute rafter calculations.
- Unfortunately, rafter calculations for Gambrel roof is not that simple because of multiple rafter angles.
- Rather, I assumed that I wanted to transfer the roof load directly to wall studs which meant all I needed to do was just match the number of required rafters to the the number of wall studs (10 studs per wall or 20 studs total)
- In addition, I also decided to install a ridge board (center board where rafters from both sides meet at the top) so I added one 2 x 6 x 12 non-pressure treat wood.
- Twenty, 2 x 6 x 8, non-pressure treated wood.
- One, 2 x 6 x 12, non-pressure treated wood;
NEXT STEP
Click here to read How I Saved $1500 Dollars By Building My Own Shed – Part 3 where I will outline the list of remaining materials needed for my shed.
How I Saved $1500 Dollars By Building My Own Shed – Part 1
Saturday 21st of July 2012
[...] How I Saved $1500 Dollars By Building My Own Shed – Part 2 [...]