
Repairing and maintaining my house meant lots of power equipment like tool boxes, lawn mower, snow thrower, weed trimmer, miter saw, etc., which eventually took up so much space that my cars got kicked out of the garage.
Having to store nails and screws in the garage while getting my cars baked in the sun didn’t make sense so I decided to build a shed instead.
| Make sure to read my “Do I need a Permit when Building a Shed” post before starting your build! |
Introduction
I don’t mean to disrespect those of you without car garages, but darn it, it is just too good of a space to waste on storing “stuff” instead of cars (especially when it is snowing or raining).
I know, I know, we are all into minimalism these days and I know I should cull my stuff but as an avid home improvement DIYer and someone who enjoys working various tools, it was just time to build a shed.
At first, I thought I would just buy one off the shelf from a local dealer but I was shocked when I found out how much they were going for.
Like all DIY projects I do, I like quality stuff at reasonable prices. I wanted a shed that would last 20+ years. That rules out any type of plastic storage sheds and smaller sheds built with puny 2 x 3s. Some sheds built with 2 x 4s were no exception, with cut corners and cheap fasteners.
Shed Prices
I wasn’t exactly looking for a “Cadillac” shed but when I looked around, I was shocked to find out just how expensive they were.
On average, I found that a a 10’x10′ wood shed with delivery, setup and taxes came out to be roughly $3,700! Now, the cost was on the high side because the shed had to be built onsite (spot was not accessible for a pre-built drop-off) but $3,700 for a shed?
Being a cheapskate frugal person that I am, that price tag was way too rich for my blood so I began researching to see if I could build one on my own at the fraction of the retail price.
Based on a preliminary estimate, I figured it would cost approximately $1,000 in material cost and take about 4 weeks (2 weekend days per week) to build it so I decided to go for it.
Planning
My shed project was starting in late October with unpredictable weather so I had to work fast so I laid out my project execution plan:
- # 1 – Verify any zoning / building code requirements;
- # 2 – Design;
- # 3 – Site Selection;
- # 4 – Township code paperwork submission & approvals;
- # 5 – Purchase Materials;
- # 6– Foundation Preparation;
- # 7 – Framing (Foundation, Floor, Walls and Roof);
- # 8 – Siding;
- # 9 – Roofing;
- # 10 – Painting;
- # 11 – Doors & Shelving;
- # 12 – Ramp;
# 1 – Verify Code Requirements
Even if you don’t think you need it, I highly recommend you check with your zoning or building departments to see if there are any requirements.
Make sure to ask about the size of shed, footing type, height requirements, etc.
It would be a giant waste of time and money if you skip this step and have to tear down the structure.
# 2 – Design
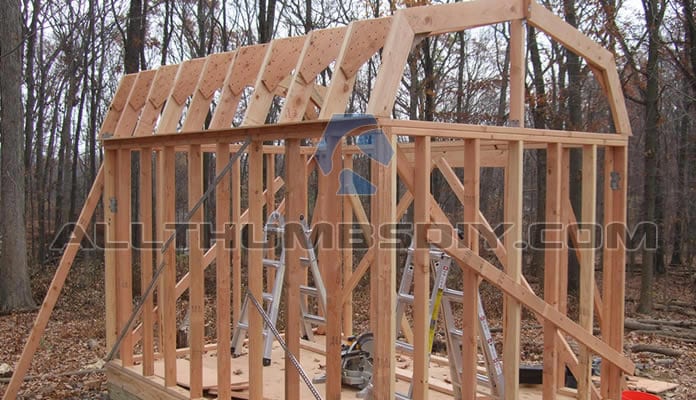
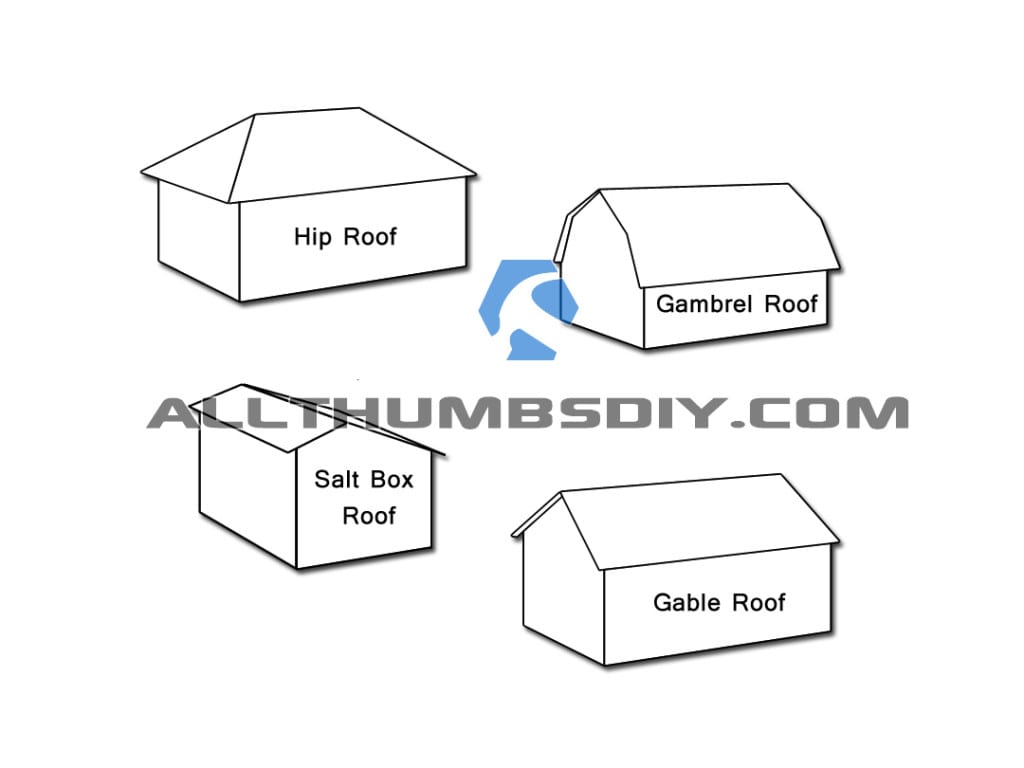
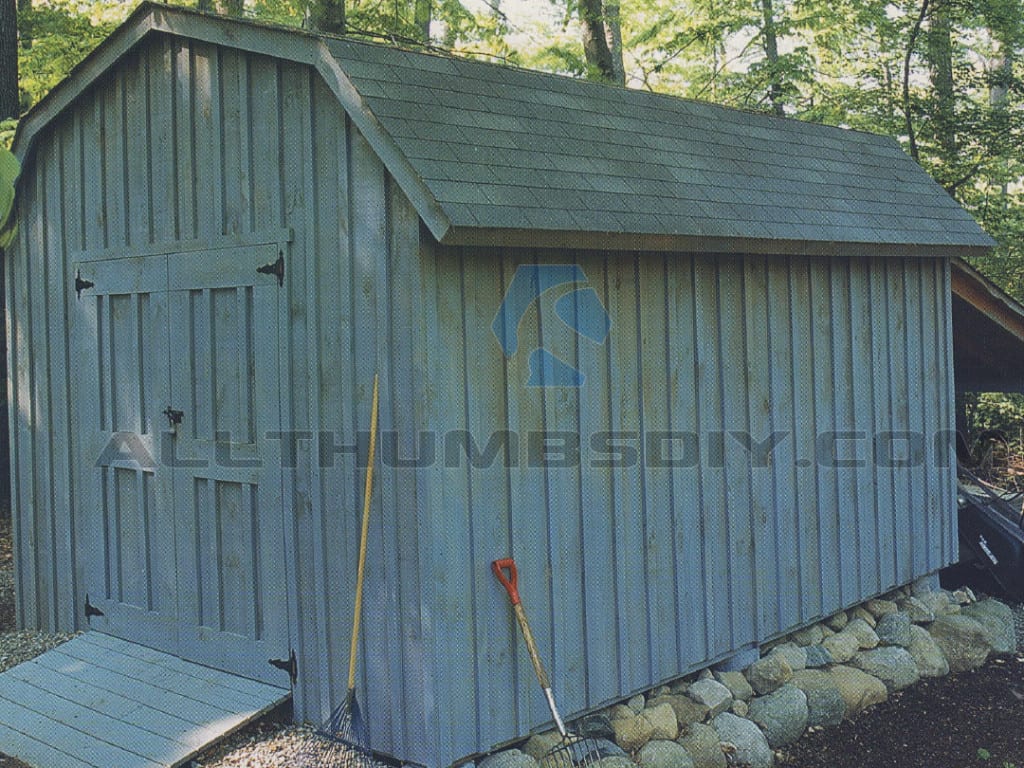
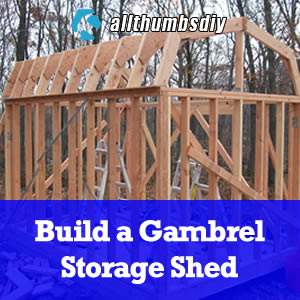
After much soul searching, I ultimately decided on a 12 x 8 (96 sq ft) shed with Gambrel-style roof because:
- shed is small enough to place on top of a pair of 6 x 6 skids;
- Side double door entrance provided unfettered access to wide storage area;
- It provided maximum “attic” storage space;
- Skids = “temporary structure” = no increase in property taxes (your town may be different);
From a build difficulty rating, a Gambrel roof is less complex than a hop roof but considerably more complex than a regular gable or salt box roofs (Gambrel roof is actually two gable roofs joined together).
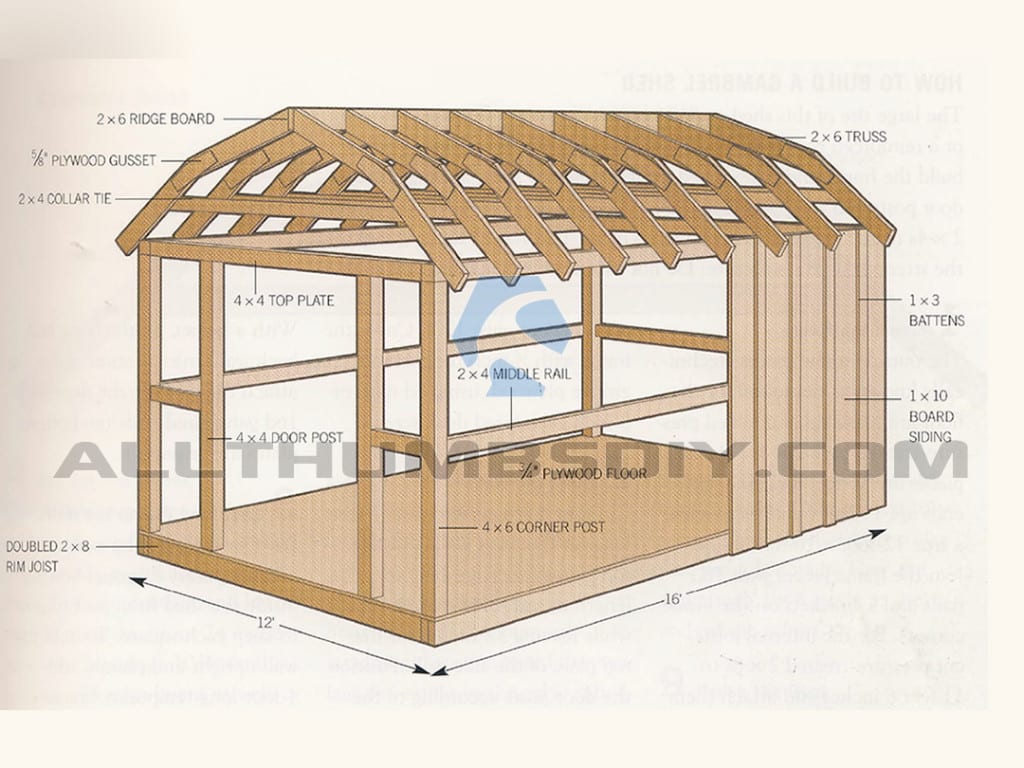
I decided to move forward with this design anyway felt that the benefit of additional attic storage was worth the effort. As far as the rest of shed was concerned, I planned on using mostly 2 x 4s and 2 x 6s (for roof rafters) with 16″ O.C. which is typical for a stick frame building (although fig. 1-5 and fig.1-6 are large and uses different lumber sizes, they roughly describe my shed plan).
# 3 – Site Selection
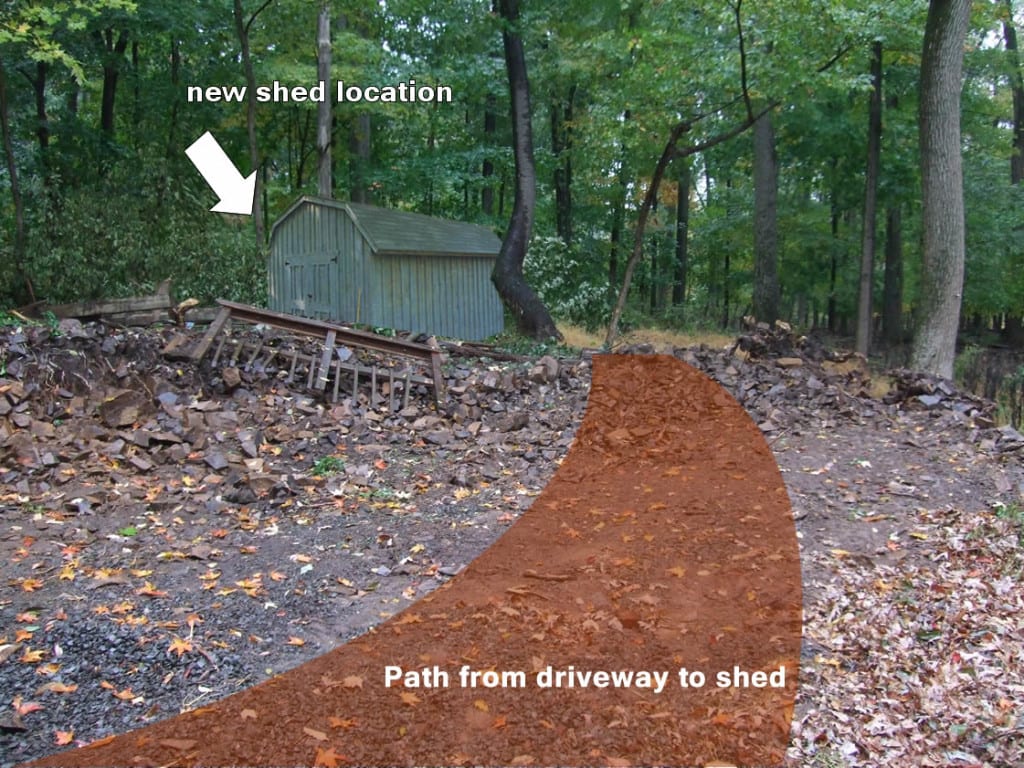
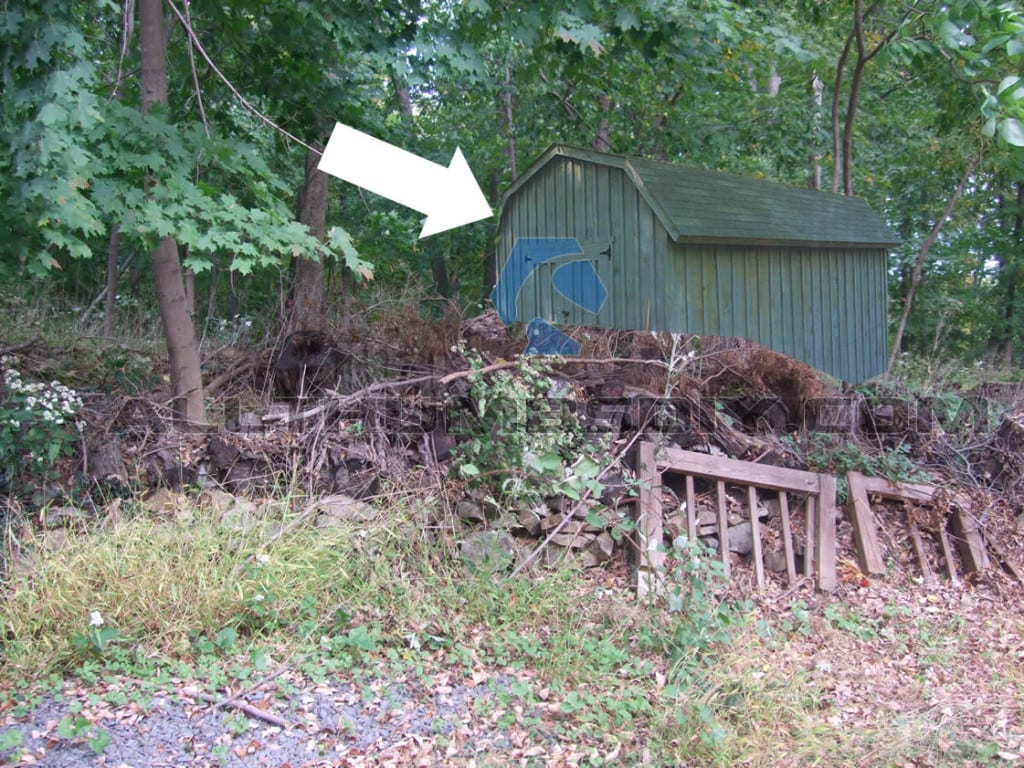
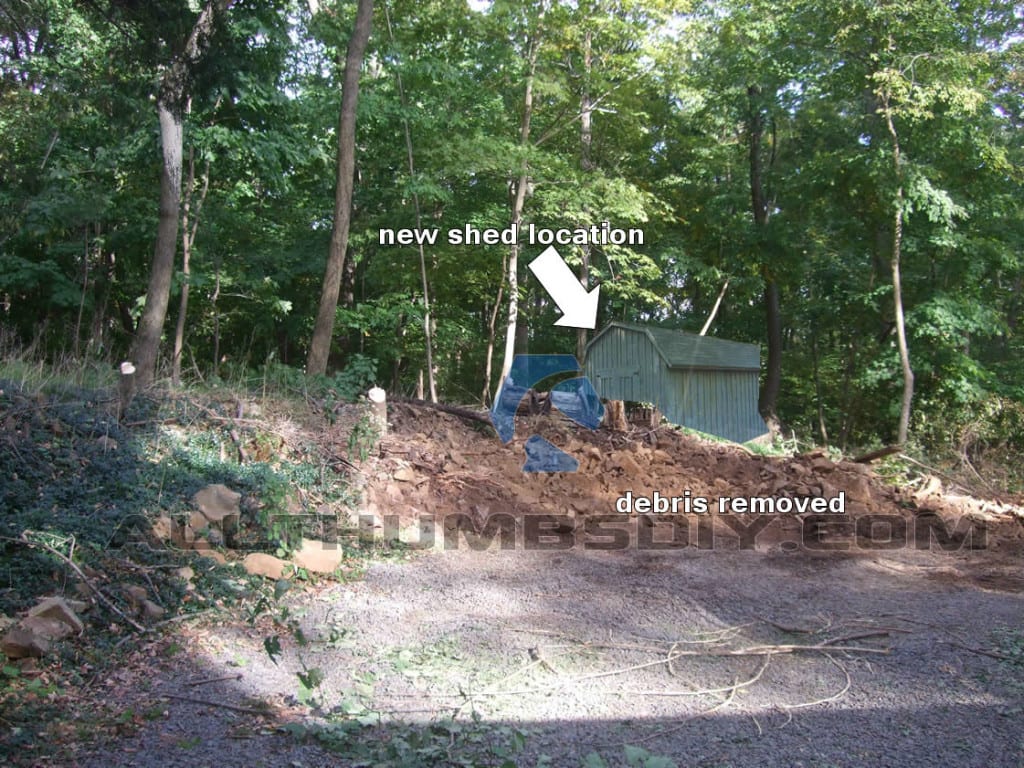
Because my garage faced the rear of the property, it made sense to locate my shed near the driveway for accessibility. The only problem was that my lot had a severe slope and it was mostly covered with large rocks which necessitated building a shed on site.
To make room for a path and shed, I had to first clear out large collection of debris including tree limbs, large rocks, etc. It took me close to a full day to get the back breaking job done.
# 4 – Township code paperwork
After submitting a rough sketch of the shed, proposed location and other paperwork with some fees, I received a go ahead to start building my shed.
NEXT STEP
In my “How I Saved $1500 Dollars By Building My Own Shed – Part 2” post, I will share my detailed inventory of items I will need to build my shed.
If you have any questions, please feel free to leave me a comment below.
Thanks!

You May Also Like

How I Saved $1500 Dollars By Building My Own Shed – Part 2
Sunday 22nd of July 2012
[...] a typical gable end roof (if you forgot what it looks like, go to fig.2.1 in How I Saved $1500 Dollars By Building My Own Shed – Part 1 article), you can use what’s called a multiplier run chart to compute rafter [...]