
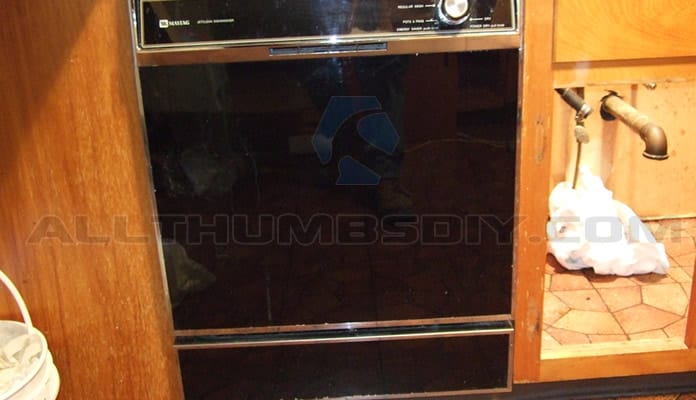
Uninstalling or removing an old or broken dishwasher is not too difficult as long as you plan out your steps. This post outlines the steps necessary to remove a Maytag JetClean Dishwasher (approximately 15years old).
Background
There are three connections we need to identify before attempting to remove the old dishwasher:
- Electrical connection – Most built-in dishwashers are either hardwired (directly to house wiring), but some can be plugged into a receptacle. We need to be extra careful and not just yank out the dishwasher not knowing the connection type;
- Plumbing Connection – Usually the water supply line will be 3/” O.D. copper or braided pipe. We need to locate the nearest 2 shutoff valves (the second or the furthest shutoff valve being the backup) prior to cutting the supply line;
- Physical Connection – How the dishwasher is physically secured to its surrounding will depend on several factors like the counter surface type, built-in vs standalone look, etc.
Ideally, you should research your dishwasher brand / model and read the installation manual to determine answers to some of these questions prior to starting the removal process.
AllThumbsDIY Steps
STEP 1– If possible, locate a manual to understand how water supply, drain and electrical connections are made before starting this work;
STEP 2– Turn off water. A shutoff valve is usually located under the sink (fig 1.0);
STEP 3– Turn off electricity by turning off breaker from the main panel;
STEP 4– Open the dishwasher door and locate screws or brackets that are either attached to the countertop or cabinet. My Maytag dishwasher was attached to the counter top via three screws (see fig.1.1);
STEP 5– Remove screws or brackets;
-
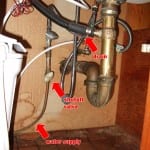
- fig.1.0
-
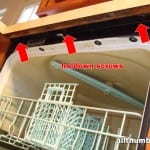
- fig.1.1
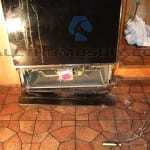
STEP 6– Pop the bottom cover and locate water supply, waste pipe and electrical connections. 7(see fig.1.2);
STEP 8– Have some towels ready as some residual water will drain out when the pipe is disconnected (in my case, a 3/8″ copper pipe);
STEP 8– Disconnect the drain pipe from the sink drain first, then disconnect from the dishwasher;
STEP 10– When disconnecting electrical wires, be very careful as the unit may have capacitors that will hold electrical charge even when the power is killed;
STEP 11– In my haste, I neglected to kill the power to my dishwasher and compounded that error by not noticing electric panel cover, causing sparks to fly and tripping my circuit breaker when I pulled out my dishwasher by about 6 inches. I was extremely lucky that I did not shock myself;
STEP 12– Remove the old dishwasher;
-
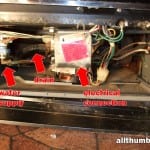
- fig.1.2
-
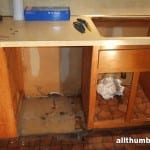
- fig.1.3
Well, I hope you found this article to be useful. If you agree, may I ask for a small favor and ask you to sign up for my newsletter? A sign up form is found on the upper right side of the screen. I promise it will be spam free.
Thanks and good luck with your DIY project!

How to Install a Bosch SHX45P06UC Dishwasher
Saturday 29th of September 2012
[...] 0 - Make sure the circuit breaker is turned off STEP 1 - Uninstall old dishwasher (click here for my previous posting on this topic) STEP 2 - Unpack dishwasher and check for any missing parts [...]
How to Install a GE Profile PDW9200 Dishwasher
Friday 28th of September 2012
[...] When you buy a dishwasher, you can usually have the store install it for you. Sometimes you can get the installation for free, but most times it cost around $75. I will show you how I installed mine (if you need to uninstall your old dishwasher, check out this article first – how to remove an old dishwasher) [...]